The GCP Console is a web-based graphical interface used to deploy, manage, and monitor all your cloud resources and services from a central dashboard. It provides a user-friendly way to handle everything from virtual machines and databases to billing and security without needing to use command-line tools.
Accessing the Console
The GCP console can be accessed at: https://
Console Layout
This is an overview of what the GCP console looks like:
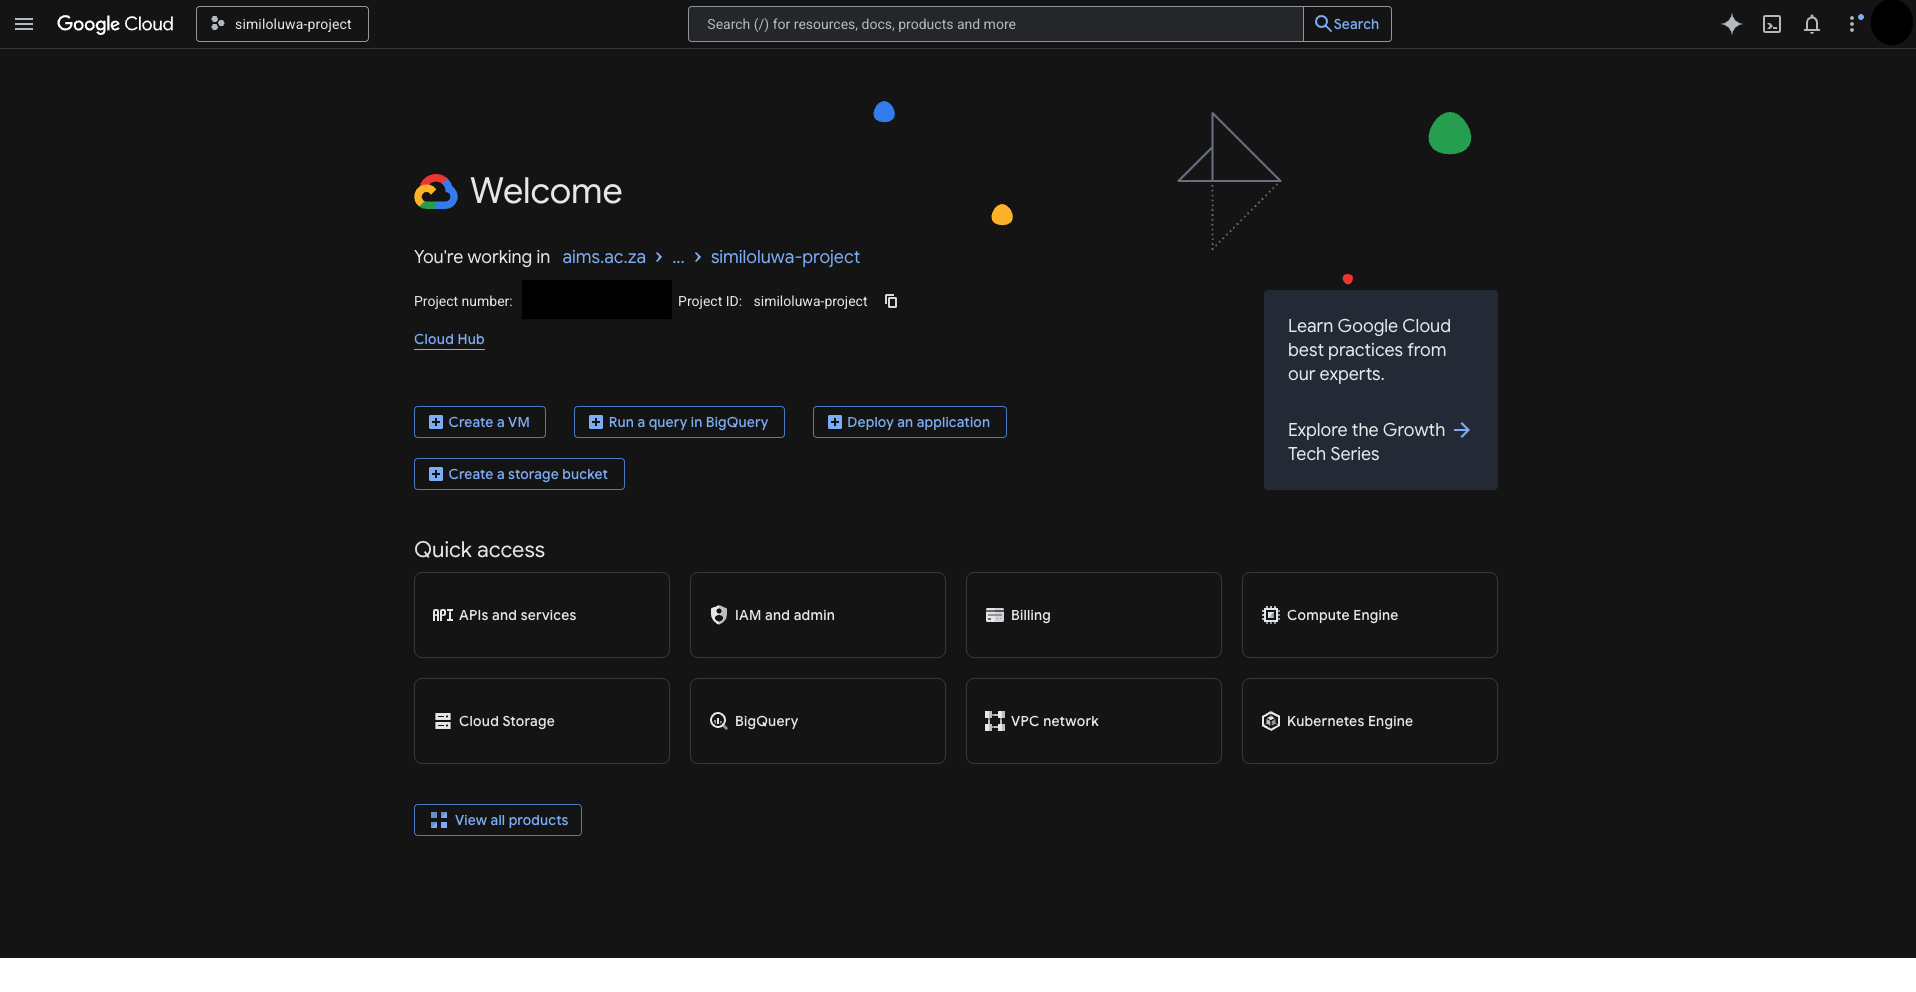
Screenshot of my GCP console
Top Navigation Bar
☰ Navigation menu (left): Access all GCP services
Project selector (top-left): Switch between projects
Search bar (center): Find services or resources (shortcut:
/)Cloud Shell (>_) (right): Browser-based terminal
Account icon (right): Settings and logout
Navigation Menu
The navigation menu is the primary way to discover and switch between the 100+ services offered by Google Cloud. You can access this by clicking the three horizontal lines (☰) in the top-left corner of the console.
You can find services like Billing, IAM & Admin, Vertex AI, and Compute Engine in the Products section of the menu. To keep your most-used tools at the top of the sidebar, you can click the Star icon (☆) next to any service to add it to your Favorites list for instant access.
Home Dashboard
What you see:
Project name and ID
Navigation menu
Quick action buttons e.g. “Create VM”, “Run a query in BigQuery”, “Deploy an application”, “Create a storage bucket”
Quick access section for commonly accessed services e.g. “APIs and services”, “IAM and admin”, “Billing”, “Compute Engine”, “Cloud Storage”, “BigQuery”, “VPC Network”, “Kubernetes Engine”
Examples
Enabling APIs and Services
Before using most Google Cloud tools, you must enable their specific API.
Open the navigation menu (☰) and select APIs & Services > Enabled APIs & services
Click on the API you want to enable e.g. “Compute Engine API”
Click on the “Enable API” button to enable the API
Accessing the Compute Engine Service
To access the compute engine service on the console:
Click on “Compute Engine” via the navigation menu or quick access section
Click on “VM instances” on the sidebar to see your list of virtual machine instances
Click on “Create instance” to create a new VM instance
Here, you can also start/stop/delete VMs, SSH into your VMs, configure and monitor resources.
Accessing Vertex AI
For machine learning and AI development:
Navigate to “Vertex AI” from the navigation menu.
Click on “Dashboard” to see your recent activity and current costs for models like Gemini 3.0 Pro.
Use the sidebar to access specialized tools like Vertex AI Studio for prompting or Colab Enterprise for coding in notebooks.
Here, you can also create and manage datasets, run experiments, deploy models, generate API keys specifically for model deployments, etc.
Managing Billing
To keep track of your AIMS GCP credits and spending:
Select Billing from the navigation menu or quick access tiles.
Click on the Reports tab in the Cost Management section of the sidebar for a detailed visual breakdown of which services are using your budget.
Click on the Budgets & alerts tab in the sidebar to create budgets and alerts. This can be used to receive an email notification if your spending reaches a specific threshold (e.g., 10% of your credits.)
IAM and Admin
This section controls “Identity and Access Management” (who can do what).
Navigate to IAM & Admin > IAM from the navigation menu
You can see the principals and their roles.
Click Grant Access to add a new Principal[1] to your project using their email.
Assign a Role (like Viewer, Editor, or Owner) to that principal to define their level of access.
Here, you can also: create labels and tags (accessible from the sidebar), create service accounts for automated scripts, create roles and policies, view audit logs to see who made changes, and check Quotas and system limits to see the resource limits for your project.
Using the Cloud Shell
Cloud Shell is a browser-based Linux terminal in your console that comes with Cloud SDK gcloud, Cloud Code, an online Code Editor and other utilities pre-installed, fully authenticated and up to date, and is free for all users.
You can click on the terminal icon (>_) in the top-right toolbar to open the Cloud Shell. The shell will open from the bottom of the page.
Testing your Cloud Shell
To see your active account (Principal):
gcloud auth list*This should show your @aims.ac.za email with an asterisk next to ACTIVE, confirming you are the active user.
To print your current Compute zone:
gcloud config get-value compute/zoneNote: If this returns nothing, it just means a default zone hasn’t been set yet, which is normal for new projects.
To list available regions:
gcloud compute regions list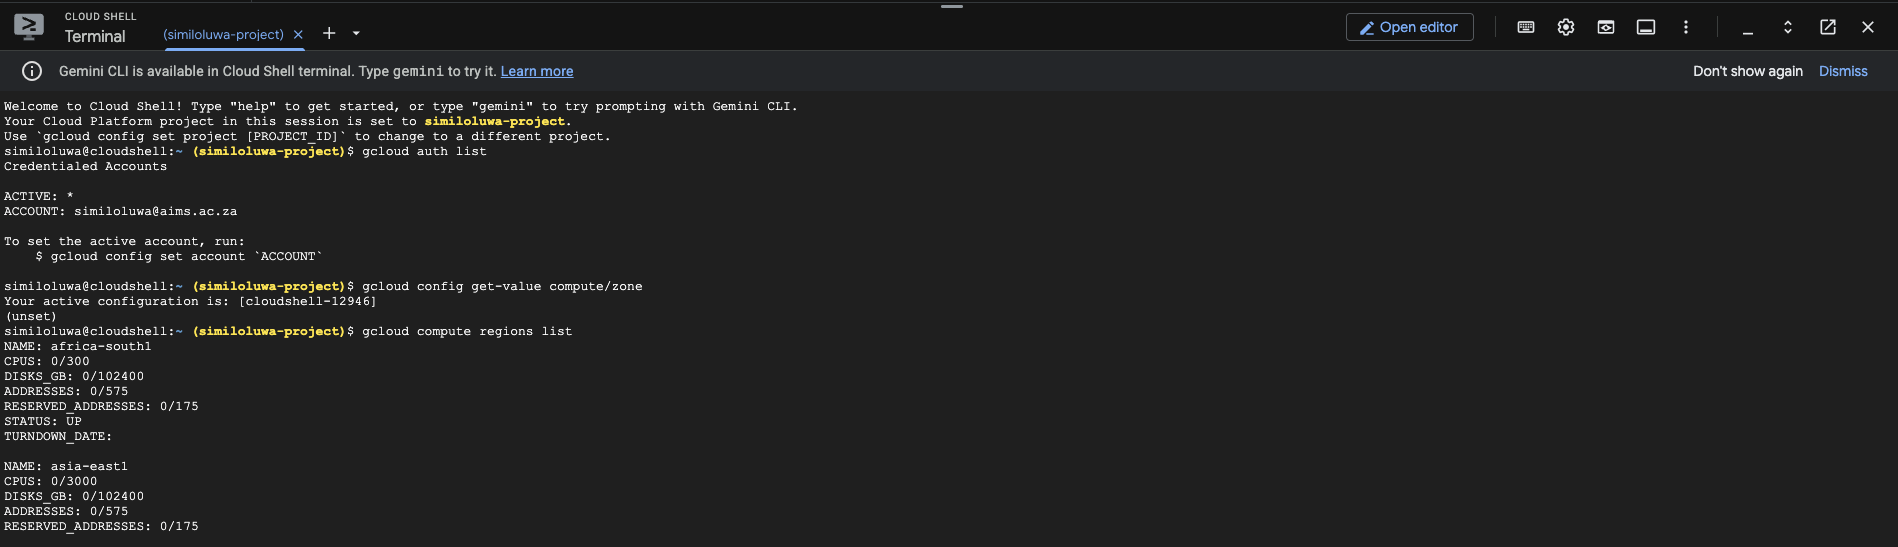
Screenshot of Cloud Shell on GCP
🔑 Key Takeaways
✅ The GCP console can be used to interact with your GCP account, services, and resources in a user-friendly and intuitive manner.
✅ Most services will not work until you explicitly Enable the API in the “APIs & Services” section.
✅ Cloud Shell is your “Power Tool”. It is more than just a command line; it includes a built-in Code Editor, 5 GB of persistent storage, and pre-authenticated command-line utilities like
gcloudandgsutil
🚀 What’s Next?
Now that you can navigate the Console, let’s learn the gcloud CLI for command-line control.
References & Further Reading
A principal is an entity that can be granted access to a Google Cloud resource. When you “Grant Access” in IAM, you are essentially telling Google Cloud which Principal has permission to perform specific actions.