In this hands-on session, we will fine-tune Gemma 3 1B (a small language model with 1 billion parameters) on the Dolly-15k instruction dataset using LoRA (Low-Rank Adaptation), track our experiments with Weights & Biases, and persist outputs and model artifacts to Google Cloud Storage.
Overview
By the end of this hands-on session, you will have:
Provisioned an L4 GPU VM using the Compute Engine service via
gcloudCLISet up a Python environment using
uvCloned the experiment repository from GitHub
Run the scripts to fine-tune Gemma 3 1B using LoRA on the Dolly 15k dataset
Created persistent SSH sessions using
tmuxLearnt how to monitor training in real-time using Weights & Biases
Persisted outputs and model artifacts to Google Cloud Storage (GCS)
Cleaned up all resources to avoid unnecessary charges
Background
Click here for more background information about this hands-on session.
Why This Experiment?
Fine-tuning takes an already capable model and adapts it to a specific task at a fraction of the cost of training from scratch, which is how most real-world LLM applications are built.
We use Gemma 3 1B because fine-tuning a model at this scale of one billion parameters introduces you to the practical realities of running large model training on cloud infrastructure, including GPU memory constraints, checkpoint management, and experiment tracking.
At 1B parameters, Gemma is large enough to produce meaningful, coherent responses and representative of the models used in real applications, but small enough to fine-tune on a single L4 GPU in under 30 minutes, making it a practical starting point.
Why LoRA?
Even at 1 Billion parameters, fully fine-tuning Gemma 1B would require updating every weight in the model on every training step, which is memory-intensive and slow on a single GPU.
LoRA solves this by freezing the original model weights and injecting small trainable matrices into specific layers, training less than the full parameters while still achieving meaningful adaptation.
The key hyperparameter is the rank (
r), which controls the size of these trainable matrices. A higher rank means more expressive power but more memory and compute.
Why Dolly-15k?
Dolly-15k is an open-source instruction-following dataset created by Databricks, containing 15,000 human-generated prompt-response pairs.
It covers a wide range of tasks including question answering, summarization, classification, and creative writing.
We use it because it is freely available, well-structured, and a standard dataset for instruction fine-tuning, making results easy to compare and reproduce.
Why tmux?
Training a 1 Billion parameter model takes time. Keeping an SSH connection open for the entire duration is fragile and impractical.
If your SSH session disconnects, any process running in that terminal is killed, meaning your training run is lost and you have to start over.
tmuxkeeps your training process running on the VM independently of your SSH connection, so a dropped connection does not affect the job.It also means you can disconnect intentionally, close your laptop, and reconnect later to check progress without interrupting anything.
Why Weights & Biases?
Training runs on a remote VM, so you need a way to monitor progress without staying connected via SSH.
WandB logs metrics like loss, learning rate, and gradient norms in real time and makes them accessible from any browser, meaning you can close your laptop and check the dashboard later.
It also keeps a history of every run, making it easy to compare experiments and share results with others.
Step 1: Create the VM
Create a new shell script file called create_vm.sh and copy the script below into it. Before running the script, update the AIMSUSERNAME variable at the top to your username:
nano create_vm.shPaste the following script:
#!/bin/bash

export AIMSUSERNAME="<your_aims_username>" # Change this to your own username
export REGION="europe-west4"
export ZONE="europe-west4-a"

# Create VPC if it doesn't exist
if ! gcloud compute networks describe ${AIMSUSERNAME}-vpc &>/dev/null; then
    gcloud compute networks create ${AIMSUSERNAME}-vpc --subnet-mode=auto
else
    echo "VPC ${AIMSUSERNAME}-vpc already exists, skipping."
fi

# Create firewall rule if it doesn't exist
if ! gcloud compute firewall-rules describe ${AIMSUSERNAME}-fw-ssh &>/dev/null; then
    gcloud compute firewall-rules create ${AIMSUSERNAME}-fw-ssh \
        --network=${AIMSUSERNAME}-vpc \
        --allow=tcp:22
else
    echo "Firewall rule ${AIMSUSERNAME}-fw-ssh already exists, skipping."
fi

# Create Cloud Router if it doesn't exist
if ! gcloud compute routers describe ${AIMSUSERNAME}-router-${REGION} --region=${REGION} &>/dev/null; then
    gcloud compute routers create ${AIMSUSERNAME}-router-${REGION} \
        --network=${AIMSUSERNAME}-vpc \
        --region=${REGION}
else
    echo "Router ${AIMSUSERNAME}-router-${REGION} already exists, skipping."
fi

# Create NAT if it doesn't exist
if ! gcloud compute routers nats describe ${AIMSUSERNAME}-nat-config \
    --router=${AIMSUSERNAME}-router-${REGION} \
    --region=${REGION} &>/dev/null; then
    gcloud compute routers nats create ${AIMSUSERNAME}-nat-config \
        --router-region=${REGION} \
        --router=${AIMSUSERNAME}-router-${REGION} \
        --nat-all-subnet-ip-ranges \
        --auto-allocate-nat-external-ips
else
    echo "NAT ${AIMSUSERNAME}-nat-config already exists, skipping."
fi

export VM_NAME="${AIMSUSERNAME}-l4-vm"

gcloud compute instances create ${VM_NAME} \
    --zone=${ZONE} \
    --machine-type=g2-standard-4 \
    --accelerator="type=nvidia-l4,count=1" \
    --image-family=common-cu128-ubuntu-2204-nvidia-570 \
    --image-project=deeplearning-platform-release \
    --maintenance-policy=TERMINATE \
    --network=${AIMSUSERNAME}-vpc \
    --scopes=storage-full,cloud-platform
Then save and run the script:
chmod +x create_vm.sh
./create_vm.sh
The script creates all necessary networking infrastructure (VPC, firewall, router, NAT) and provisions a VM with an NVIDIA L4 GPU.
Then verify the VM is running:
gcloud compute instances listStep 2: SSH into the VM
gcloud compute ssh <YOUR_AIMS_USERNAME>-l4-vm --zone=europe-west4-a --tunnel-through-iapReplace <YOUR_AIMS_USERNAME> and the --zone flag with the values you used when running the script.
When you have successfully “SSH-ed” into your server, verify the GPU is available.
nvidia-smiYou should see the NVIDIA L4 with 24GB VRAM listed. All subsequent commands are run inside this SSH session.
Step 3: Install uv
uv is a fast Python package and project manager that handles creating virtual environments, installing dependencies, and locking package versions. We use it because it guarantees the exact same environment can be recreated on any machine with a single command.
Install uv:
curl -LsSf https://astral.sh/uv/install.sh | sh
source $HOME/.local/bin/env
Verify uv installation:
uv --versionStep 4: Clone the GitHub Repository
Clone the GitHub repository containing the code for this hands-on session into your VM:
git clone https://github.com/rexsimiloluwah/finetuning-gemma-1b-aims-gcp-tutorial.git
cd finetuning-gemma-1b-aims-gcp-tutorial
Step 5: Set Up the Python Environment
To setup the Python virtual environment using uv:
uv venv --python 3.12
uv sync
uv sync reads the uv.lock file and installs all dependencies at the exact versions used during development, ensuring the environment on the VM is identical to what was used locally.
Step 6: Configure Environment Variables
You need two API keys before running anything in this hands-on session: a HuggingFace API token to access the Gemma model and a Weights & Biases API key to access the WandB platform for experiment tracking.
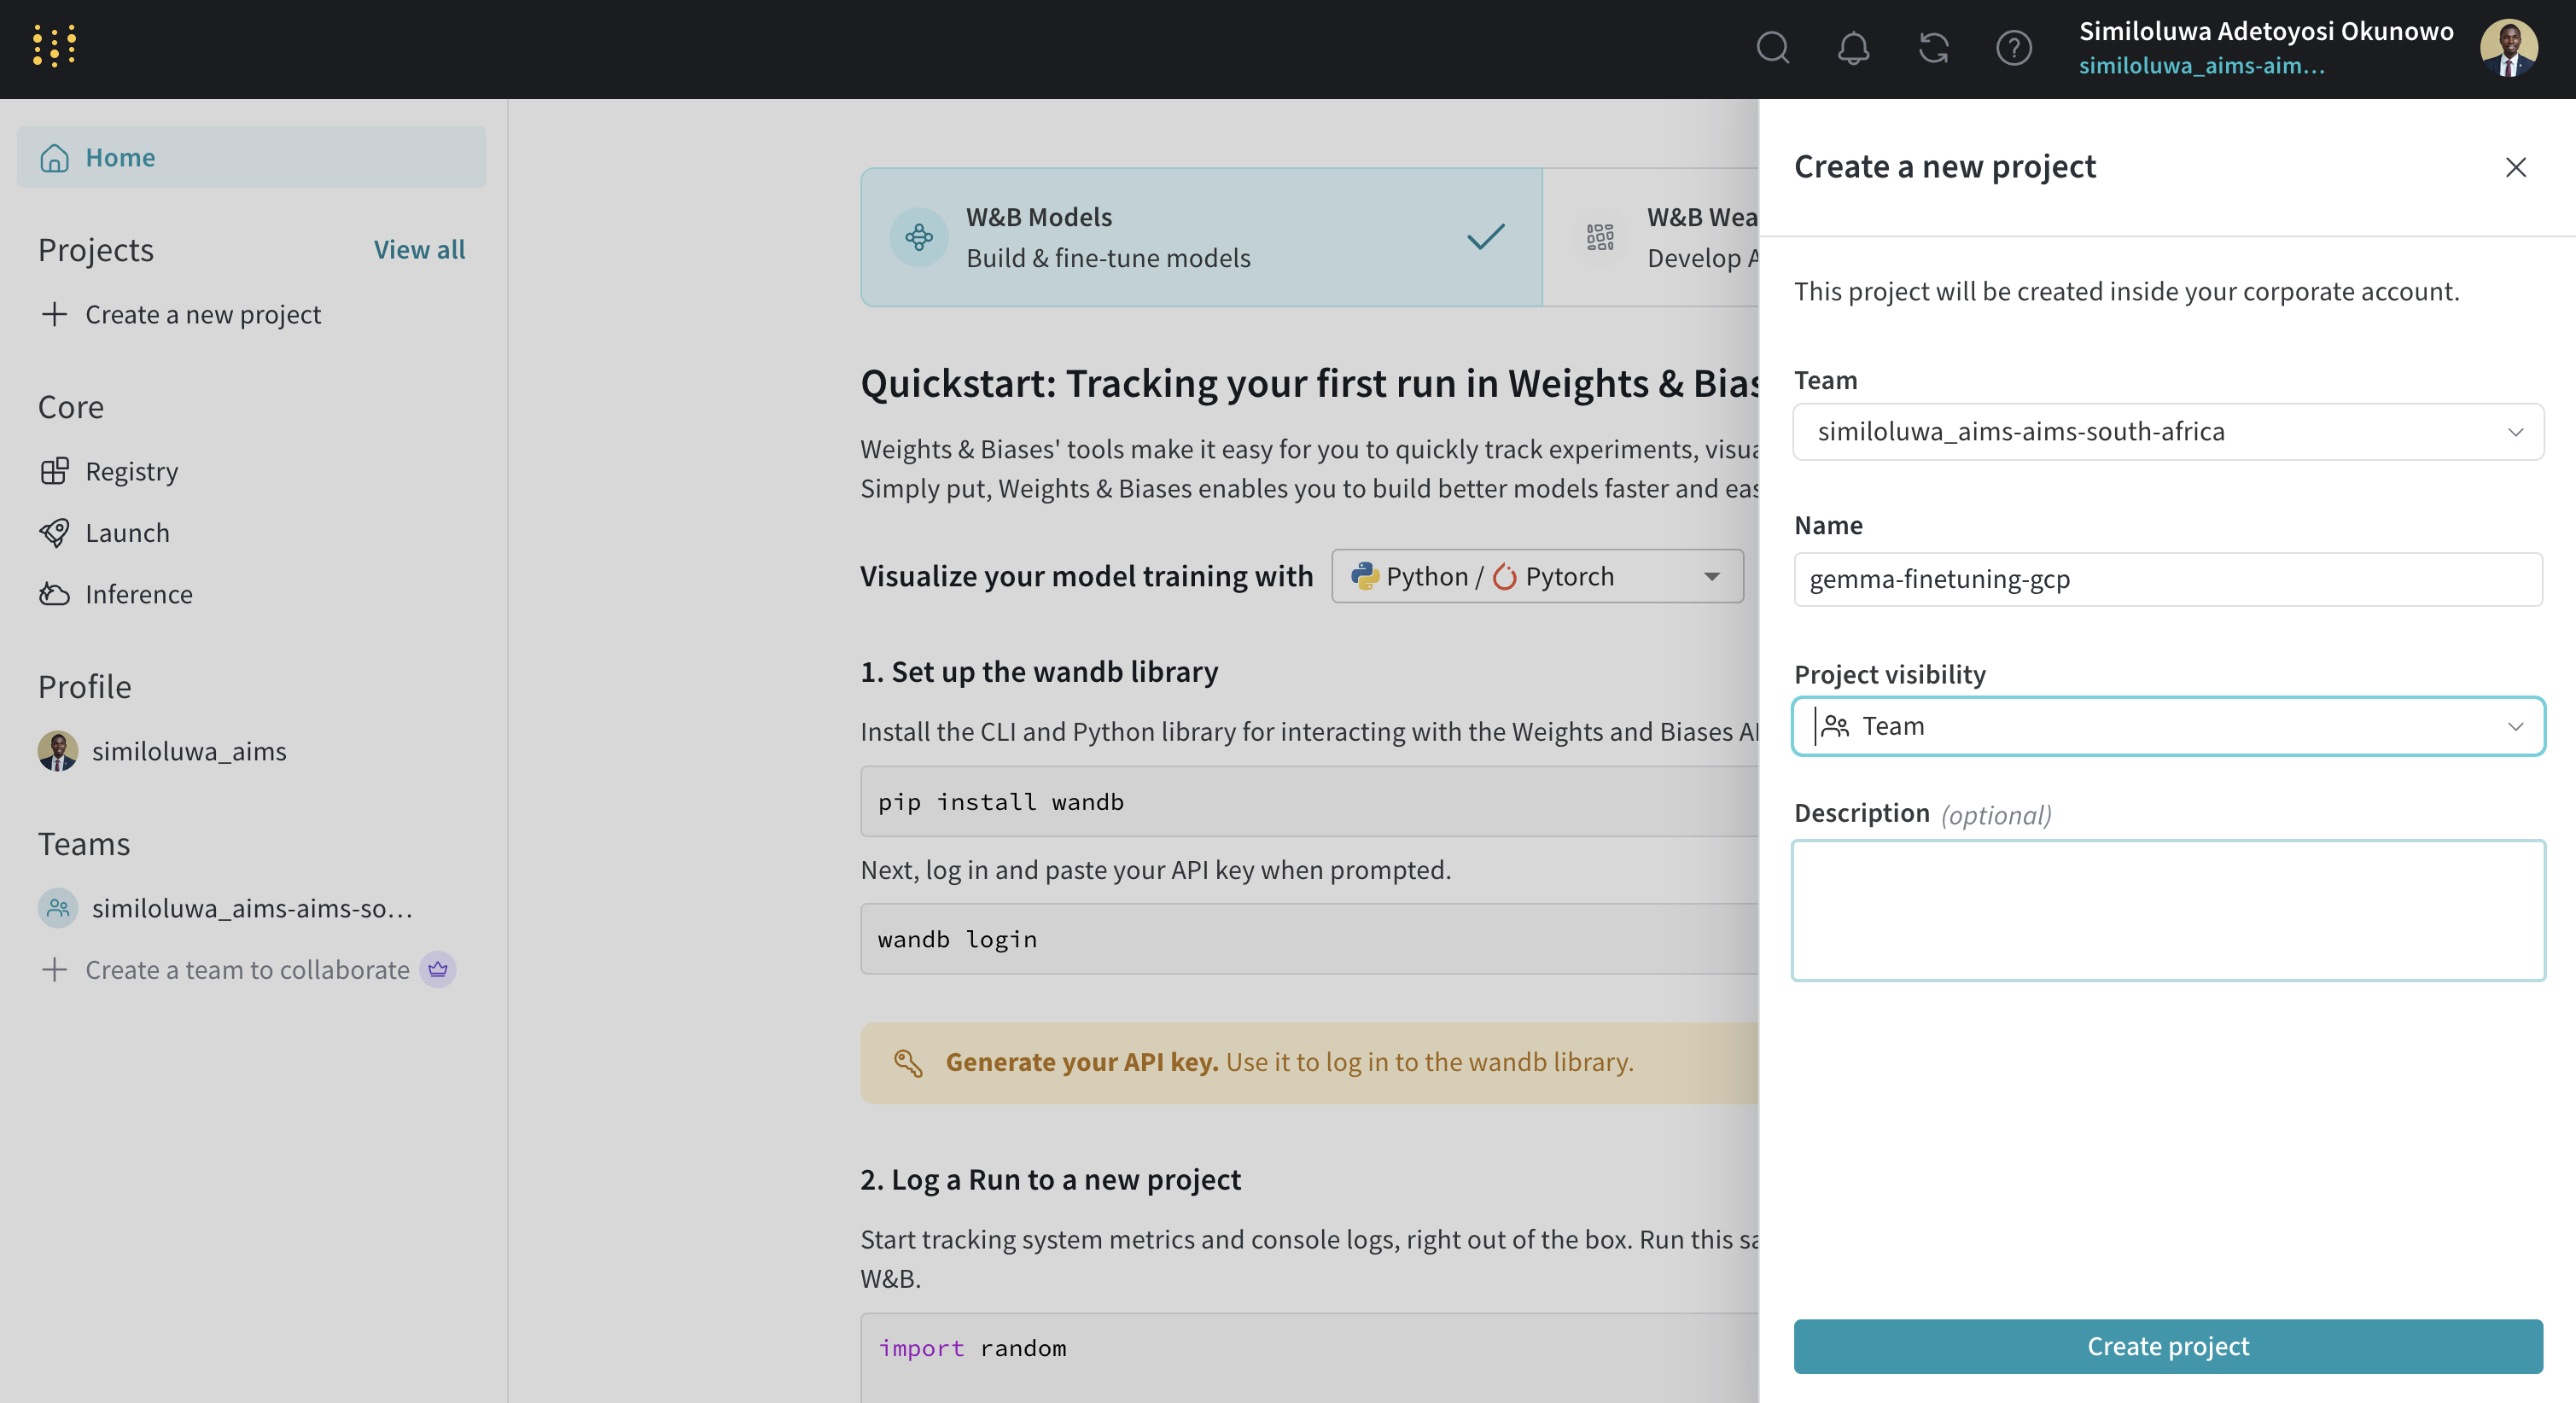
Screenshot of “Create a new project” step in WandB
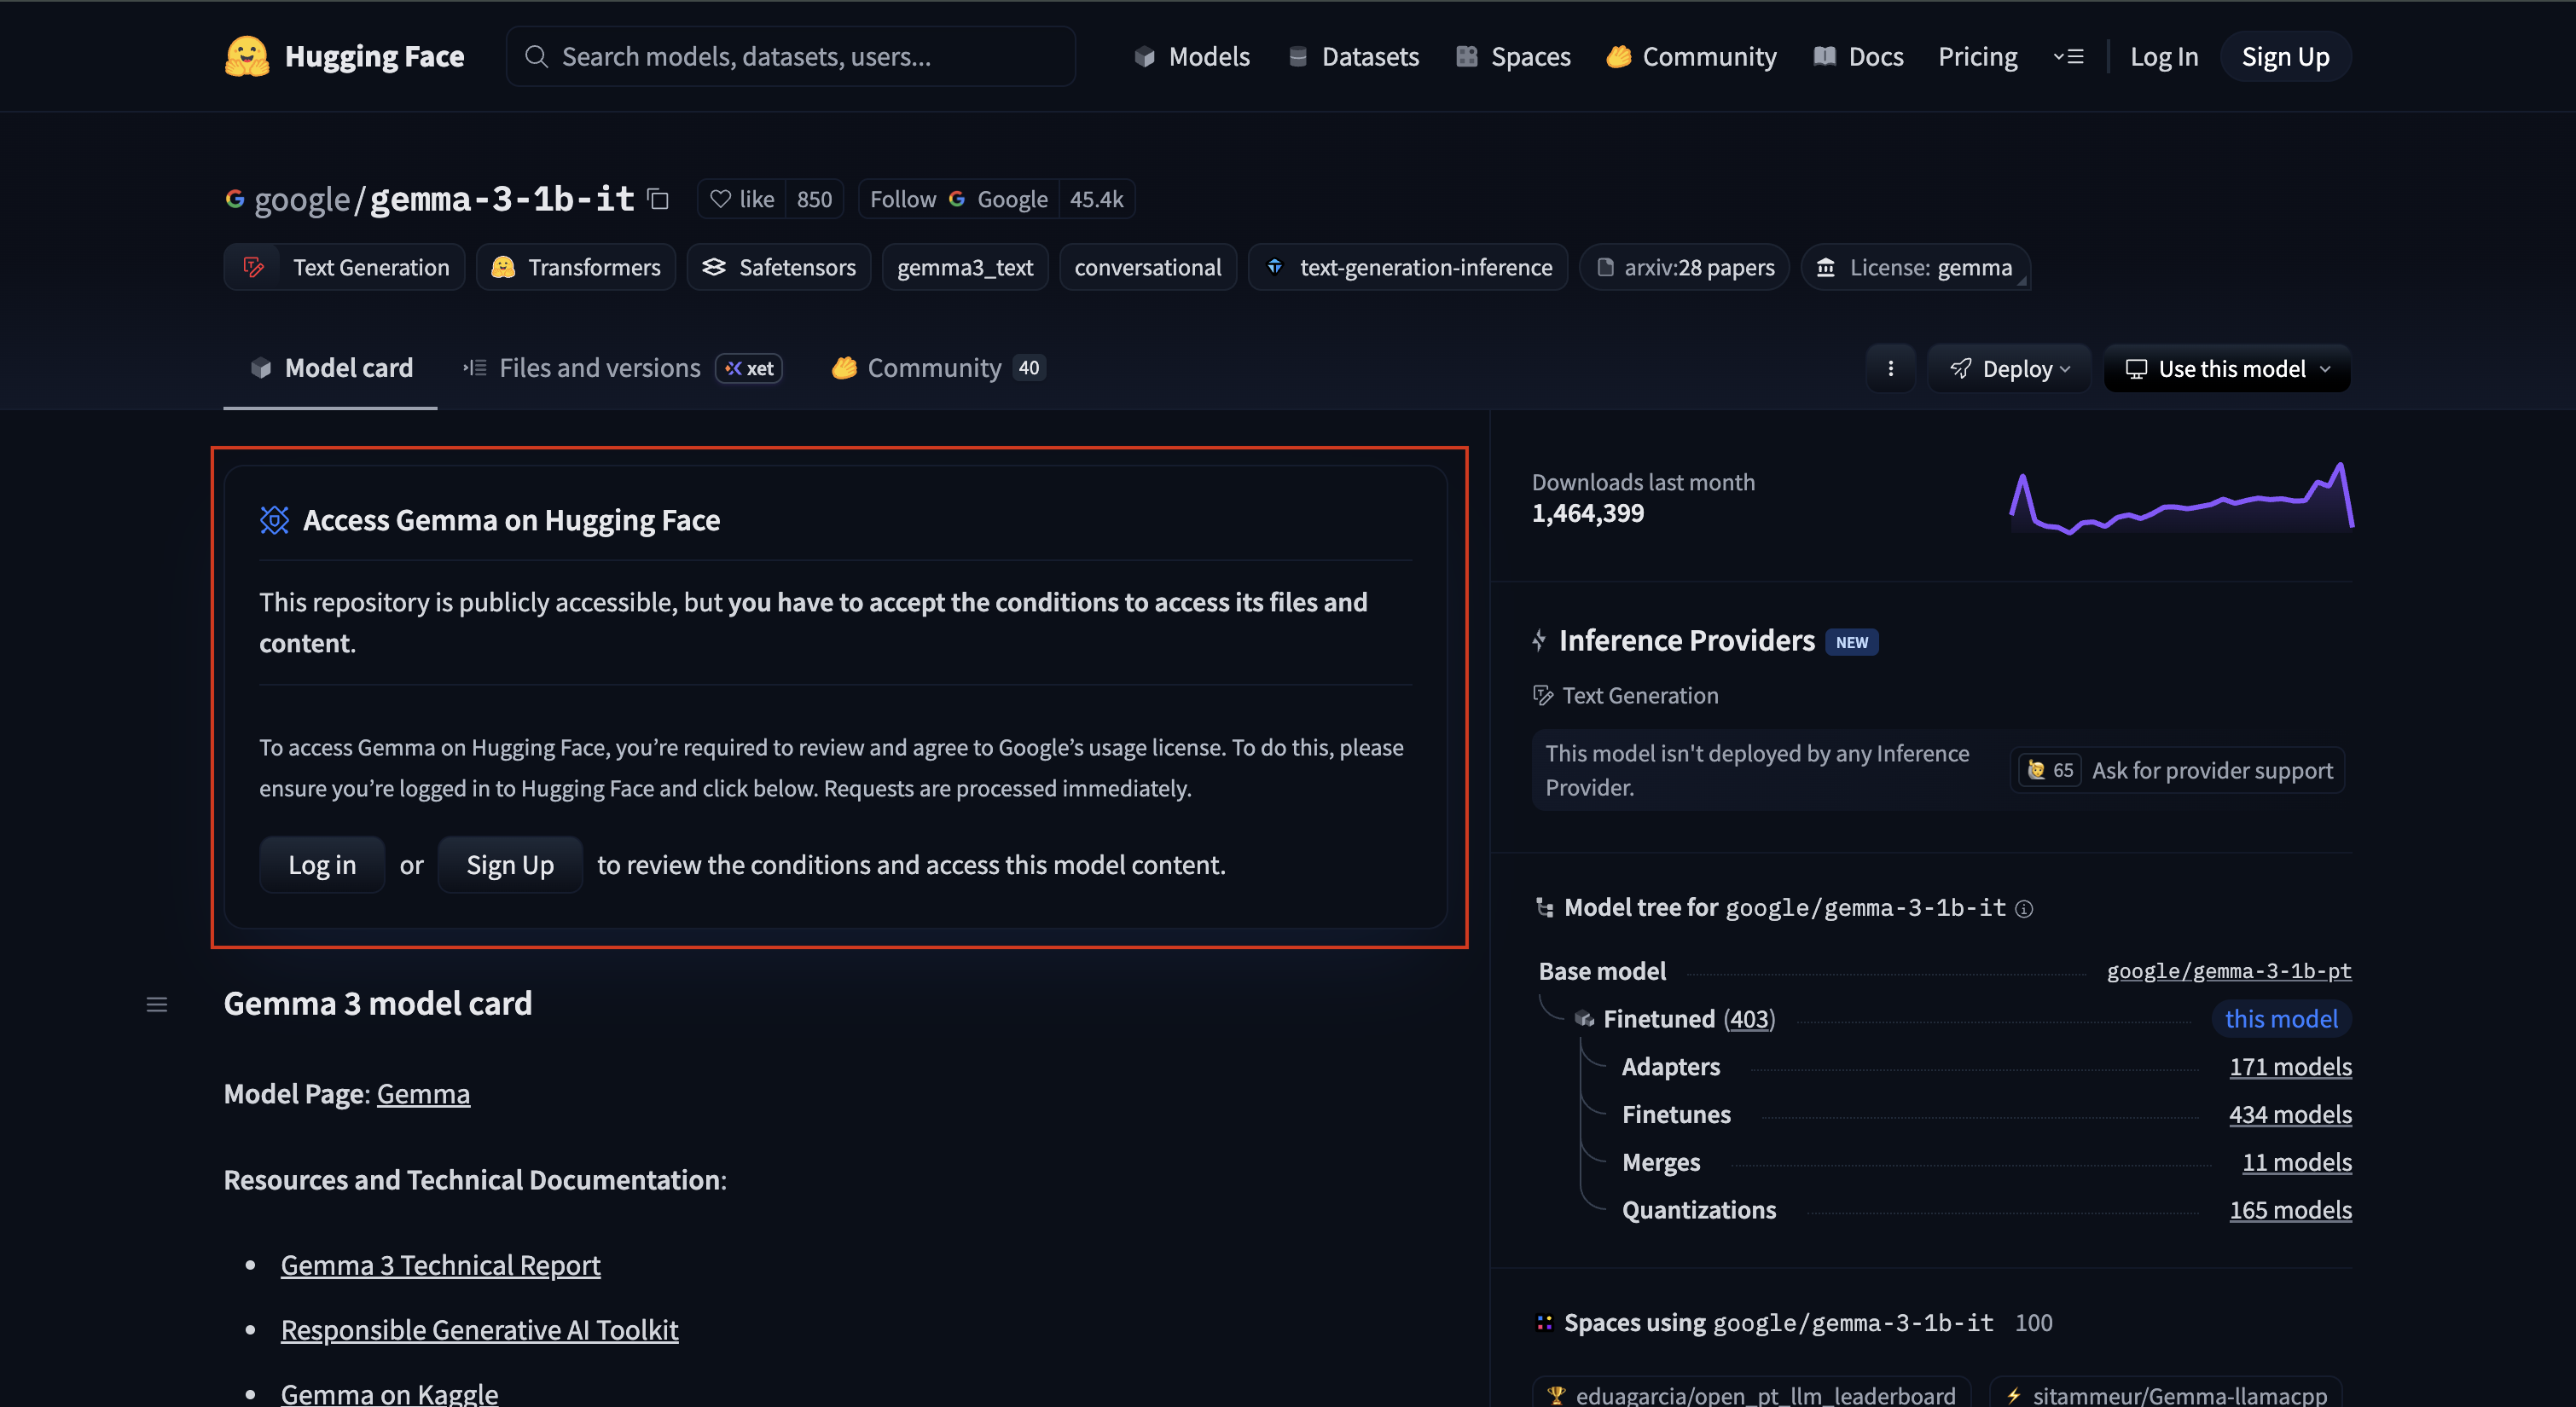
Screenshot of “Accept Gemma 3 1B License Agreement on HuggingFace” step
Now copy the example env file .env.example to create your .env file and fill in your credentials:
cp .env.example .env
nano .env
Fill in your values:
HF_TOKEN=your_huggingface_token
WANDB_API_KEY=your_wandb_api_key
WANDB_PROJECT=your_wandb_project_name
To exit the nano editor: press Ctrl+O then Enter to save, then Ctrl+X
Step 7: Upload the Dataset to Google Cloud Storage (GCS) Bucket (Optional)
Rather than downloading the dataset from HuggingFace every time you run an experiment, we upload it once to GCS (GCP’s scalable cloud object storage service) and read from there in all subsequent runs. This is faster, avoids rate limits, and means your experiment does not depend on an external service being available. On real projects with large datasets, this pattern becomes essential.
Run the upload script:
uv run bash scripts/download_and_upload_gcs.sh

# You can optionally pass a custom bucket name:
uv run bash scripts/download_and_upload_gcs.sh <BUCKET_NAME>
This script downloads the Dolly-15k dataset from HuggingFace, creates a new GCS bucket, and uploads the downloaded dataset to the GCS bucket.
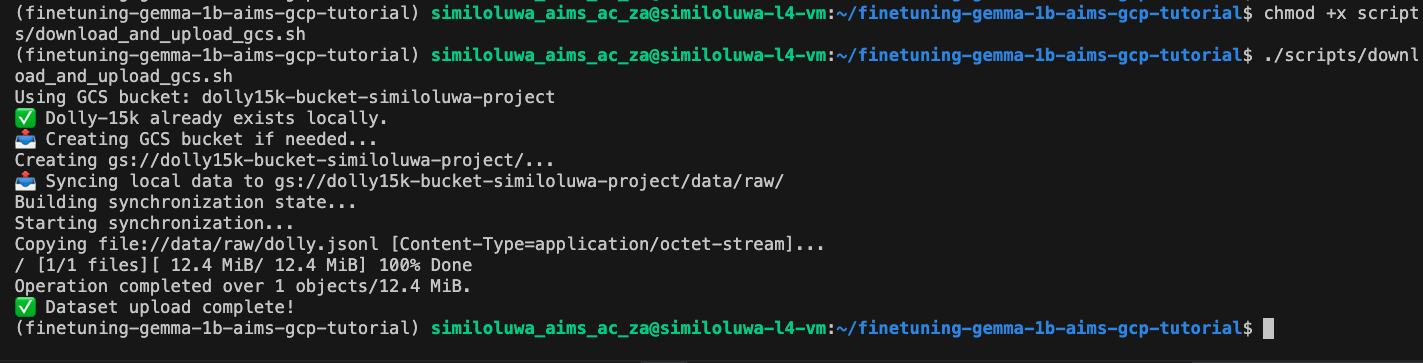
Screenshot of “Upload Dataset to GCS Bucket” step
Verify the data is in the GCS bucket:
gcloud storage ls gs://<BUCKET_NAME>/data/raw/Step 8: Start a tmux Session
Training this 1 Billion parameter model using LoRA takes about 25-40 minutes. Rather than keeping your SSH connection open the entire time, we use tmux to run training in a persistent terminal session. This means if your SSH connection closes, training keeps running on the VM.
Install tmux and start a new session:
sudo apt-get install -y tmux
tmux new -s finetunegemma1b
This creates a new session named “finetunegemma1b”. You should now be inside the created tmux session.
To detach the session without killing it:
Press
Ctrl+Bthen theDkey
Alternatively, you can run the command from another shell for this server:
tmux detach -s <session_name>To return to a detached session layer:
tmux attach -t <session_name>Step 9: Run the Training Script
In the tmux session shell, run the script below to start finetuning the model:
uv run python -m scripts.run_train \
    data.source=hf \
    data.max_train_samples=10000 \
    training.num_epochs=2 \
    training.batch_size=8 \
    experiment_id=exp_lora_r8
This trains on 10,000 samples for 2 epochs with LoRA rank 8, giving us 10,000 / 8 = 1,250 steps per epoch and 2,500 steps total. On the NVIDIA L4 GPU, this should take roughly 20-30 minutes.
You can now detach from the tmux session and monitor training progress from your WandB dashboard at wandb.ai. You will see train/loss, eval/loss, train/grad_norm, and train/learning_rate updating every 10 steps.
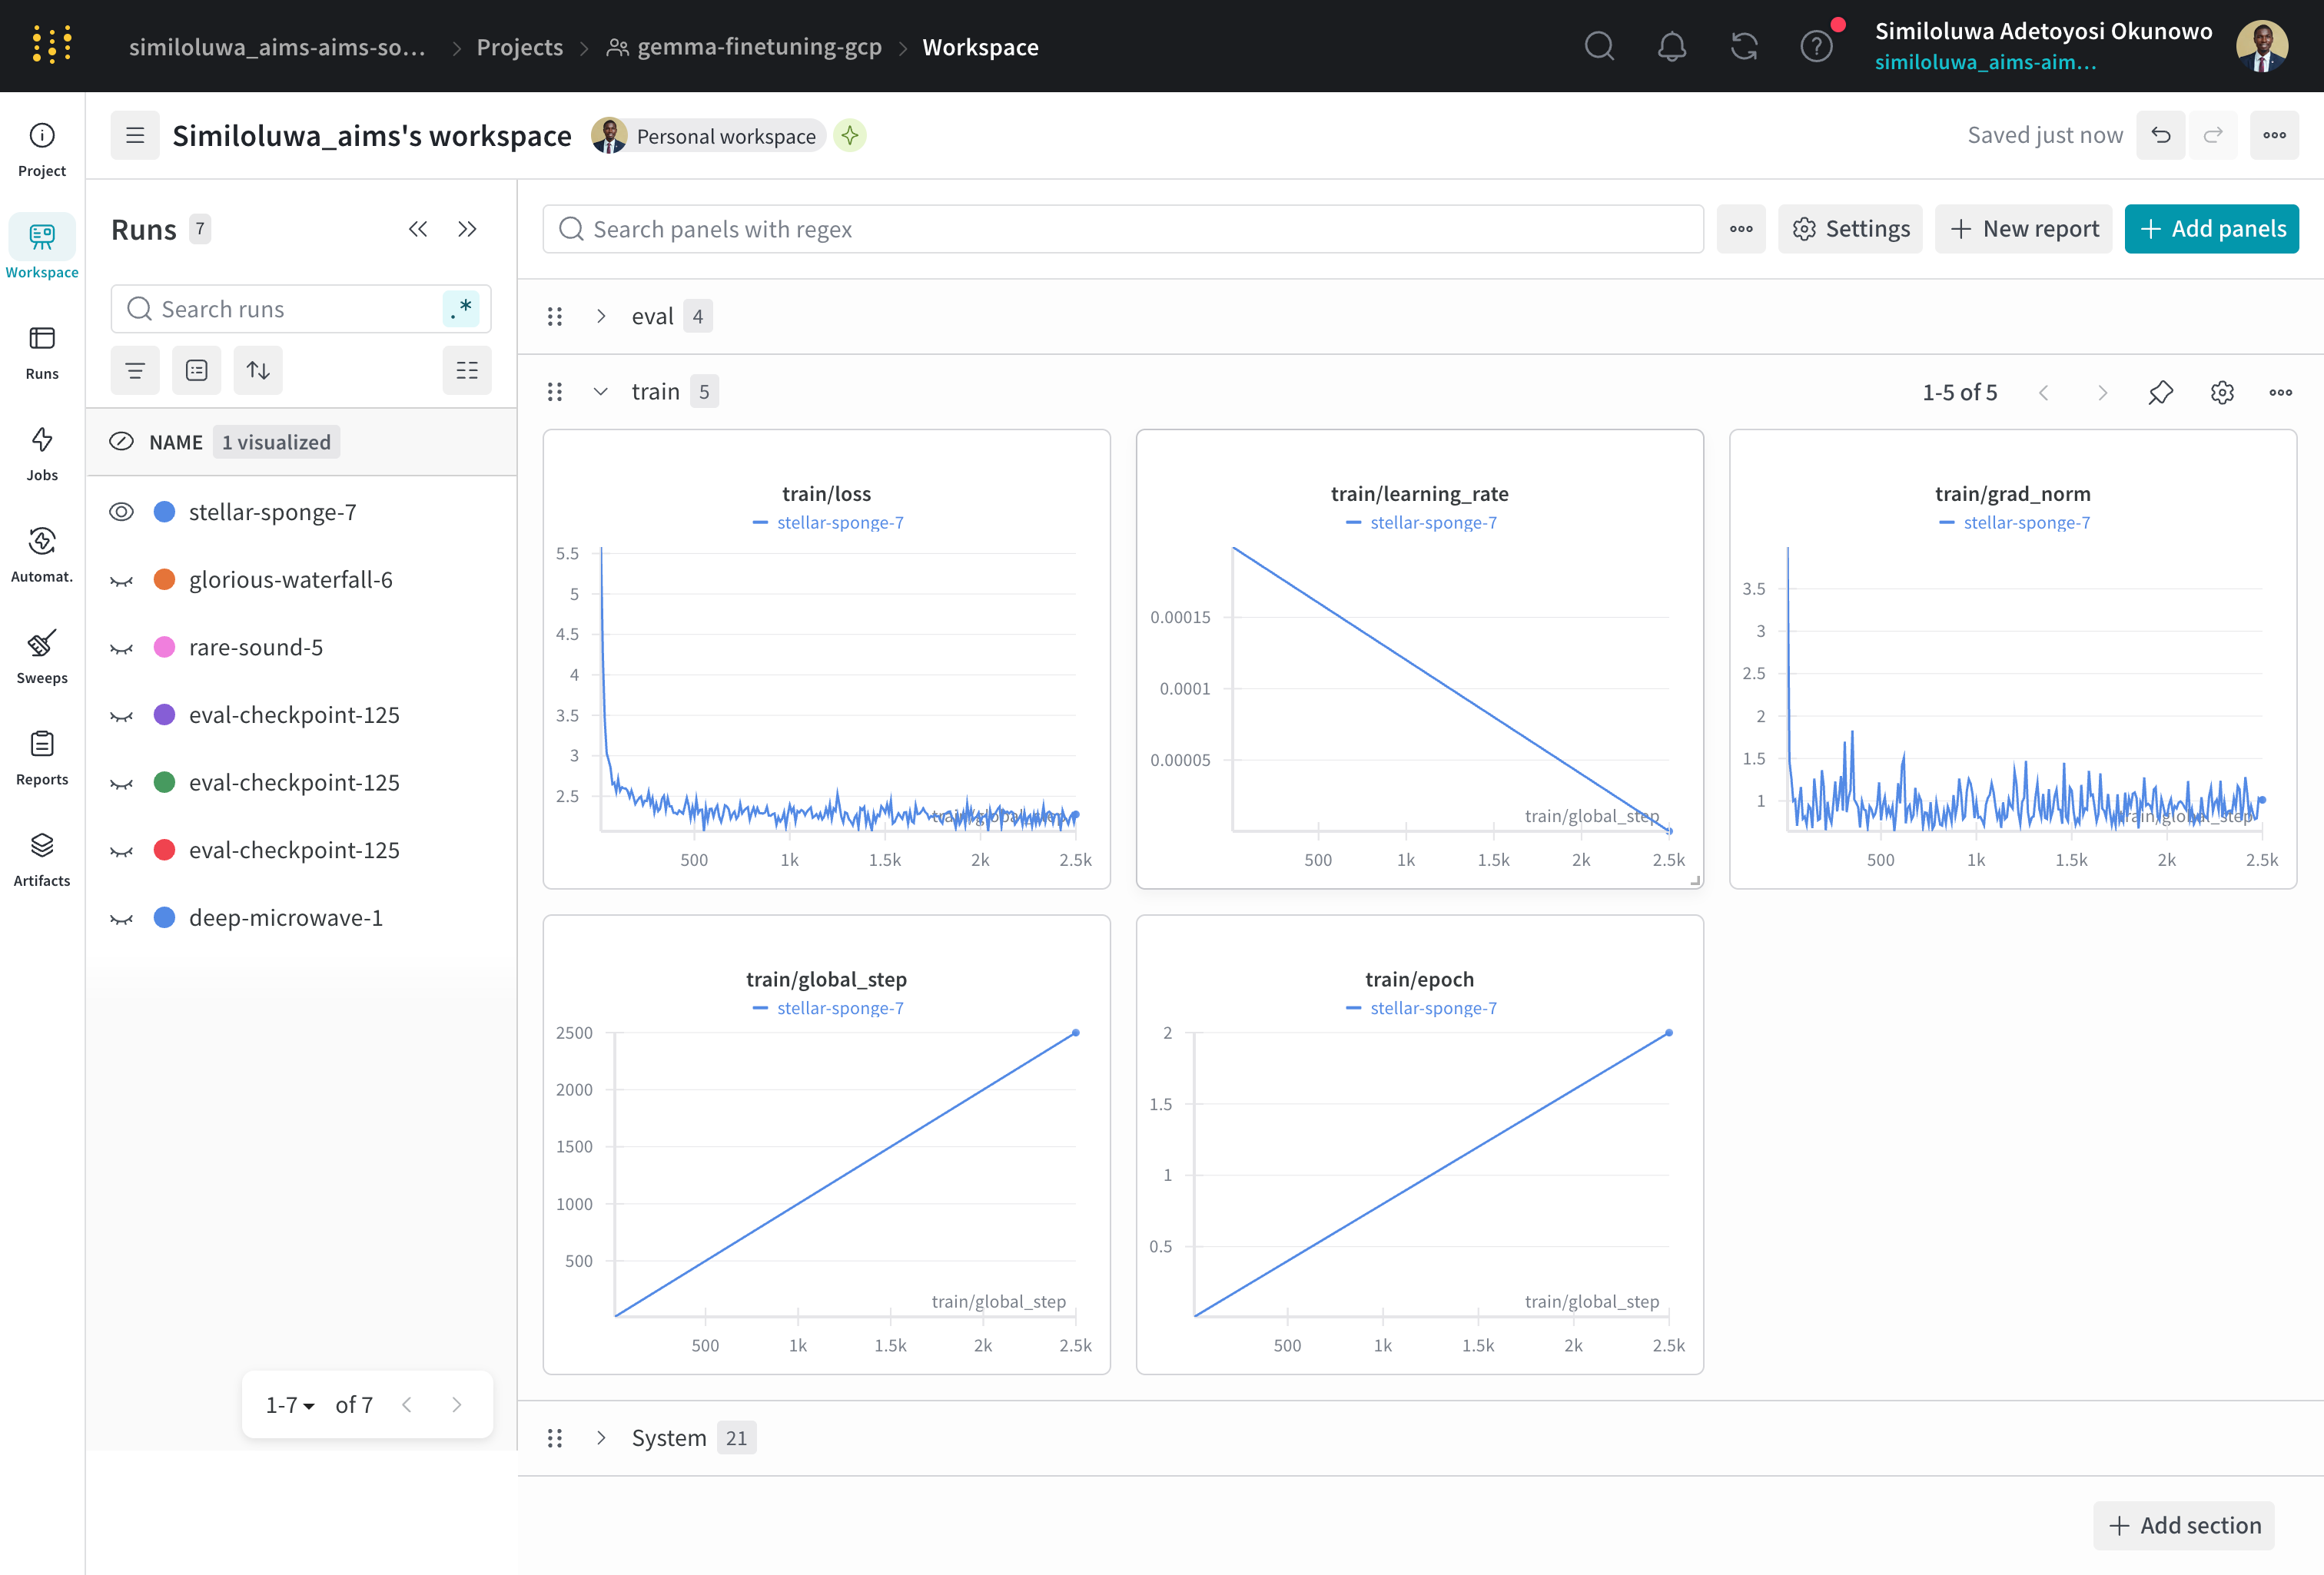
Screenshot of WandB dashboard for monitoring training progress and metrics
Step 10: Run Evaluation
Once training finishes, reattach to the tmux session if you detached:
tmux attach -t <session_name>Run the evaluation script. Replace <experiment_id> and <checkpoint_folder> with the actual paths from your outputs/ directory:
uv run python -m scripts.run_evaluate \
    --model_path outputs/<experiment_id>/<checkpoint_folder> \
    --eval_file data/eval/eval_prompts.jsonl
This computes perplexity and repetition rate on the evaluation set and logs the results to WandB.

Screenshot of WandB dashboard for monitoring evaluation results
Step 11: Run Inference (Optional)
Test the model on a single instruction
uv run python -m scripts.run_inference \
    --model_path outputs/<experiment_id>/<checkpoint_folder> \
    --instruction "Explain what machine learning is in simple terms"
You can also run in interactive mode to keep sending instructions:
uv run python -m scripts.run_inference \
    --model_path outputs/<experiment_id>/<checkpoint_folder>
Screenshot of inference result using the fine-tuned Gemma 3 1B model
Step 12: Sync Outputs to GCS
Before deleting the VM, sync your checkpoints and logs to your GCS bucket so they persist:
gcloud storage cp -r outputs/ gs://<BUCKET_NAME>/outputs/Verify the GCS bucket content from the GCS dashboard or from the CLI:
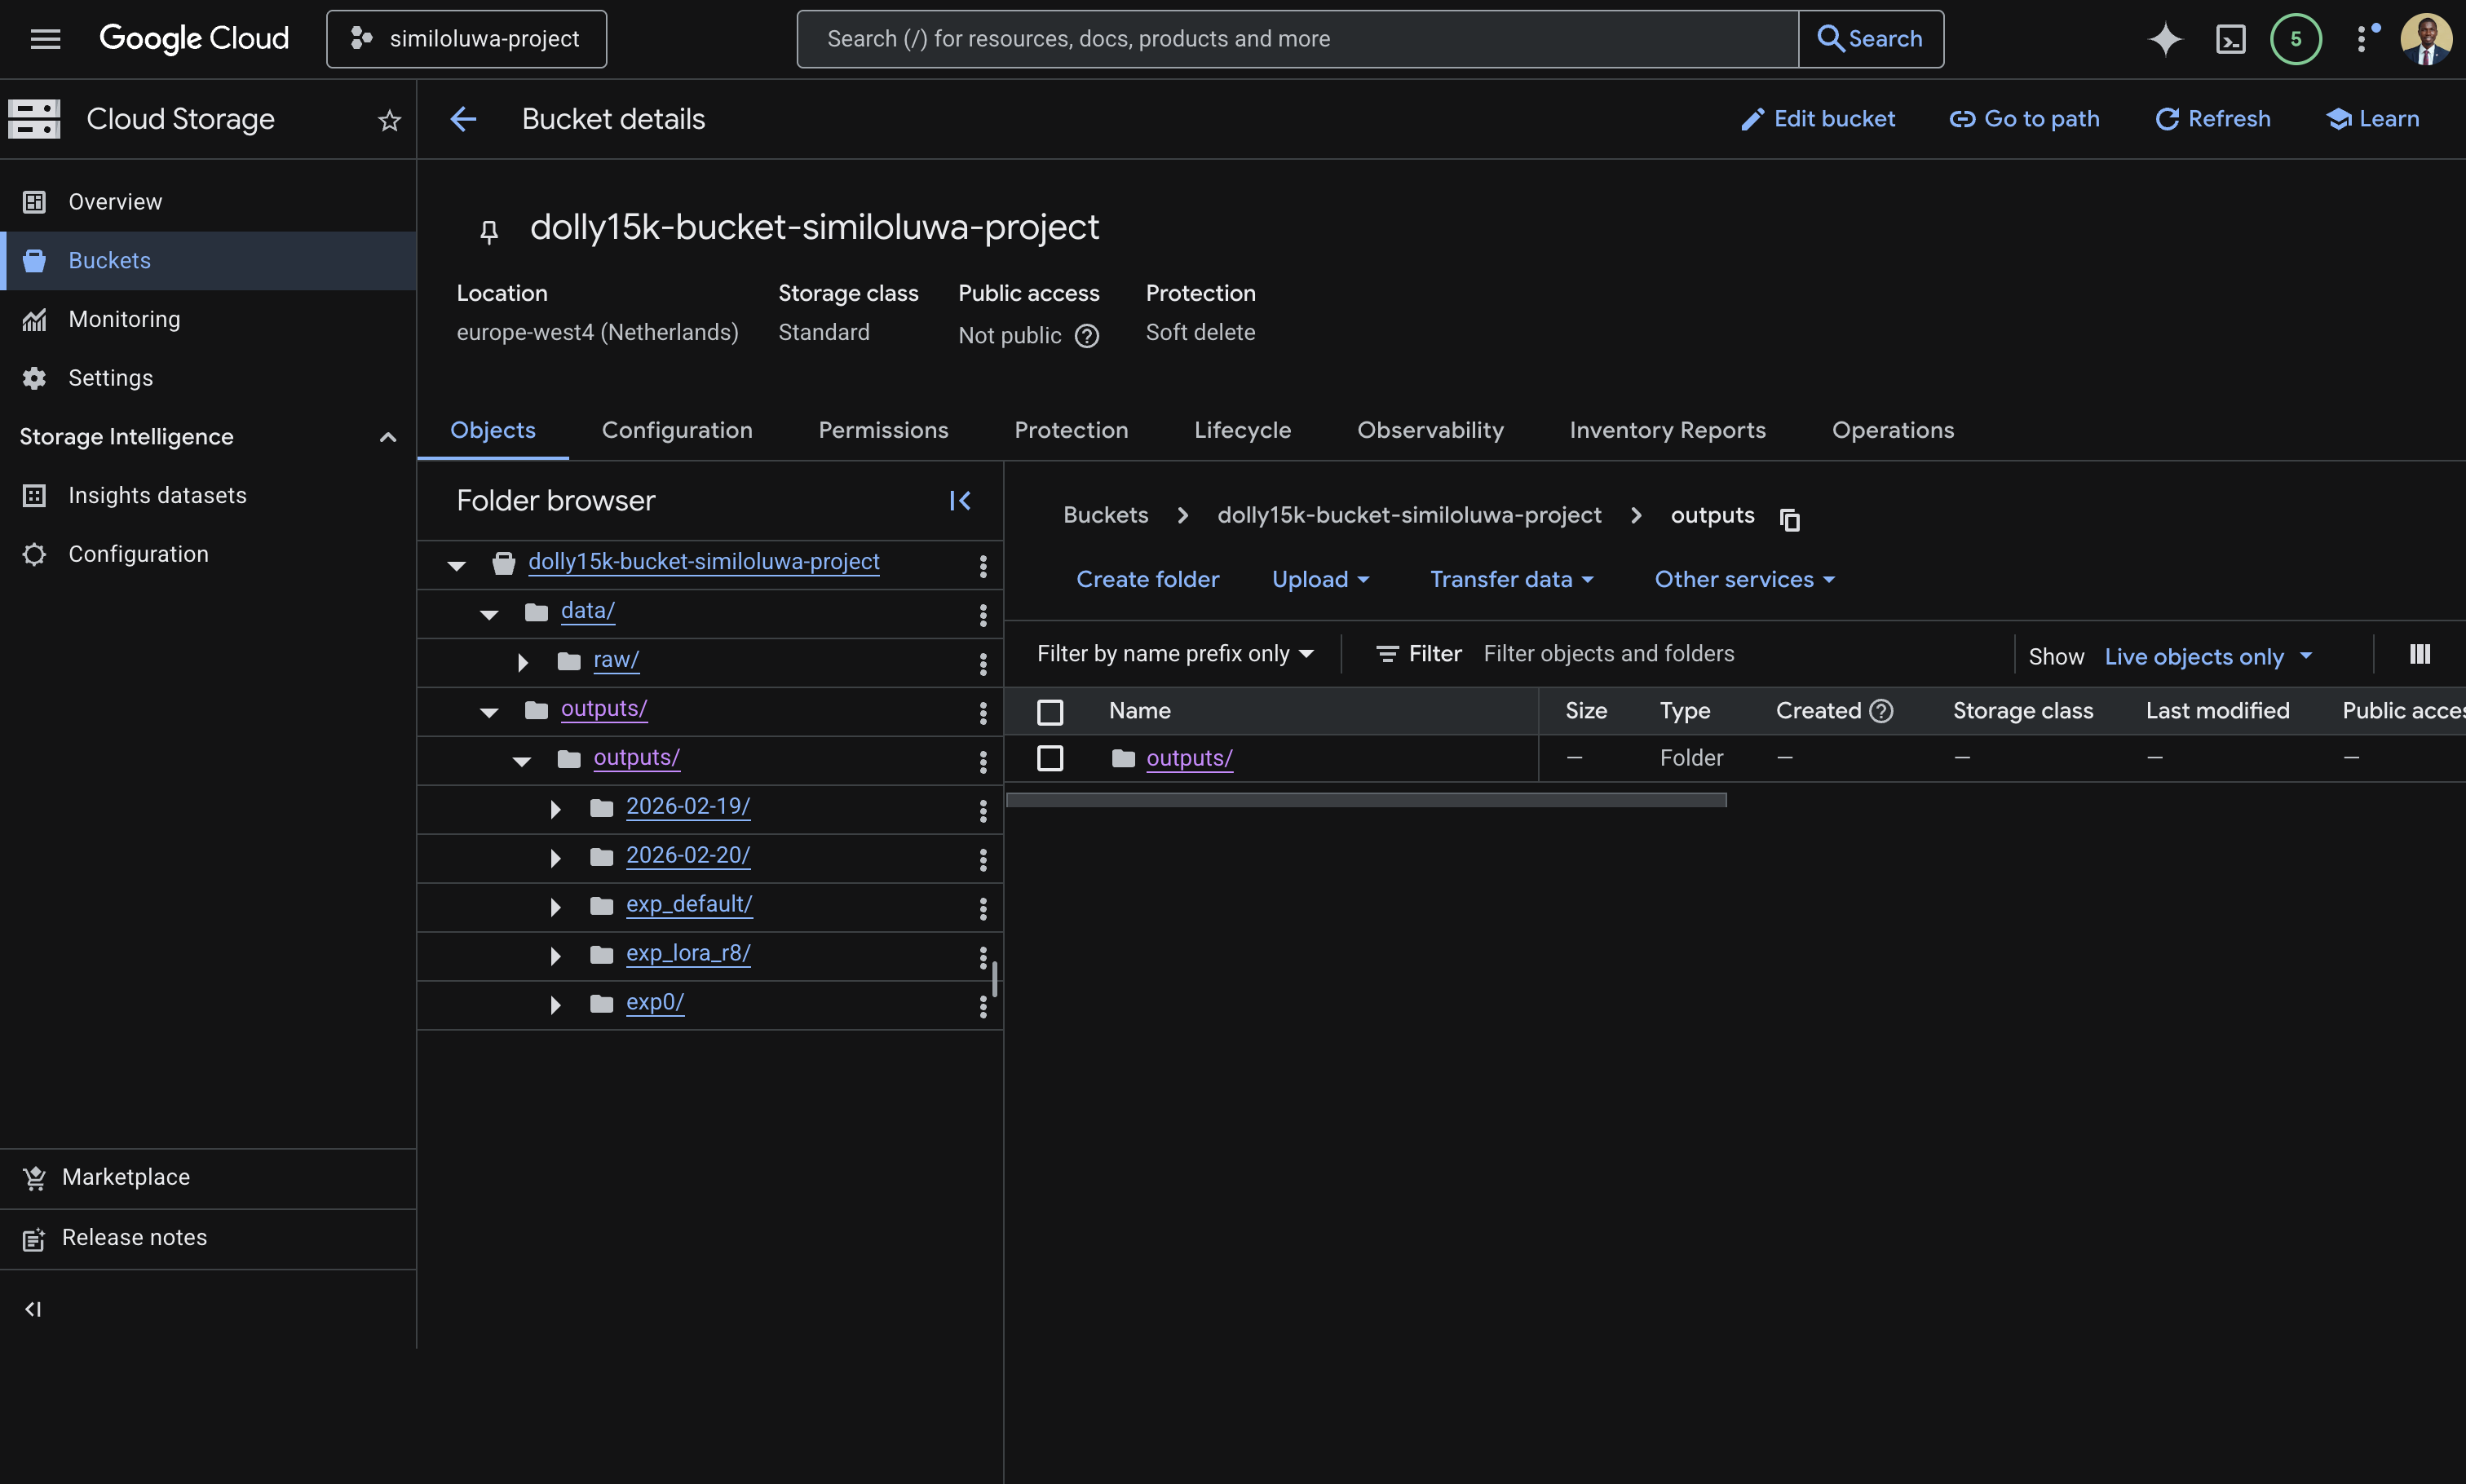
Screenshot of GCS bucket on the GCP console showing the “data” and synced “outputs” folder.
gcloud storage ls gs://<BUCKET_NAME>/outputs/Exit the tmux session:
exitStep 13: Resource Cleanup
Run the script below and replace <YOUR_AIMSUSERNAME> and <ZONE> with the values you used in the VM creation script.
gcloud compute instances delete <YOUR_AIMSUSERNAME>-l4-vm --zone=<ZONE> --quietVerify it has been deleted:
gcloud compute instances list🔑 Key Takeways
Using a package manager like
uvensures your Python environment is reproducible across any machine. A singleuv syncinstalls all dependencies at the exact versions pinned in the lock file, eliminating environment mismatch issues.Uploading your dataset to GCS once and reading from there on every run is more reliable and faster than downloading from external sources each time.
tmuxis essential for long-running jobs on remote VMs. It keeps your process alive even if your SSH connection is destroyed.WandB gives you full visibility into training progress and metrics from any browser, without needing to stay connected to the VM.
Always sync outputs to GCS before deleting your VM. VM disks are ephemeral and deleted with the instance.
Always delete your VM after a session to avoid unexpected charges.
🚀 What’s Next?
In the next session, we will look at Vertex AI, Google Cloud’s fully managed ML platform and how it can simplify running experiments like this without provisioning or managing any infrastructure yourself.