Overview
In this hands-on session, we will set up a GCP billing budget and alert so you are notified before you overspend your credits. We will also use the GCP Pricing Calculator to estimate the cost of the experiments we ran in the previous hands-on sessions.
Learning Objectives
By the end of this session, you will be able to:
Set up a billing budget and alert in GCP
Use the GCP Pricing Calculator to estimate experiment costs
Understand the cost breakdown of the resources used in this tutorial
Step 1: Open the Billing Console
Go to console
.cloud .google .com In the top left, click the navigation menu
Click Billing
Step 2: Create a Budget
In the left sidebar, click Budgets and alerts, then click Create budget to create a new budget.
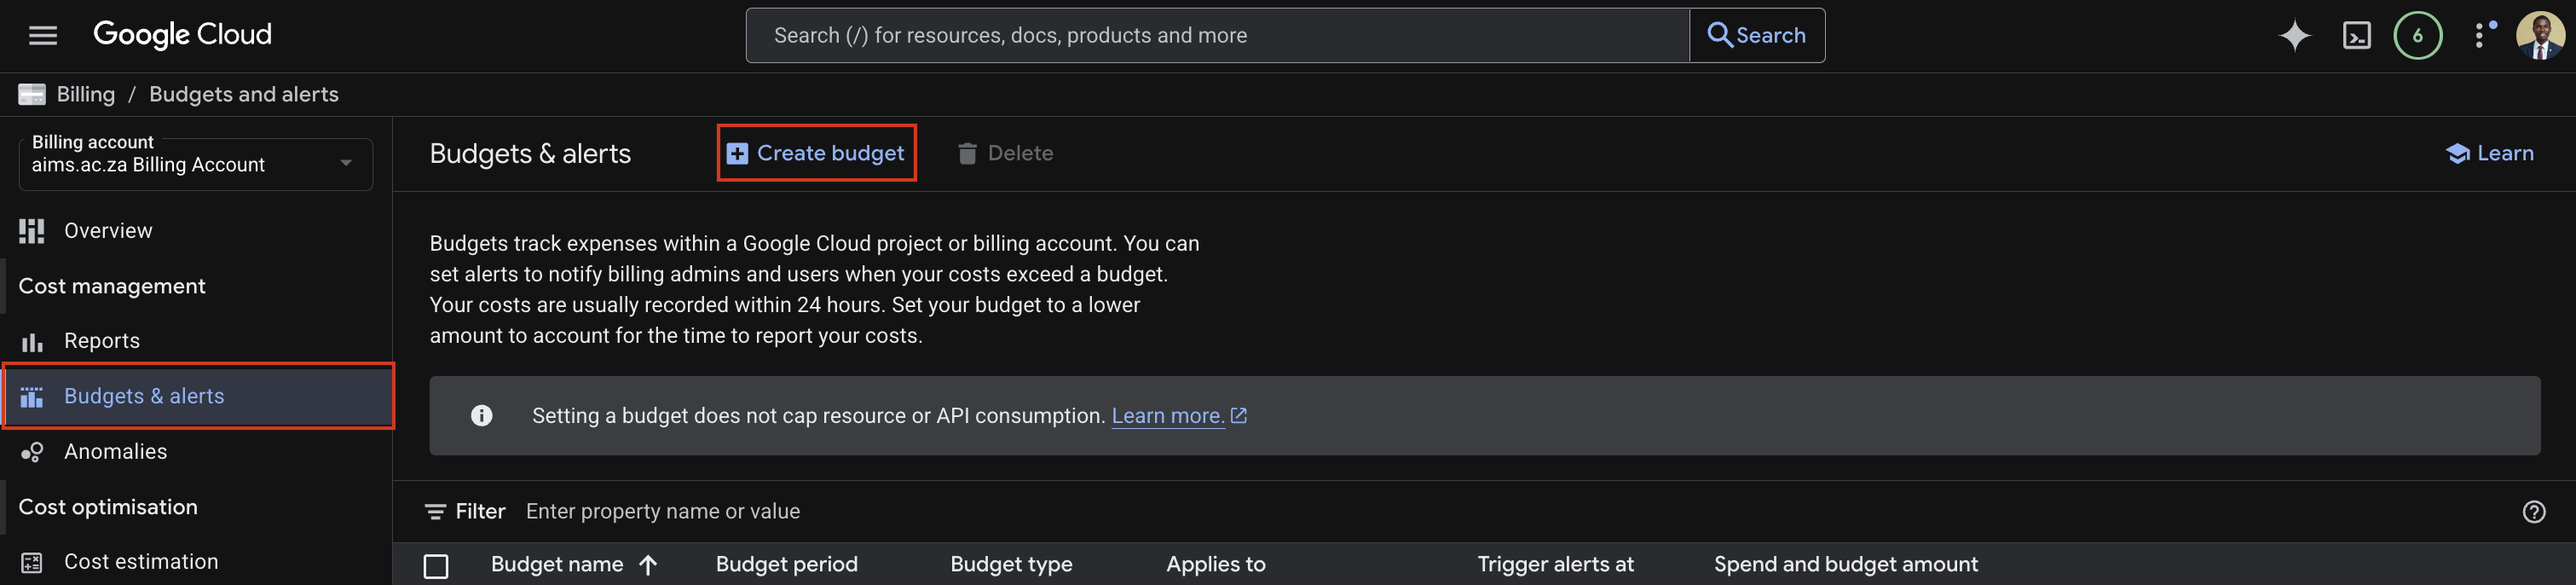
Screenshot: Create a budget.
To create a budget, we need to set up the scope (which projects and services to monitor), the amount (the total budget limit), and the actions (how you want to be notified when you hit your limit).
Scope:
Enter a name for the budget, for example
gcp-aims-tutorial-budgetUnder Time range, leave it as Monthly
Under Projects, make sure your project is selected
Leave all services selected so the budget covers all GCP services
Click Next
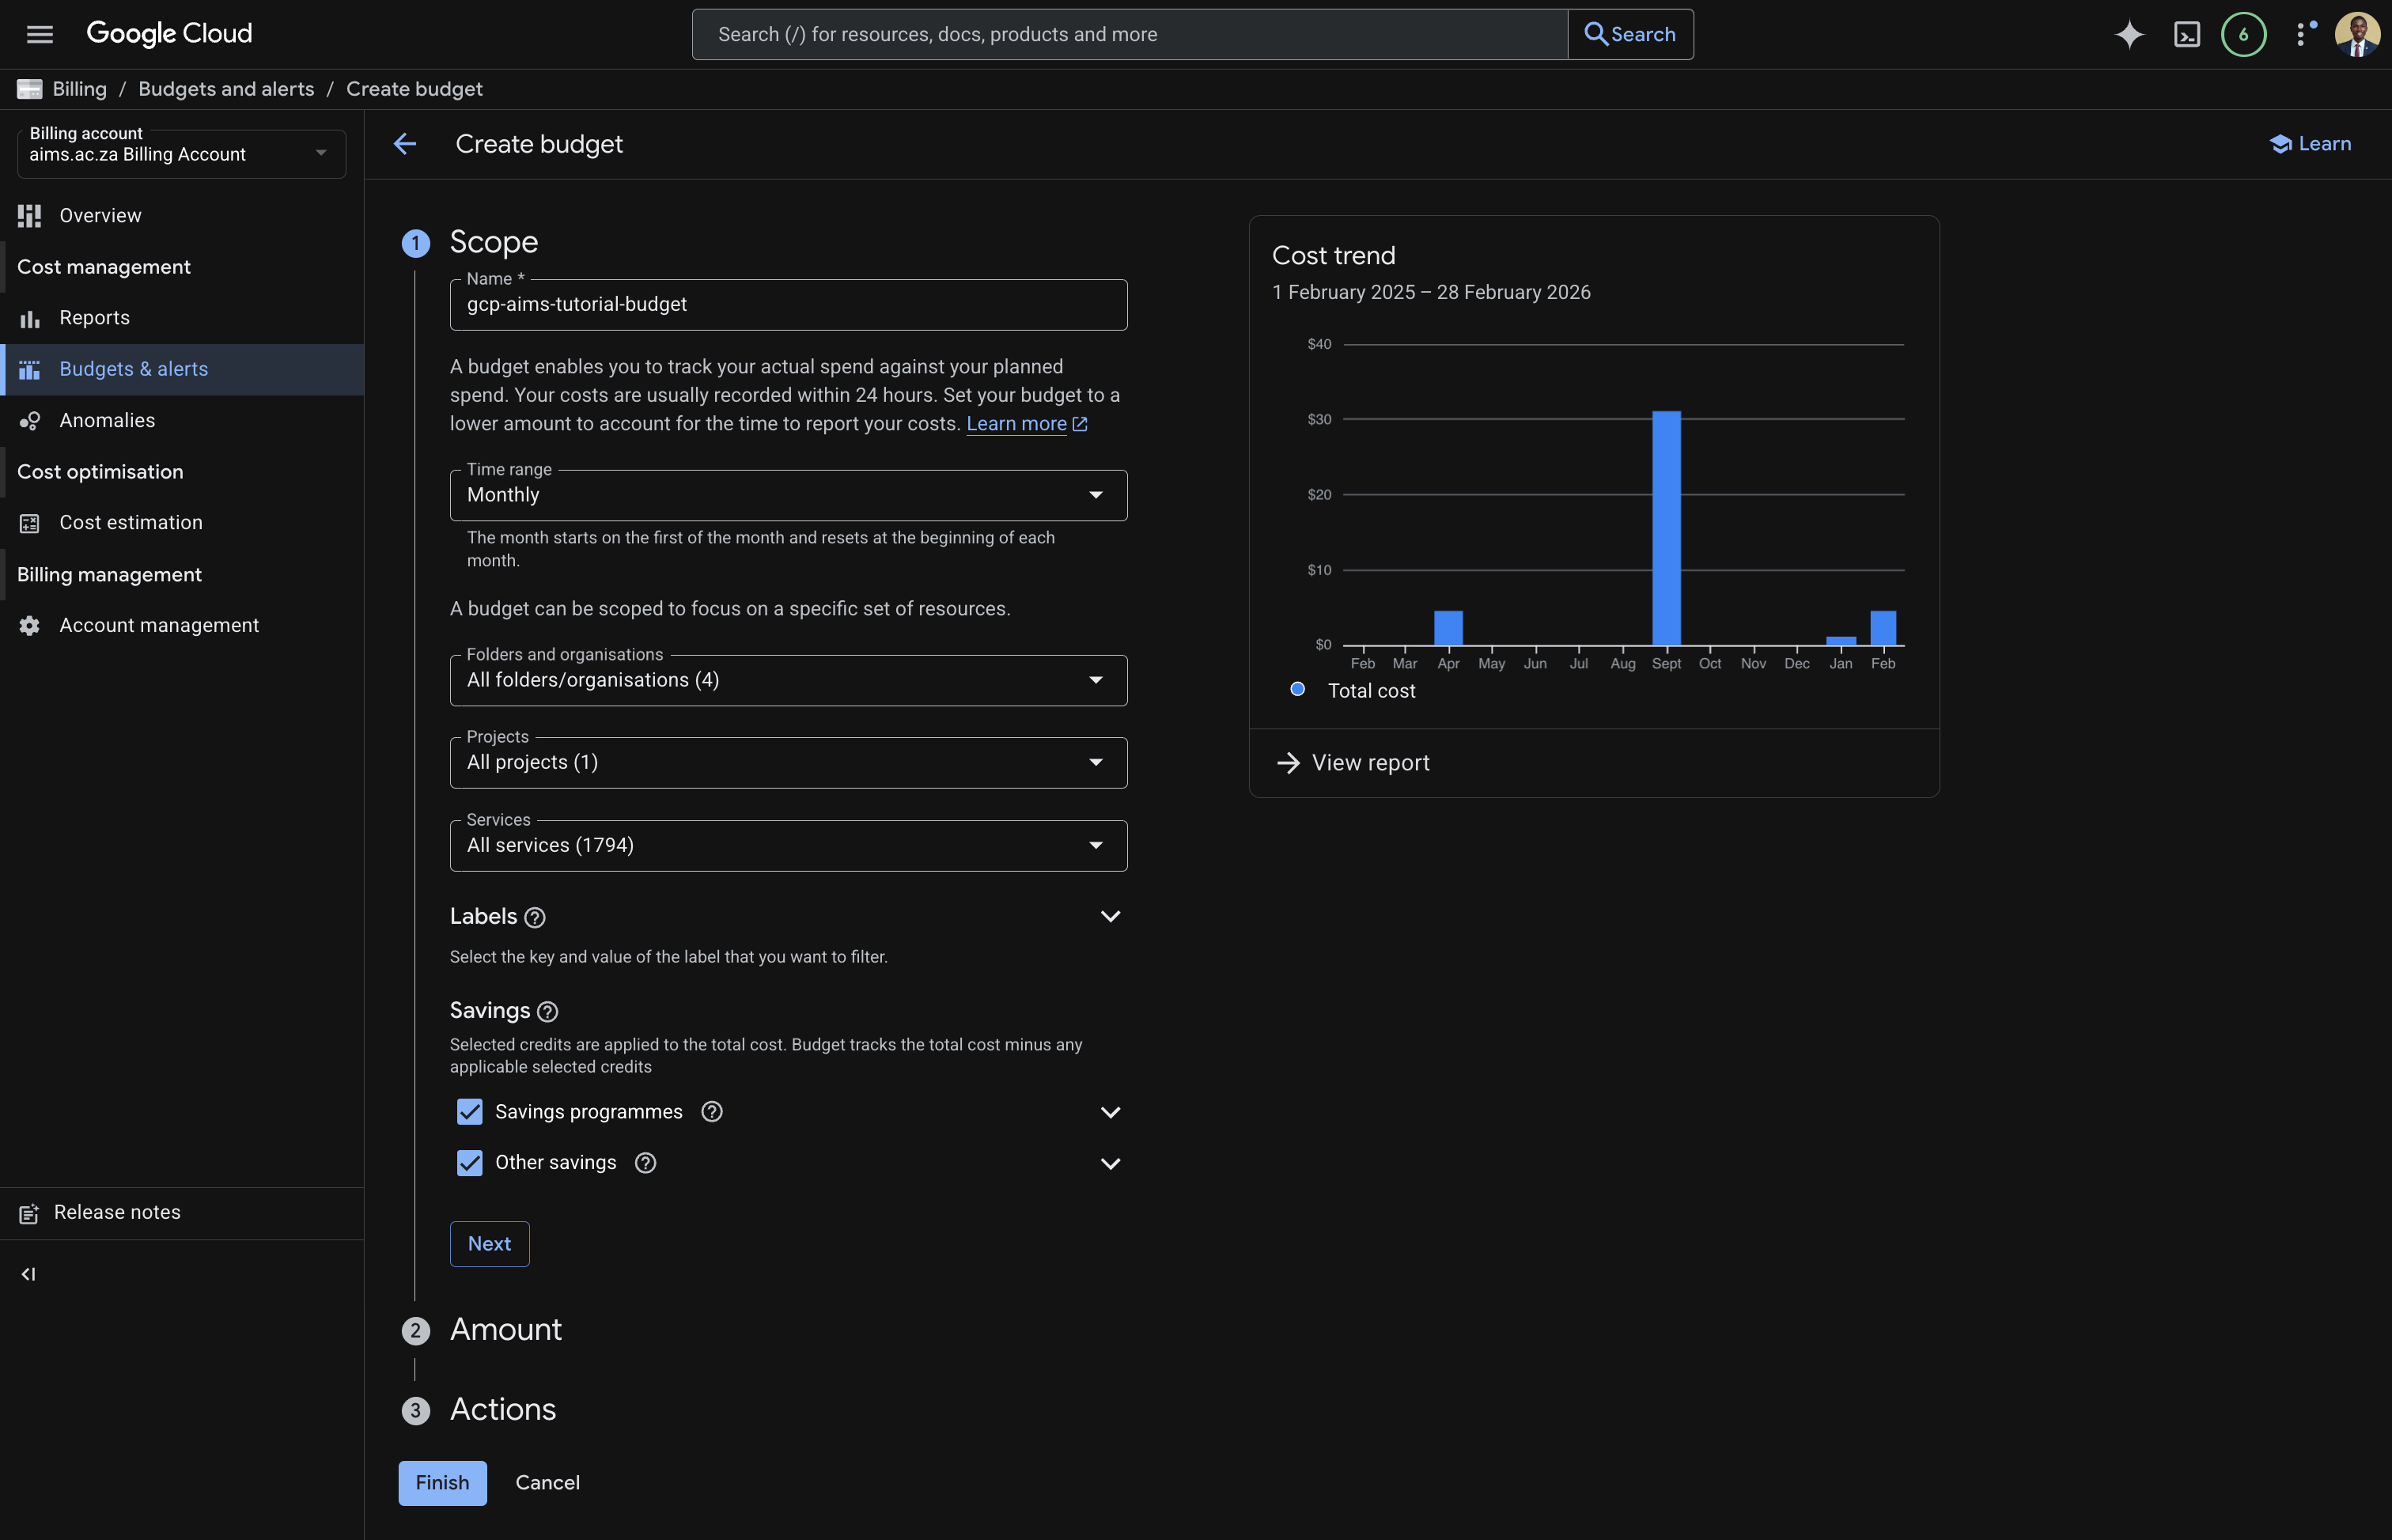
Screenshot: Set up the budget scope
Amount
Under Budget type, select Specified amount
Enter your target amount i.e. $10.
Note for AIMS students: While your total allocation might be $2,000, setting a low monthly target like $10 or $20 helps you catch accidental “resource leaks” early.
Click Next
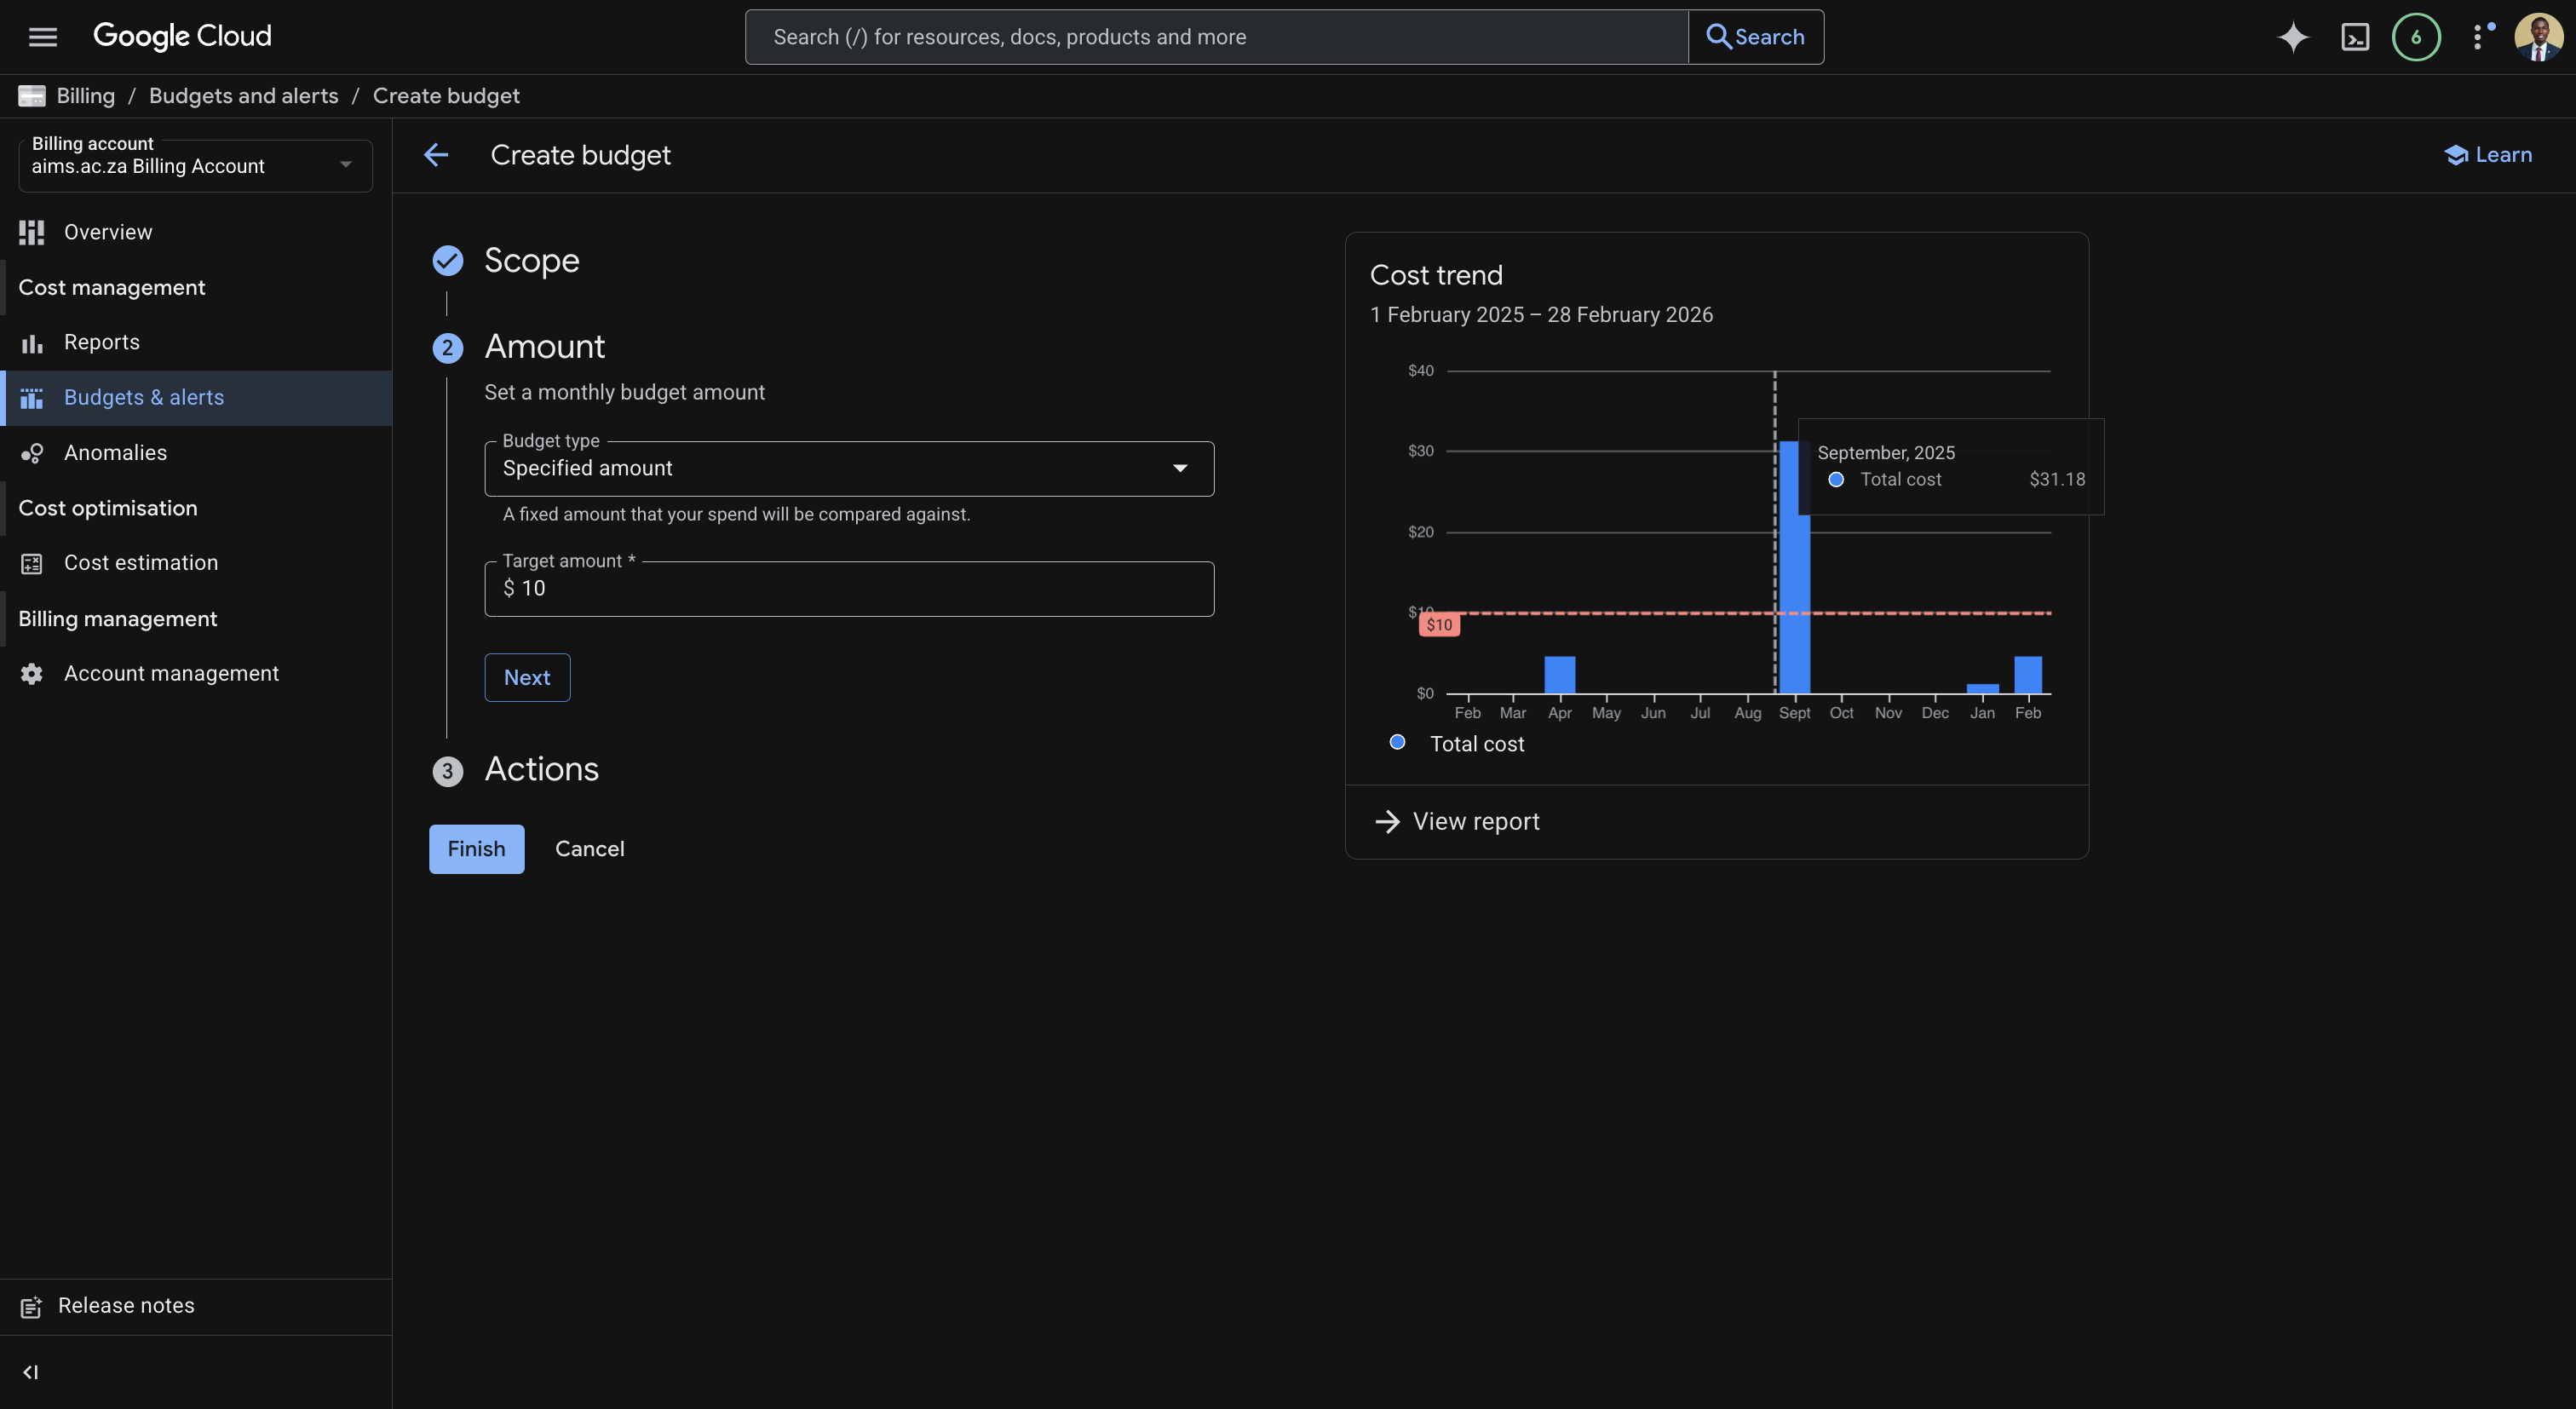
Screenshot: Set up the budget amount
Actions
By default, Google Cloud creates three alert thresholds at 50%, 90%, and 100% of your budget. Keep these defaults:
50%: Acts as an early warning that your experiment is halfway through its monthly allowance.
90%: Serves as a critical “wrap up” signal to finish your runs.
100%: Notifies you that you have fully reached your limit.
Under Manage Notifications, make sure the box “Email alerts to billing admins and users” is checked. This ensures you receive an immediate email notification the moment a threshold is crossed.
Click Finish to finally create the budget.
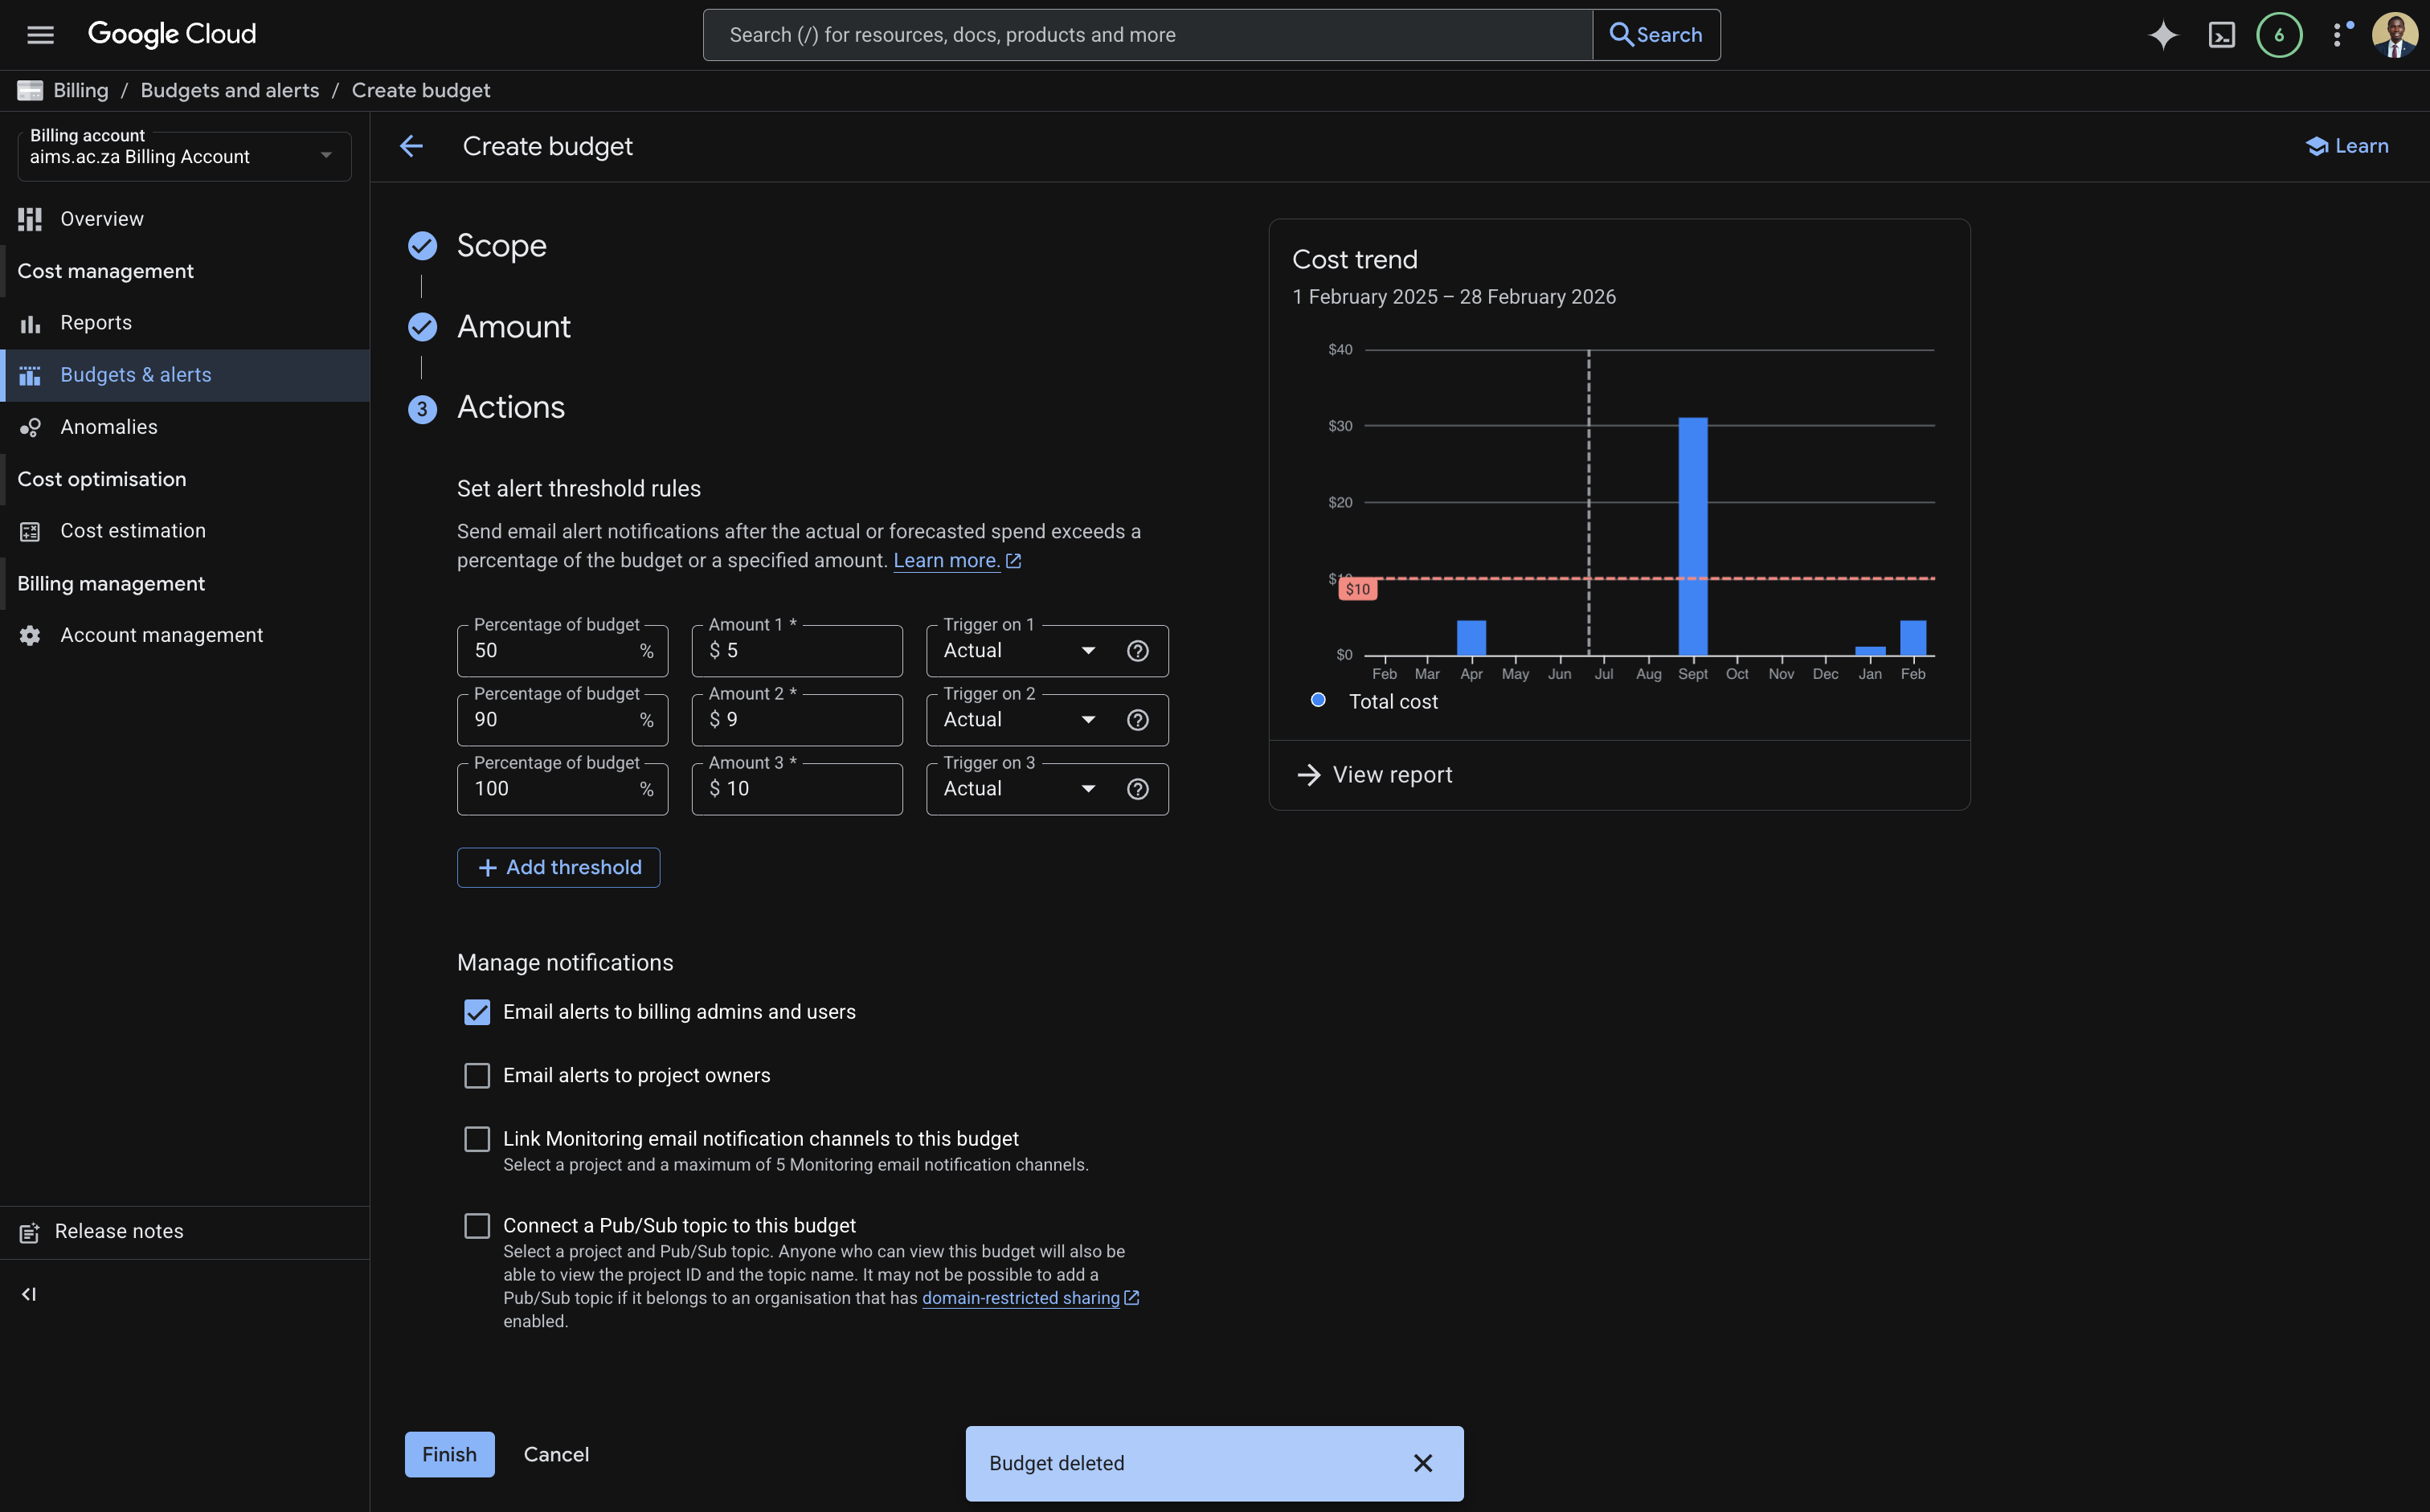
Screenshot: Set up the budget actions
Step 3: Verify the Budget
You should not see the budget listed on the Budget and alerts page with the spend progress bar and configured thresholds.
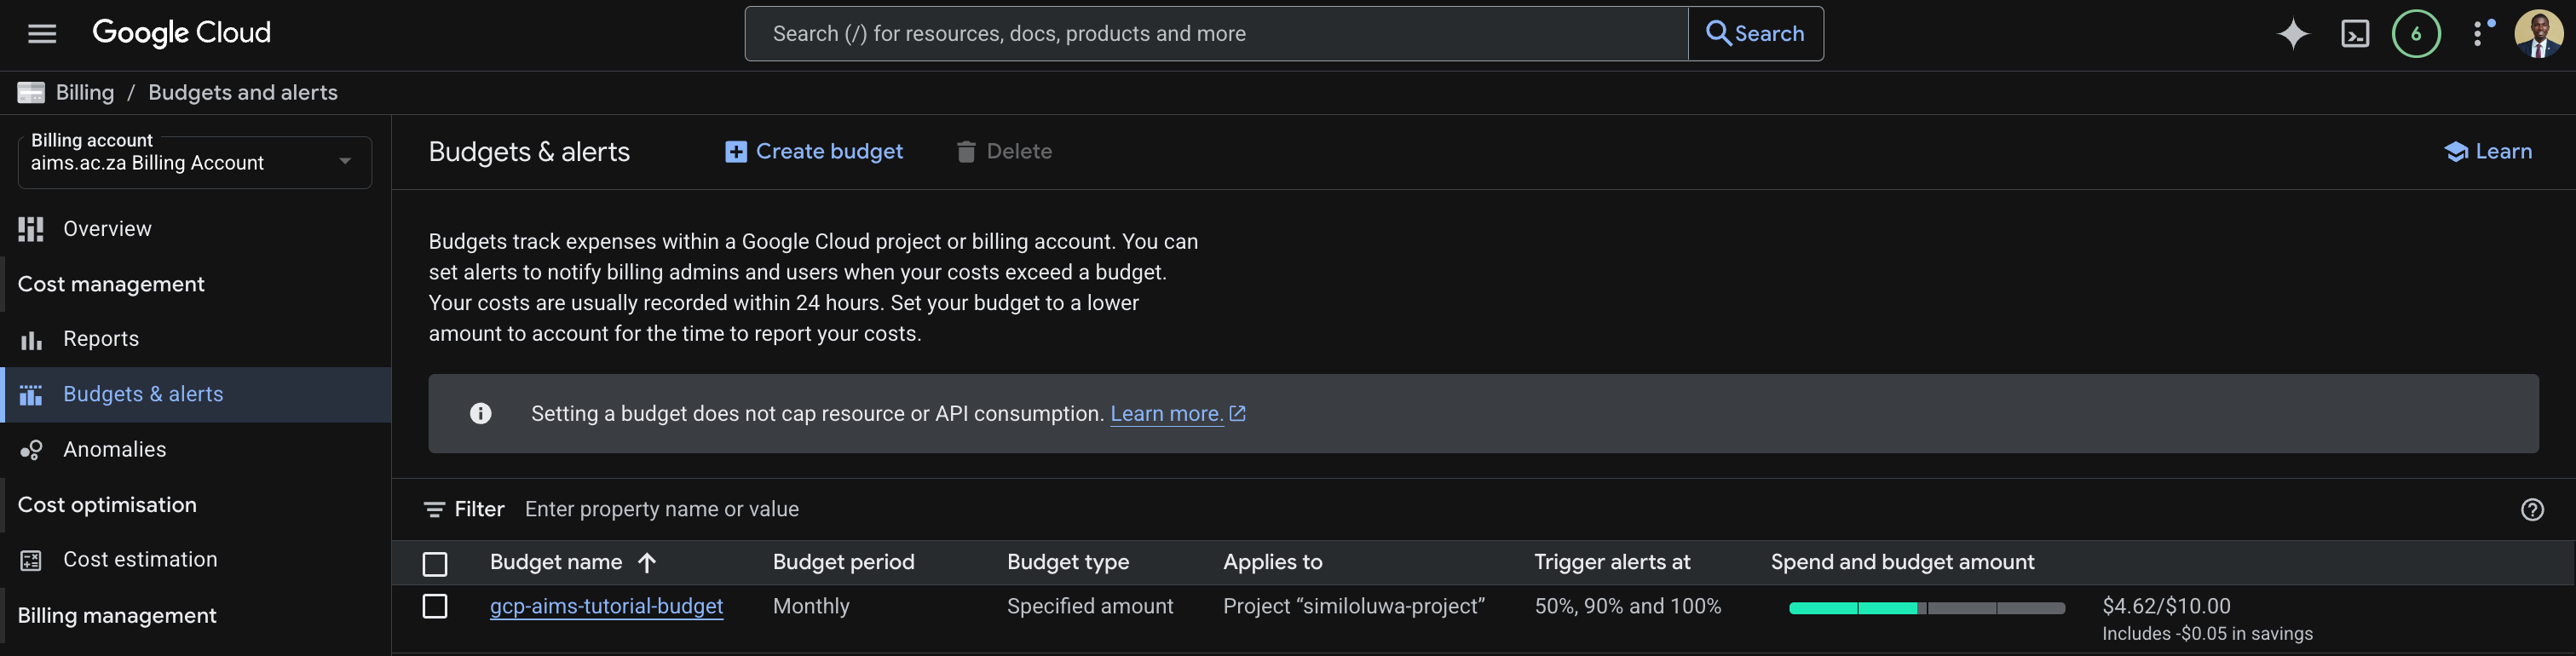
Screenshot: Budgets and alerts page showing the newly created budget with spend progress.
You will receive an email notification when your spending reaches 50%, 90%, and 100% of the budget amount.
🔑 Key Takeaways
Always set up billing budget and alert before running experiments, not after.
GCP billing alerts notify you but do not stop your resources automatically. Manual cleanup of resources is always required.
The biggest cost driver is usually GPU compute time. Always delete VMs and runtimes when you are done.
Job-based compute like Vertex AI Custom Training is almost always cheaper than always-on VMs for batch training since it terminates automatically when done.
📚 References and Further Reading
GCP Billing Documentation - Official documentation on managing billing and budgets
GCP Pricing Calculator - Estimate costs for any GCP service before running experiments
Compute Engine Pricing - Full pricing breakdown for GPU VM instances
Vertex AI Pricing - Full pricing breakdown for Vertex AI training and serving
GCS Pricing - Storage and data transfer pricing for Google Cloud Storage