While the GCP Console is great for clicking through settings, using the gcloud command-line interface (CLI) is much more powerful. It allows your work to be repeatable and scriptable, meaning you can recreate your exact environment with a single command instead of dozens of manual clicks. It also enables automating tasks, such as starting or deleting multiple machines at once.
Installing the Google Cloud CLI
You need the Google Cloud CLI installed on your local machine to use gcloud
Follow the official guides to download and install it:
After installation, run the gcloud init command in your terminal to log in and select your project.
gcloud initTry these basic commands to make sure your terminal is connected to your GCP account:
# See which project you are currently using
gcloud config list project

# List the VMs you currently have
gcloud compute instances list
Creating a Virtual Machine (VM)
Step 1: Create a Secure Network (VPC)
This creates a Virtual Private Cloud (VPC) to isolate your computing resources within the project.
export AIMSUSERNAME="your_aims_username" # This is for AIMS students
gcloud compute networks create ${AIMSUSERNAME}-vpc --subnet-mode=autoStep 2: Create a Firewall Rule for SSH
By default, all incoming traffic is blocked. This rule allows traffic on Port 22, which is required for SSH connections.
gcloud compute firewall-rules create ${AIMSUSERNAME}-fw-ssh \
    --network=${AIMSUSERNAME}-vpc \
    --allow=tcp:22
Step 3: Set Up Internet Access (Router and NAT)
This allows your VM to access external resources (such as HuggingFace to download a model) without assigning a public External IP address to the instance.
export REGION="europe-west4" # This is your region

# Create the Cloud Router
gcloud compute routers create ${AIMSUSERNAME}-router-${REGION} \
    --network=${AIMSUSERNAME}-vpc \
    --region=${REGION}

# Create the NAT configuration
gcloud compute routers nats create ${AIMSUSERNAME}-nat-config \
    --router-region=${REGION} \
    --router=${AIMSUSERNAME}-router-${REGION} \
    --nat-all-subnet-ip-ranges \
    --auto-allocate-nat-external-ips
Step 4: Create the VM
This command provisions a virtual machine with an NVIDIA L4 GPU. The L4 is a modern, cost-effective mid-range GPU with 24GB RAM.
export ZONE="europe-west4-a"
export VM_NAME="${AIMSUSERNAME}-l4-vm" # Any other name works!

gcloud compute instances create ${VM_NAME} \
    --zone=${ZONE} \
    --machine-type=g2-standard-4 \
    --accelerator="type=nvidia-l4,count=1" \
    --image-family=common-cu128-ubuntu-2204-nvidia-570 \
    --image-project=deeplearning-platform-release \
    --maintenance-policy=TERMINATE \
--network=${AIMSUSERNAME}-vpcQuery the VM status:
Verify that the instance has been provisioned and is in the RUNNING state:
gcloud compute instances list --filter="name=${VM_NAME}"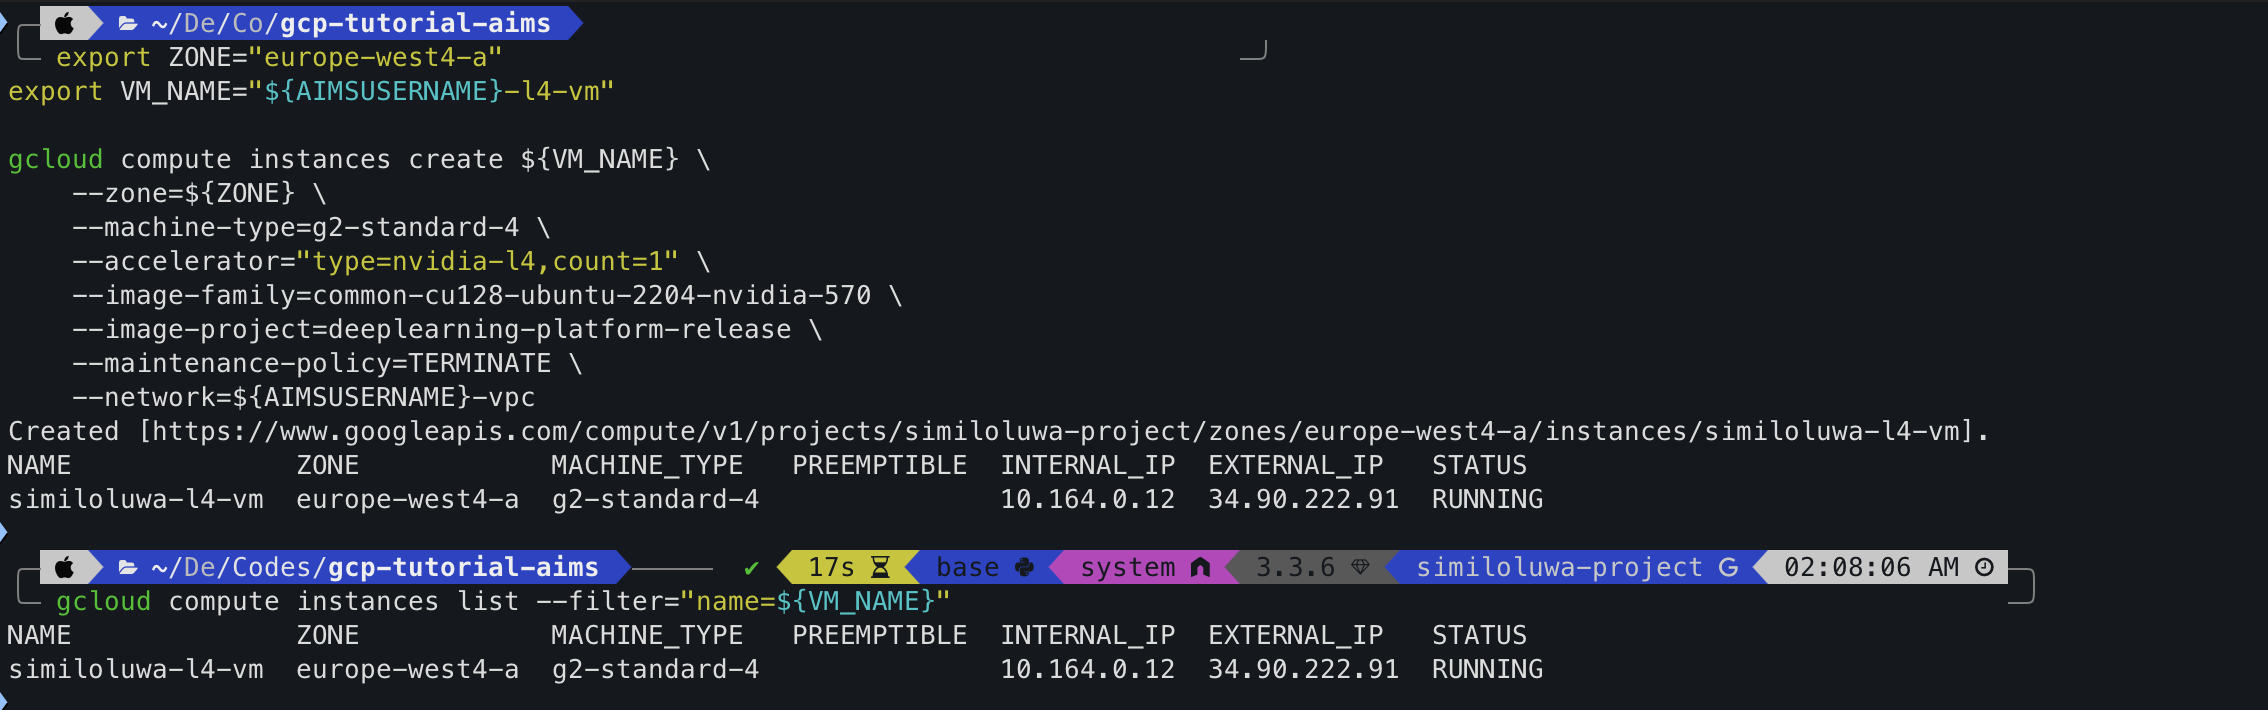
Screenshot: L4 GPU VM created and queried successfully using gcloud
Step 5: Connecting to your VM via SSH
You can access the VM securely through the private network via SSH using Identity-Aware Proxy (IAP). We include a port-forwarding flag (-L 8080:localhost:8080) so you can open JupyterLab in your local browser:
gcloud compute ssh ${VM_NAME} \
    --zone=${ZONE} \
    --tunnel-through-iap \
    -- -L 8080:localhost:8080
Now you can run commands like nvidia-smi on your VM to check the GPU information.
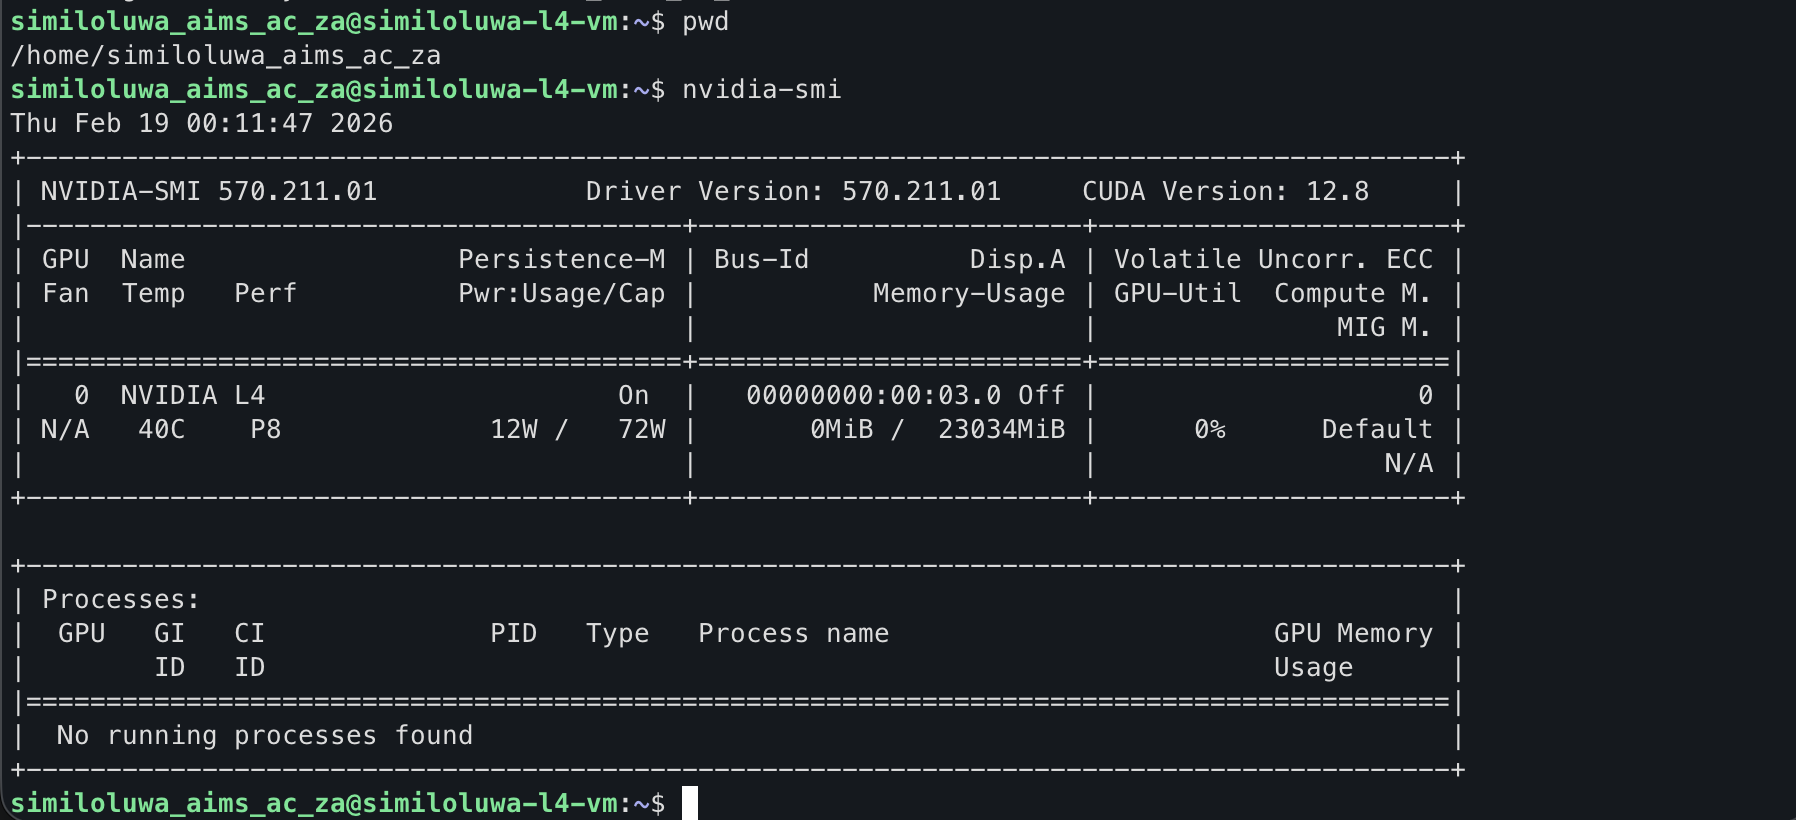
Screenshot: L4 GPU VM successfully connected to via SSH using gcloud
Step 6: Automating Multiple VMs with a Bash Script
The gcloud CLI enables automating large-scale tasks. You can use a bash script to launch multiple VM instances simultaneously for parallel experiments.
Script to create 3 VMs:
# This loop provisions 3 instances in the background
for i in {1..3}
do
   gcloud compute instances create "experiment-vm-$i" \
       --zone=europe-west4-a \
       --machine-type=g2-standard-4 \
       --accelerator="type=nvidia-l4,count=1" \
       --image-family=common-cu128-ubuntu-2204-nvidia-570 \
       --image-project=deeplearning-platform-release \
       --maintenance-policy=TERMINATE \
       --network=${AIMSUSERNAME}-vpc &
done
wait
echo "All VM instances have been deployed."
Screenshot: Multiple L4 GPU VMs created and queried successfully using gcloud
Step 7: Resource Cleanup
Part A: Delete all VM instances
gcloud compute instances delete $(gcloud compute instances list --format="value(name)") --quiet --zone=${ZONE}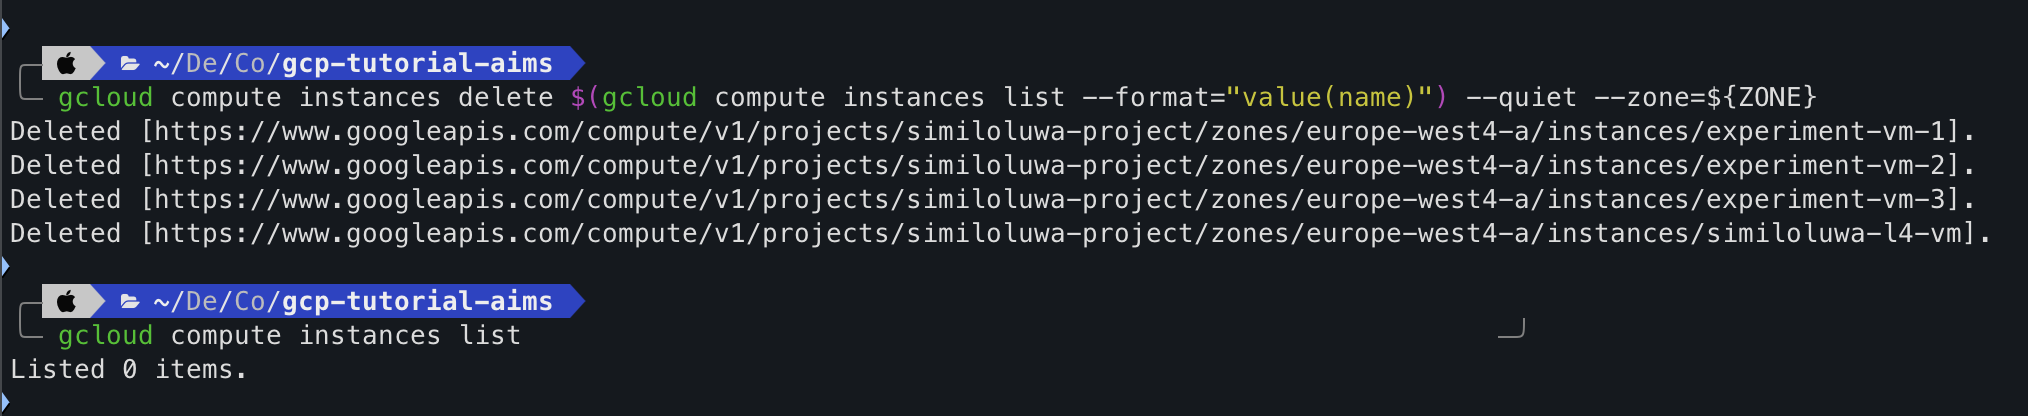
Screenshot: VMs deleted successfully.
Part B: Delete Networking Infrastructure
# 1. Delete the NAT and Cloud Router
gcloud compute routers nats delete ${AIMSUSERNAME}-nat-config --router=${AIMSUSERNAME}-router-${REGION} --region=${REGION} --quiet
gcloud compute routers delete ${AIMSUSERNAME}-router-${REGION} --region=${REGION} --quiet

# 2. Delete the Firewall rule
gcloud compute firewall-rules delete ${AIMSUSERNAME}-fw-ssh --quiet

# 3. Delete the VPC Network
gcloud compute networks delete ${AIMSUSERNAME}-vpc --quiet
🔑 Key Takeaways
Using the
gcloudCLI makes infrastructure deployment repeatable and scriptable, allowing you to provision complex networking and high-performance compute resources with a single command.Using variables like
AIMSUSERNAME,REGION, andZONEensures your scripts are flexible and easily adaptable.To avoid residual charges for cost management, you must return the project to a blank state by deleting not only the VM instance but also the associated networking components like the Cloud NAT, Router, and VPC.
🚀 What’s Next
In the next part, we will run a full AI experiment on a GPU VM to fine-tune a small language model with 1 billion parameters (Gemma 1B). This hands-on session will introduce you to leveraging GCP services to manage end-to-end machine learning workflows.