In this hands-on tutorial, you will create your first GPU-powered virtual machine using the GCP Console web interface.
Step 1: Create a Virtual Private Cloud (VPC) Network
Every virtual machine requires a network to function. A Virtual Private Cloud (VPC) is a secure, isolated private network hosted within Google Cloud. It acts as the virtual equivalent of a physical network in a traditional data center. Specifically, a VPC network does the following:
Provides connectivity for your Compute Engine virtual machine (VM) instances.
Enables communication between your VMs, other Google Cloud services, and the public internet.
Acts as a secure boundary, allowing you to control exactly what traffic can enter or leave your network using firewall rules.
To ensure your VM has the correct network configuration and to prevent creation errors, we will manually create a VPC first.
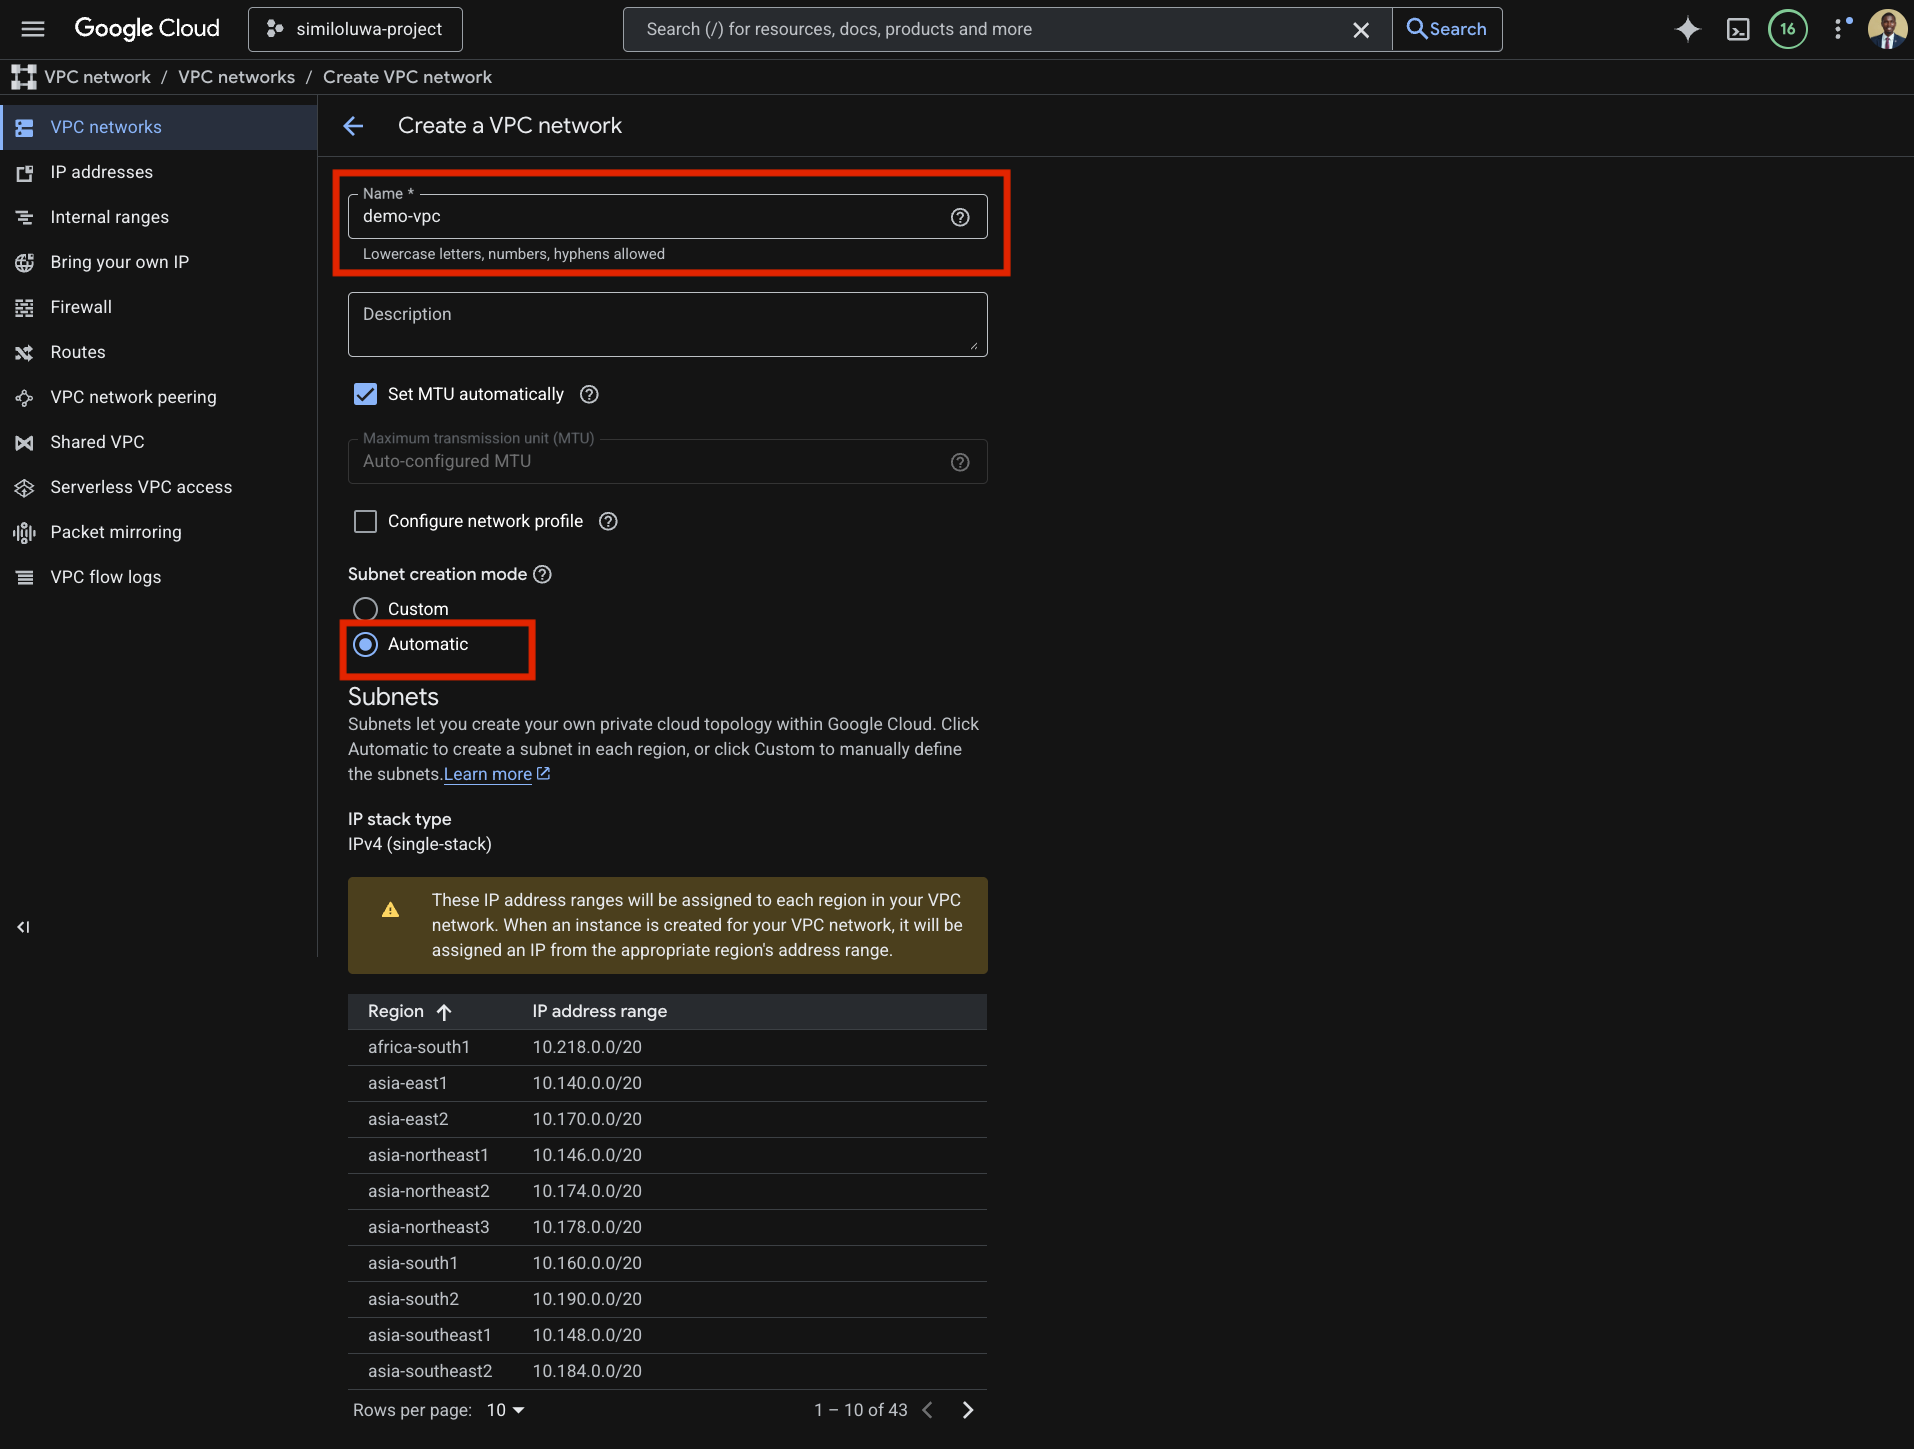
Open the Navigation menu (☰) and go to VPC network → VPC networks.
Click the Create VPC Network button
Name: Enter
demo-vpc, or whatever name you want.Subnet creation mode: Select Automatic. This instructs Google Cloud to automatically create a subnet with a predefined IP range in every available region.
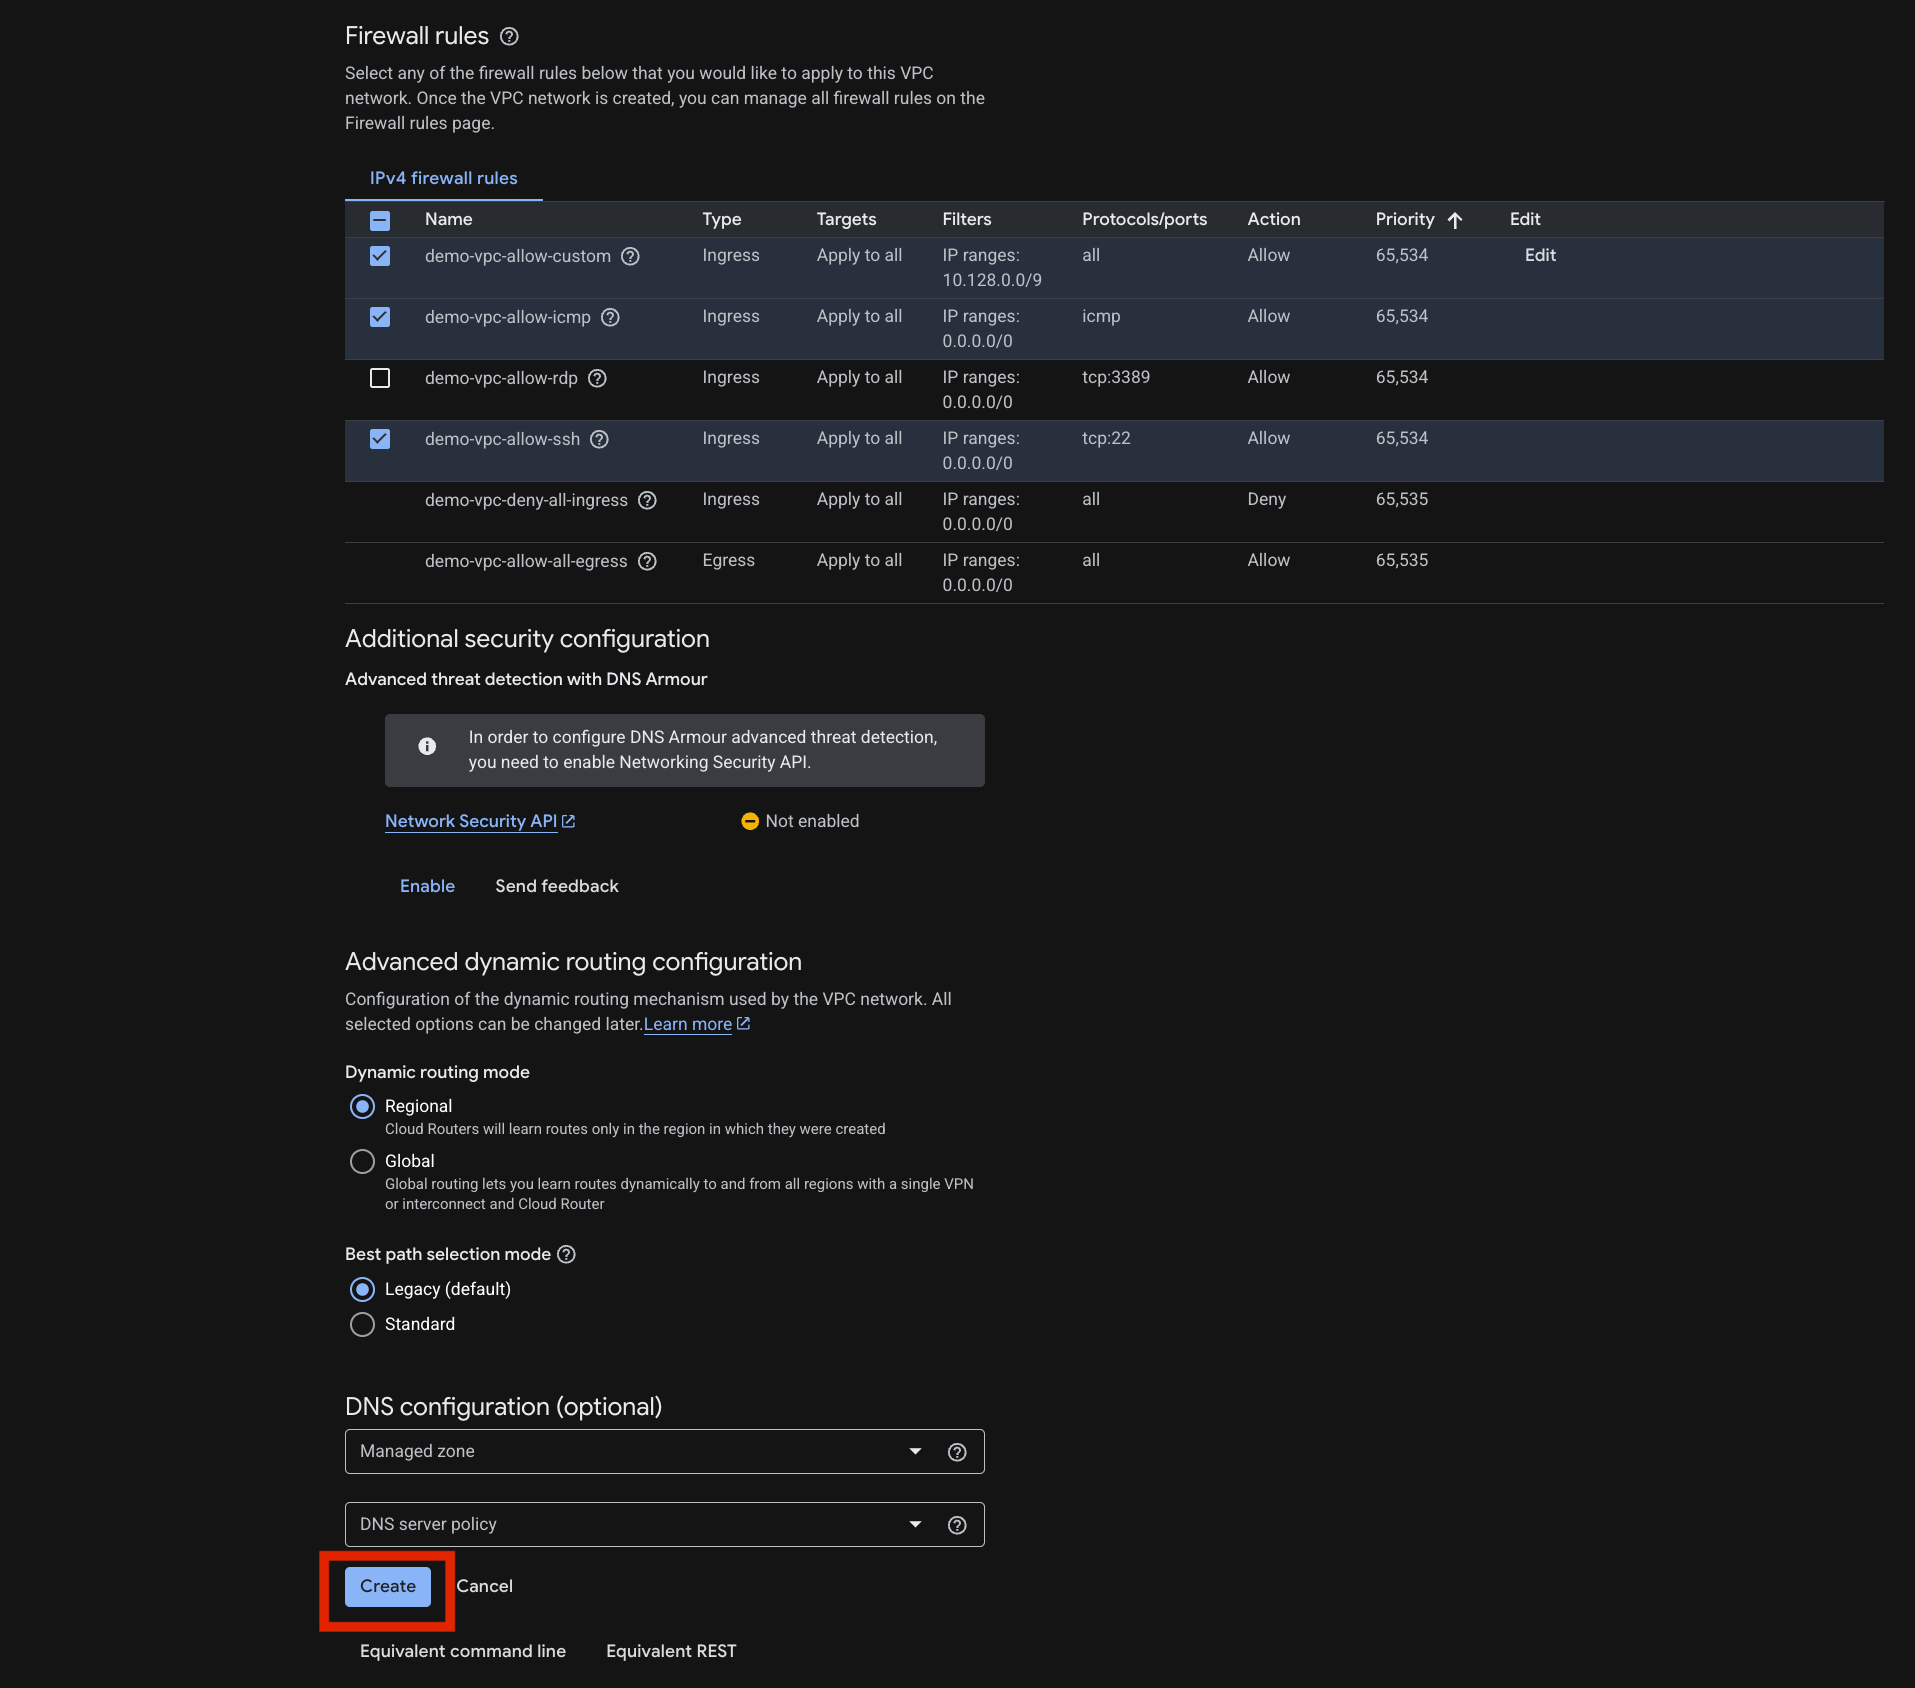
Firewall rules: Select the checkboxes for allow-ssh, allow-icmp, and allow-custom. Opening the SSH port (port 22) is absolutely required so you can log into your VM later.
Click Create and wait for the status icon to show it is ready.
Screenshot of VPC creation step A (configure VPC details and subnet creation mode)
Screenshot: VPC creation step B (configure firewall rules and click “create”)
Step 2: Navigate to Compute Engine on the GCP Console
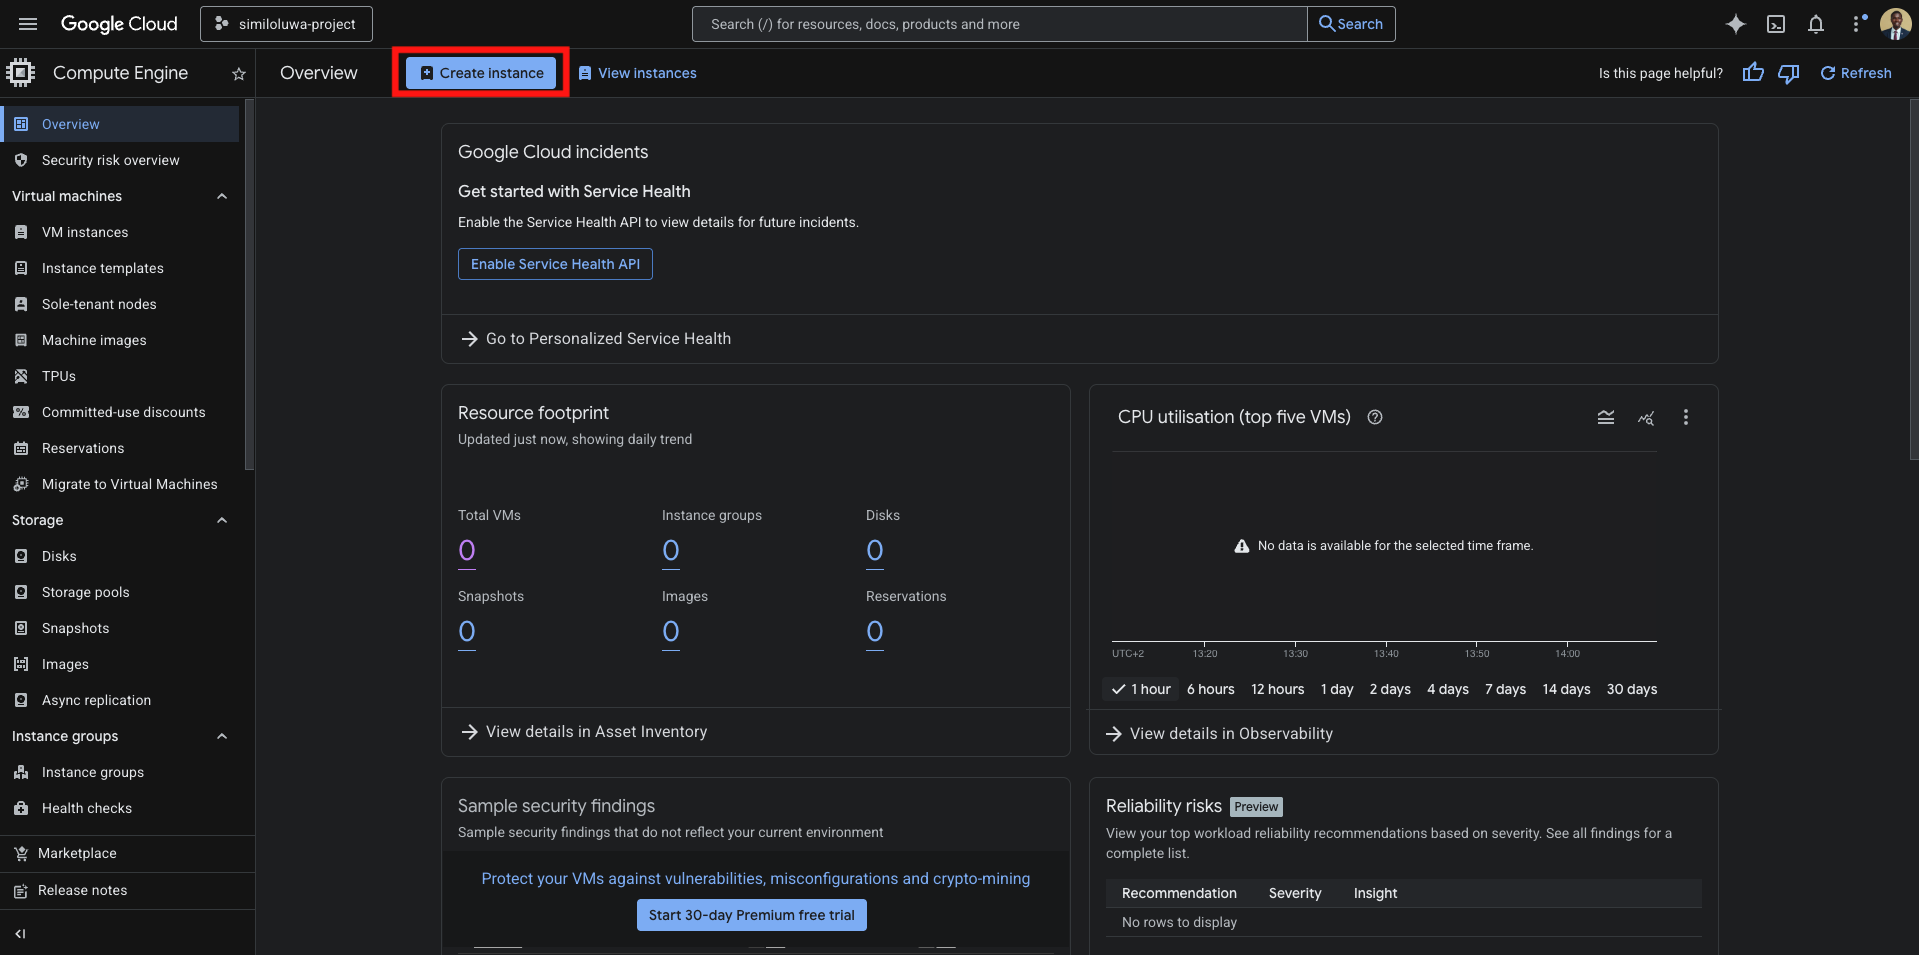
Open the Navigation menu (☰) in top-left
Go to Compute Engine → VM instances
If the Compute Engine API is not enabled, click Enable and wait a few moments. You can also enable the Compute Engine API from the APIs & Services page.
Screenshot of “Create instance” page
Step 3: Create and Configure the Instance
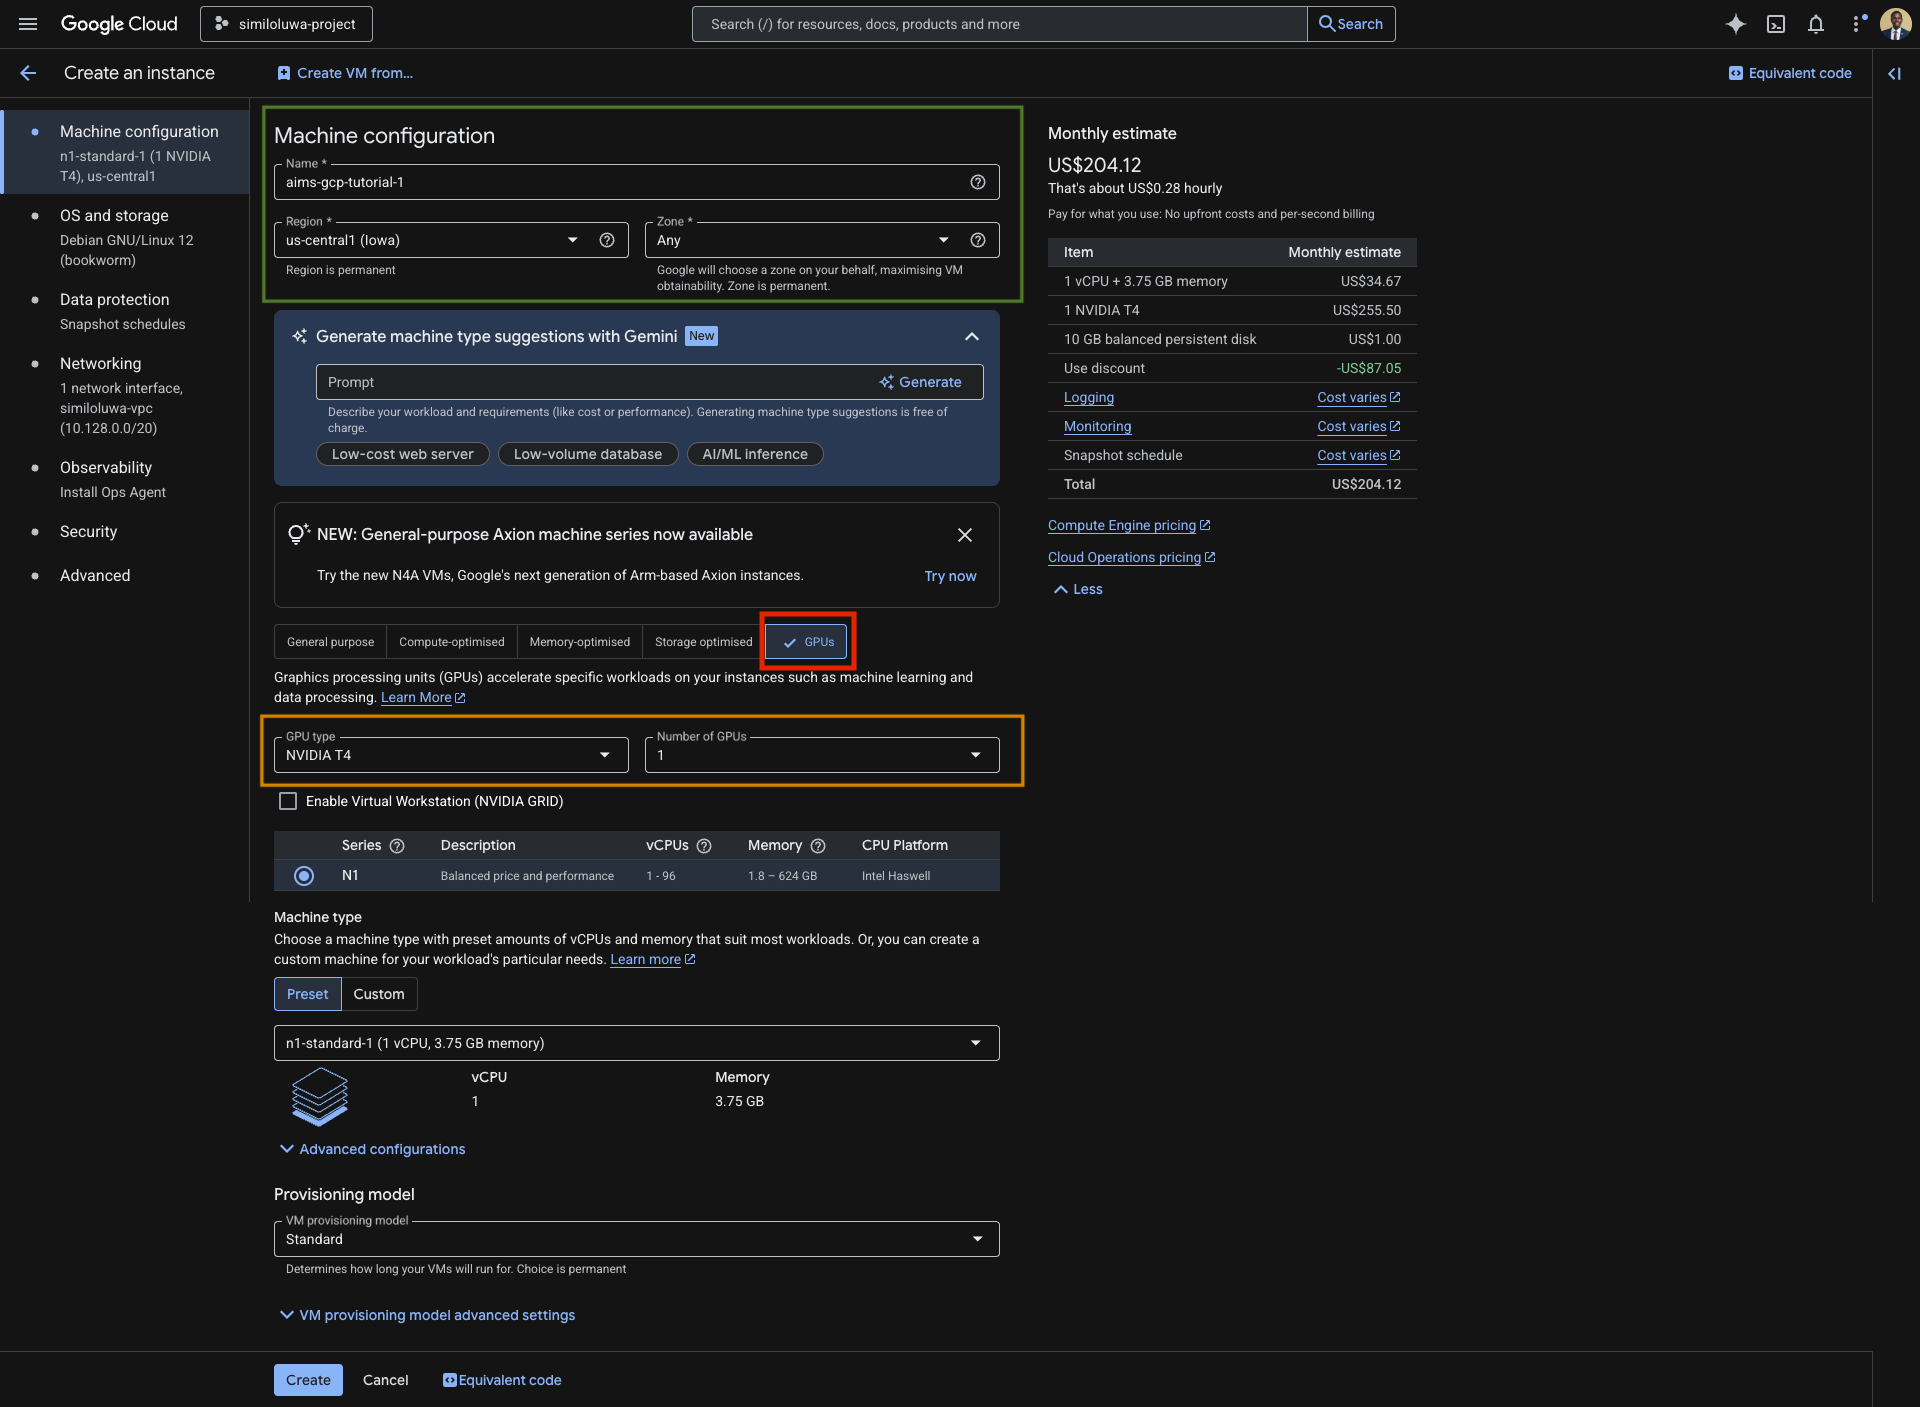
Click the Create instance button at the top of the Compute Engine dashboard. This will take you to the instance configuration page where you can configure the machine configuration, operating system (OS) and storage, networking, security, etc.
For Machine Configuration
Enter a name for the virtual machine instance i.e.
aims-gcp-tutorial-1and select a region i.e.us-central1 (Iowa)and zone.To configure the machine type, select the GPUs tab and choose NVIDIA T4 under GPU type and 1 under the Number of GPUs dropdown to use 1 GPU. This means we will be working with a single NVIDIA T4 GPU.
Screenshot of “Machine configuration” page
For OS and Storage Configuration
On the sidebar, click on OS and Storage. This will allow you to configure the operating system.
Click on Switch Image to configure the OS image for the boot disk.
In the Operating system dropdown under “Public images”, select Deep Learning on Linux to use a
In the Version dropdown, select Deep Learning VM with CUDA 12.4 M124. You can also select a different CUDA version.
Set the Boot disk type to Balanced persistent disk. This provides the best cost-to-performance ratio.
Click Select to continue.
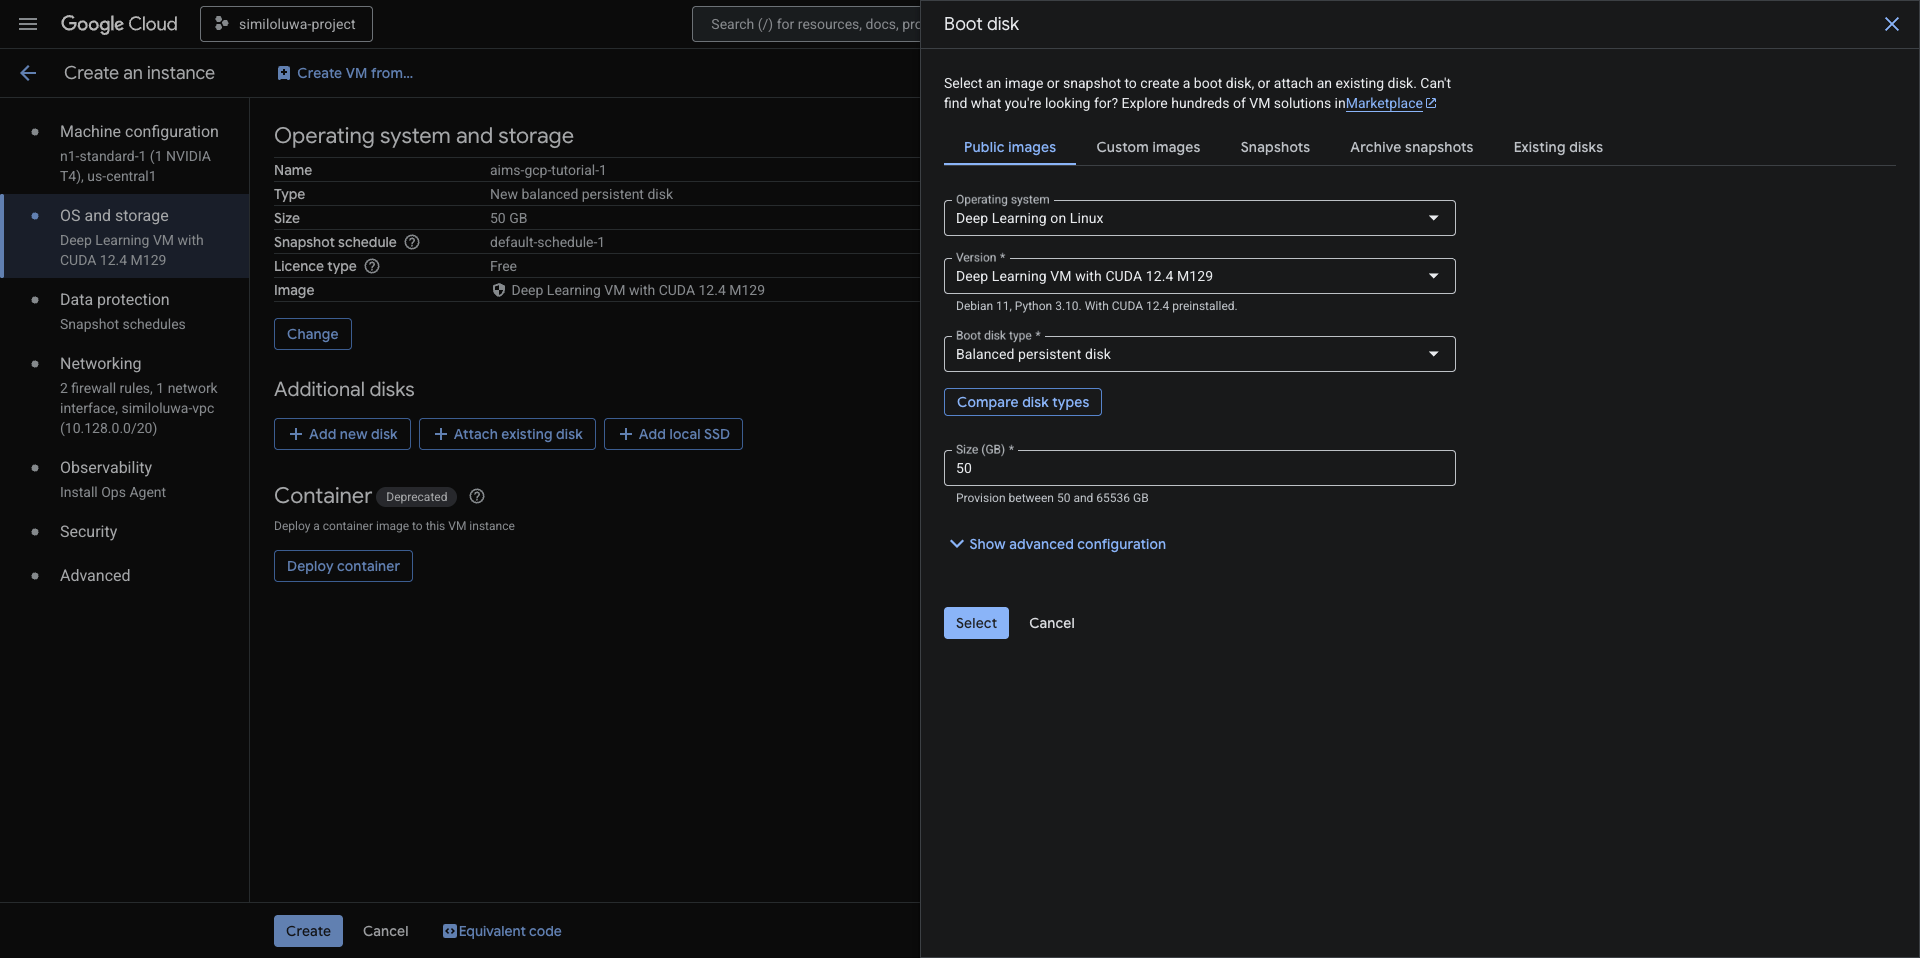
Screenshot: “OS and Storage” configuration window
Networking, Security, and Advanced Settings
Before clicking the Create button on the bottom of the page to create your first VM instance on GCP, click on Networking in the sidebar to link your VM to the network you created in Step 2.
Under the Firewall section, check Allow HTTP traffic and Allow HTTPS traffic. Checking these boxes opens ports 80 and 443, permitting inbound HTTP and HTTPS traffic to your VM. This is essential for exposing web-based applications hosted on your VM to the internet, allowing you to access tools like Jupyter Notebooks or web demos remotely via your browser.
Under Network interfaces, click the dropdown.
You can select the VPC network you just created i.e.
demo-vpcfor the network interface’s Network.Ensure External IPv4 address is set to Ephemeral. This assigns a public IP address so you can reach the VM from the internet.
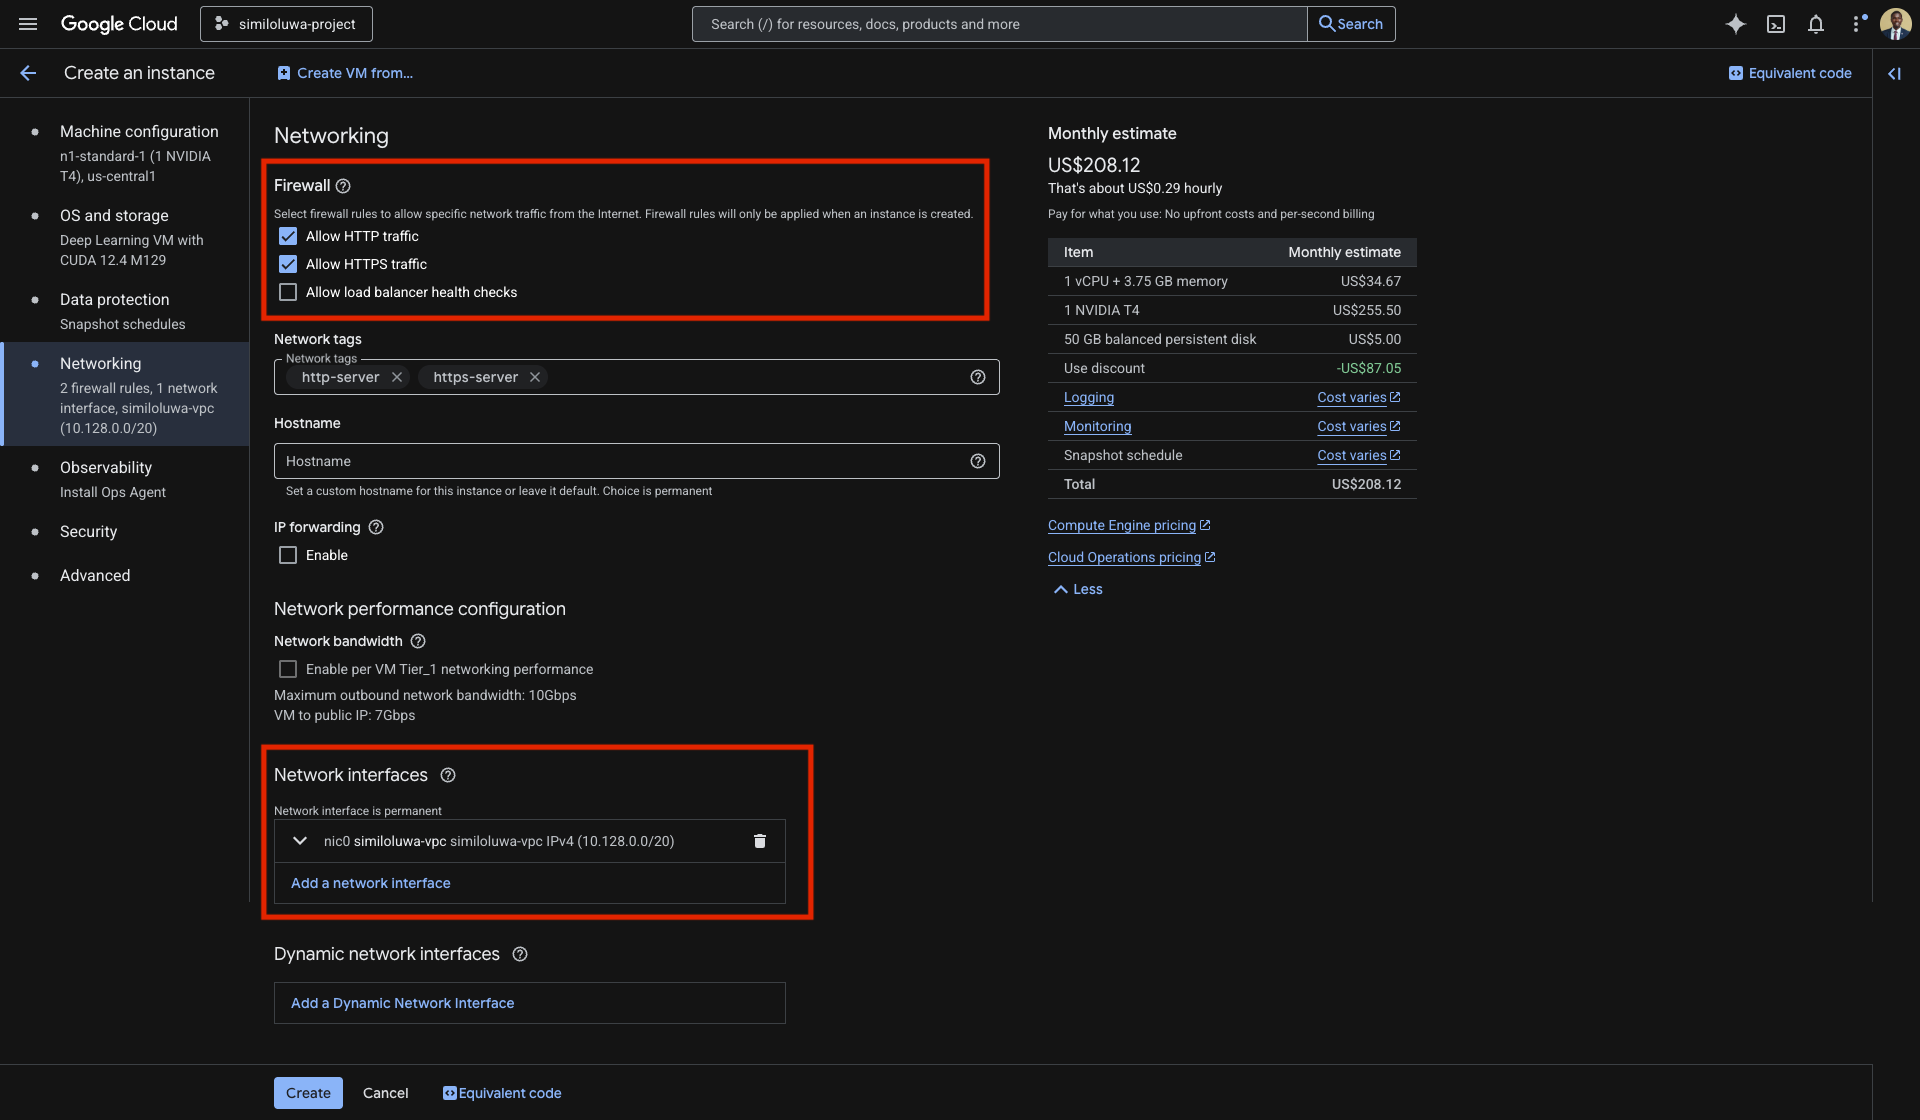
Screenshot: “Networking” configuration page
Security & Advanced: Here you can manage SSH keys or add startup scripts. For most tasks, the default service account settings are sufficient.
After completing the configuration steps above, you can then click the Create button to create your first VM instance in GCP using the Console 🥳. The creation process will take about ~1-2 minutes.
Step 4: The VM Instances Page
Once you click Create, your VM will appear on the list of VMs.
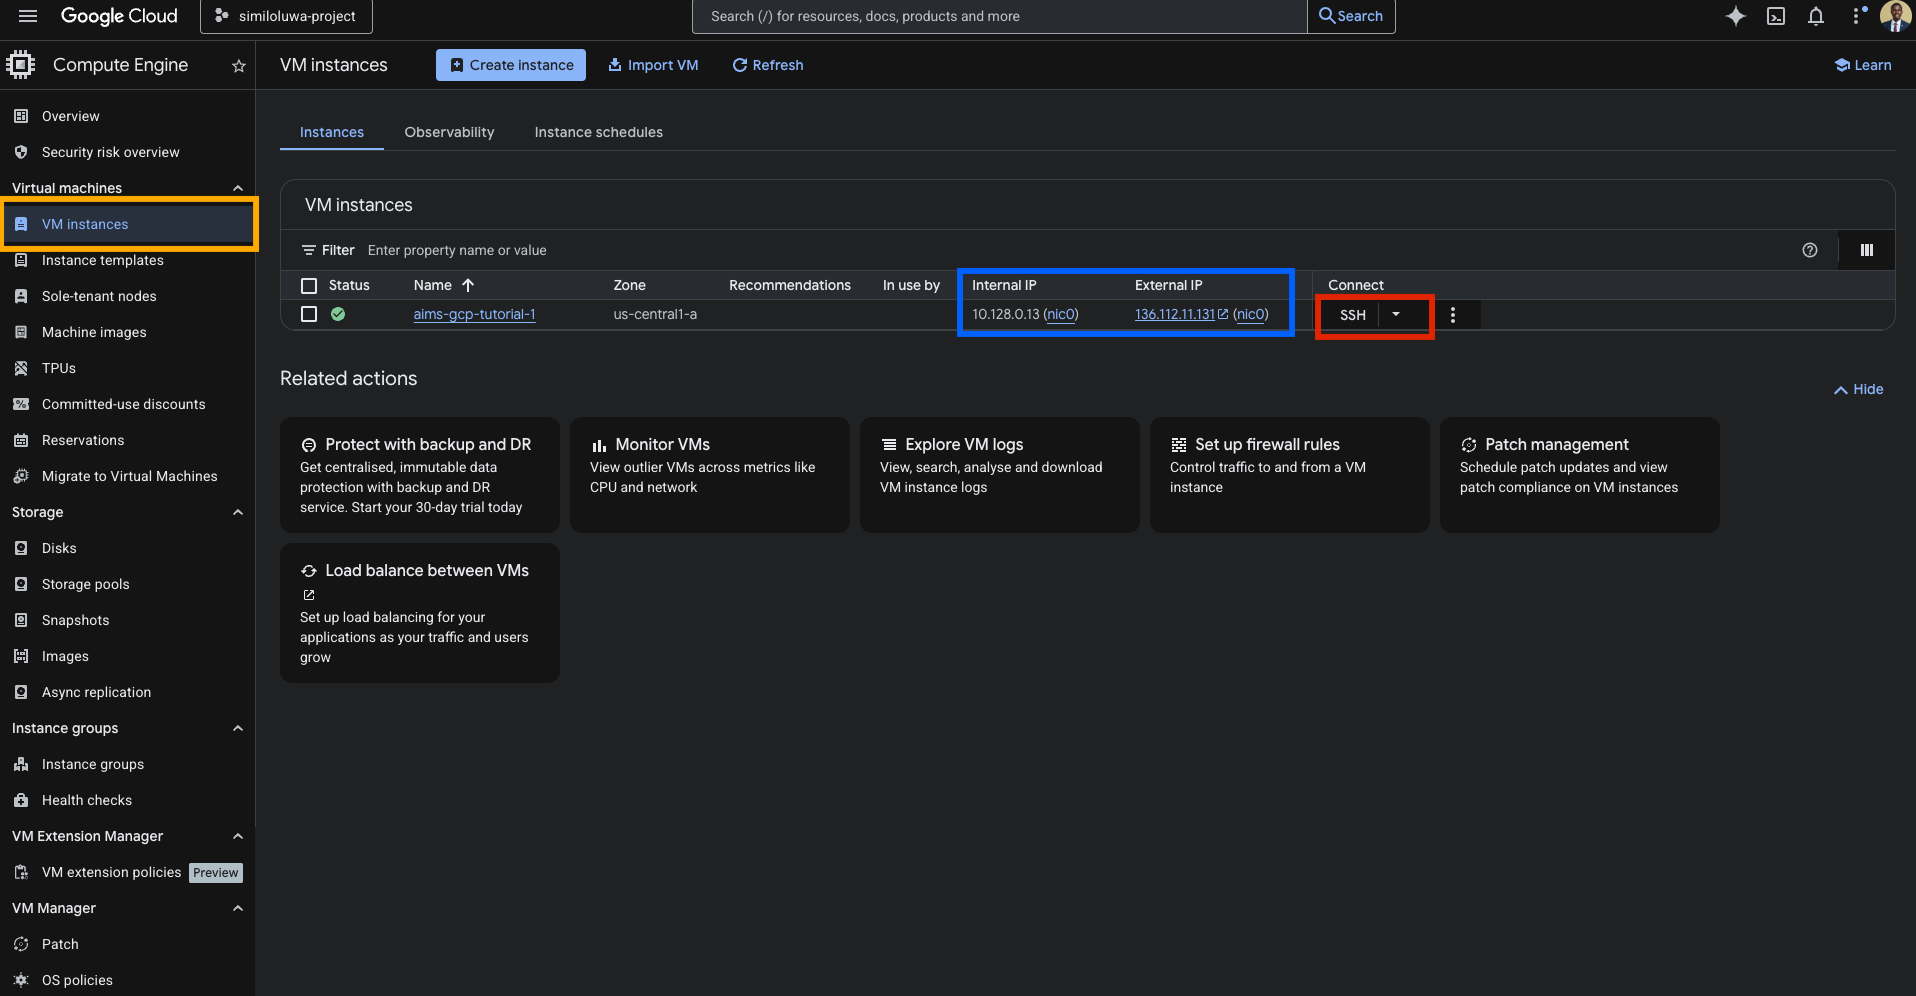
Screenshot: VM instances list page with the SSH button outlined in red.
Notice two critical pieces of information:
Internal IP: Used for communication between different Google Cloud resources in your project. It is private and carries no data transfer costs.
External IP: The public address used to reach your VM from the internet (e.g., via your laptop terminal).
Connecting to your VM via SSH
To access the VM, click the SSH button in the “Connect” column of the VMs list.
A browser-based terminal window will open. Click Authorize when prompted to allow the connection.
Because we used a Deep Learning image, the system will automatically detect the GPU hardware. You will see a prompt: “Would you like to install the Nvidia driver? [y/n]”.
Type
yand press Enter. The installation will take 3–5 minutes.
Once finished, verify the setup by running pwd to see your home directory and nvidia-smi to view the GPU status.
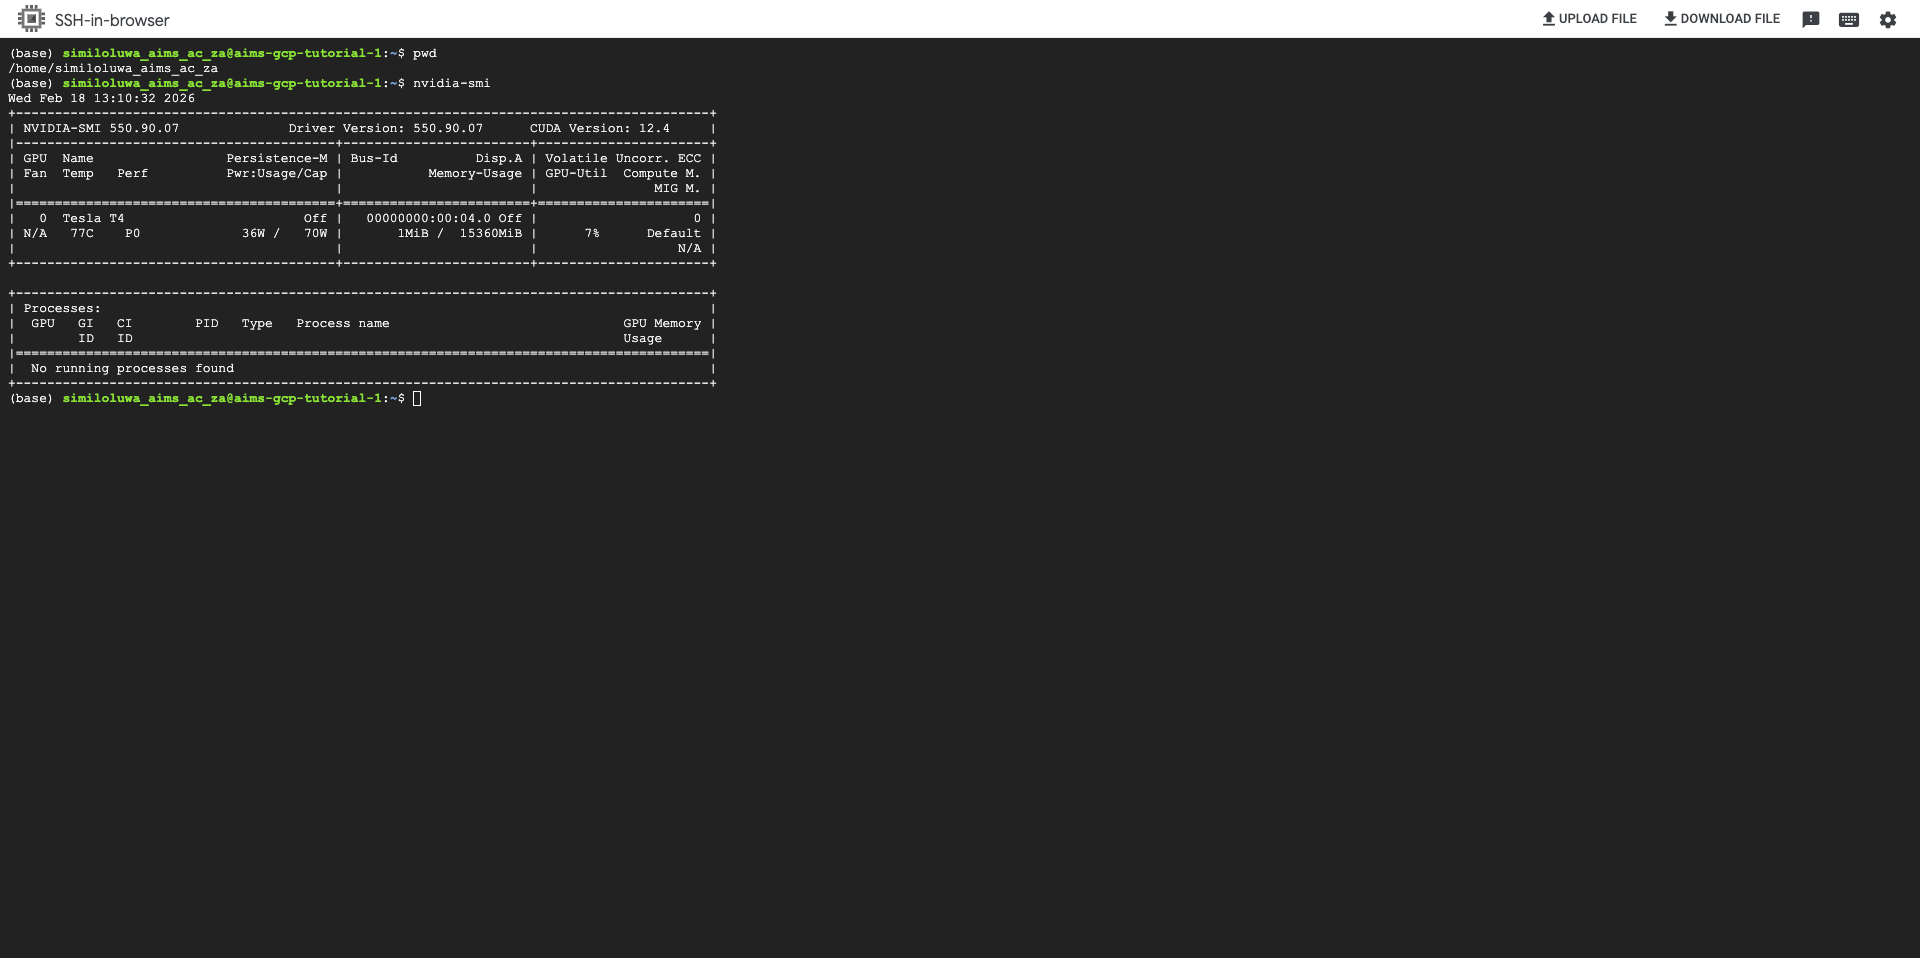
Screenshot: SSH browser terminal showing the output of the pwd command and the nvidia-smi command
Step 5: Stopping or Deleting your VM Istance
As you may have noticed, the monthly estimate for keeping a this VM you just created running 24/7 is approximately 0.35 for an N1 machine with a T4 GPU). This is quite a lot of money to lose.
To manage your budget, you must proactively manage the state of your VM from the VM instances page by stopping or deleting unused VMs.
To stop or delete a VM:
Go to the VM instances page in the GCP Console.
Check the box next to your VM name.
Click the Stop button to stop the VM or the Delete button to delete the VM.
🚀 What’s Next?
You have successfully created a GPU-enabled VM via the GCP Console using the Compute Engine service 🥳. Beyond creating VMs, the console allows you to interact with a wide range of GCP services and resources.
Now that you have mastered the interface, we will move to the terminal to learn how to automate these tasks using the command line