Overview
In this hands on session, we will run the same Gemma 1B fine-tuning experiment using Colab Enterprise, Vertex AI’s managed notebook environment. Unlike the Custom Training Job approach where you submit a job specification and wait, Colab Enterprise gives you an interactive Jupyter notebook (similar to Google Colab) that runs directly in your browser with no SSH or infrastructure setup required.
Learning Objectives
By the end of this session, you will be able to:
Create a runtime template with a GPU configuration in Colab Enterprise
Create and connect a runtime to a notebook
Run the fine-tuning experiment interactively in a notebook
Clean up all resources after the session.
Prerequisites
A WandB account and API key
A HuggingFace account and API token with the Gemma 3 1B model license agreement accepted.
Step 1: Open Colab Enterprise
Go to your GCP Console
In the left sidebar, navigate to Vertex AI
Under the Notebooks section, click Colab Enterprise.
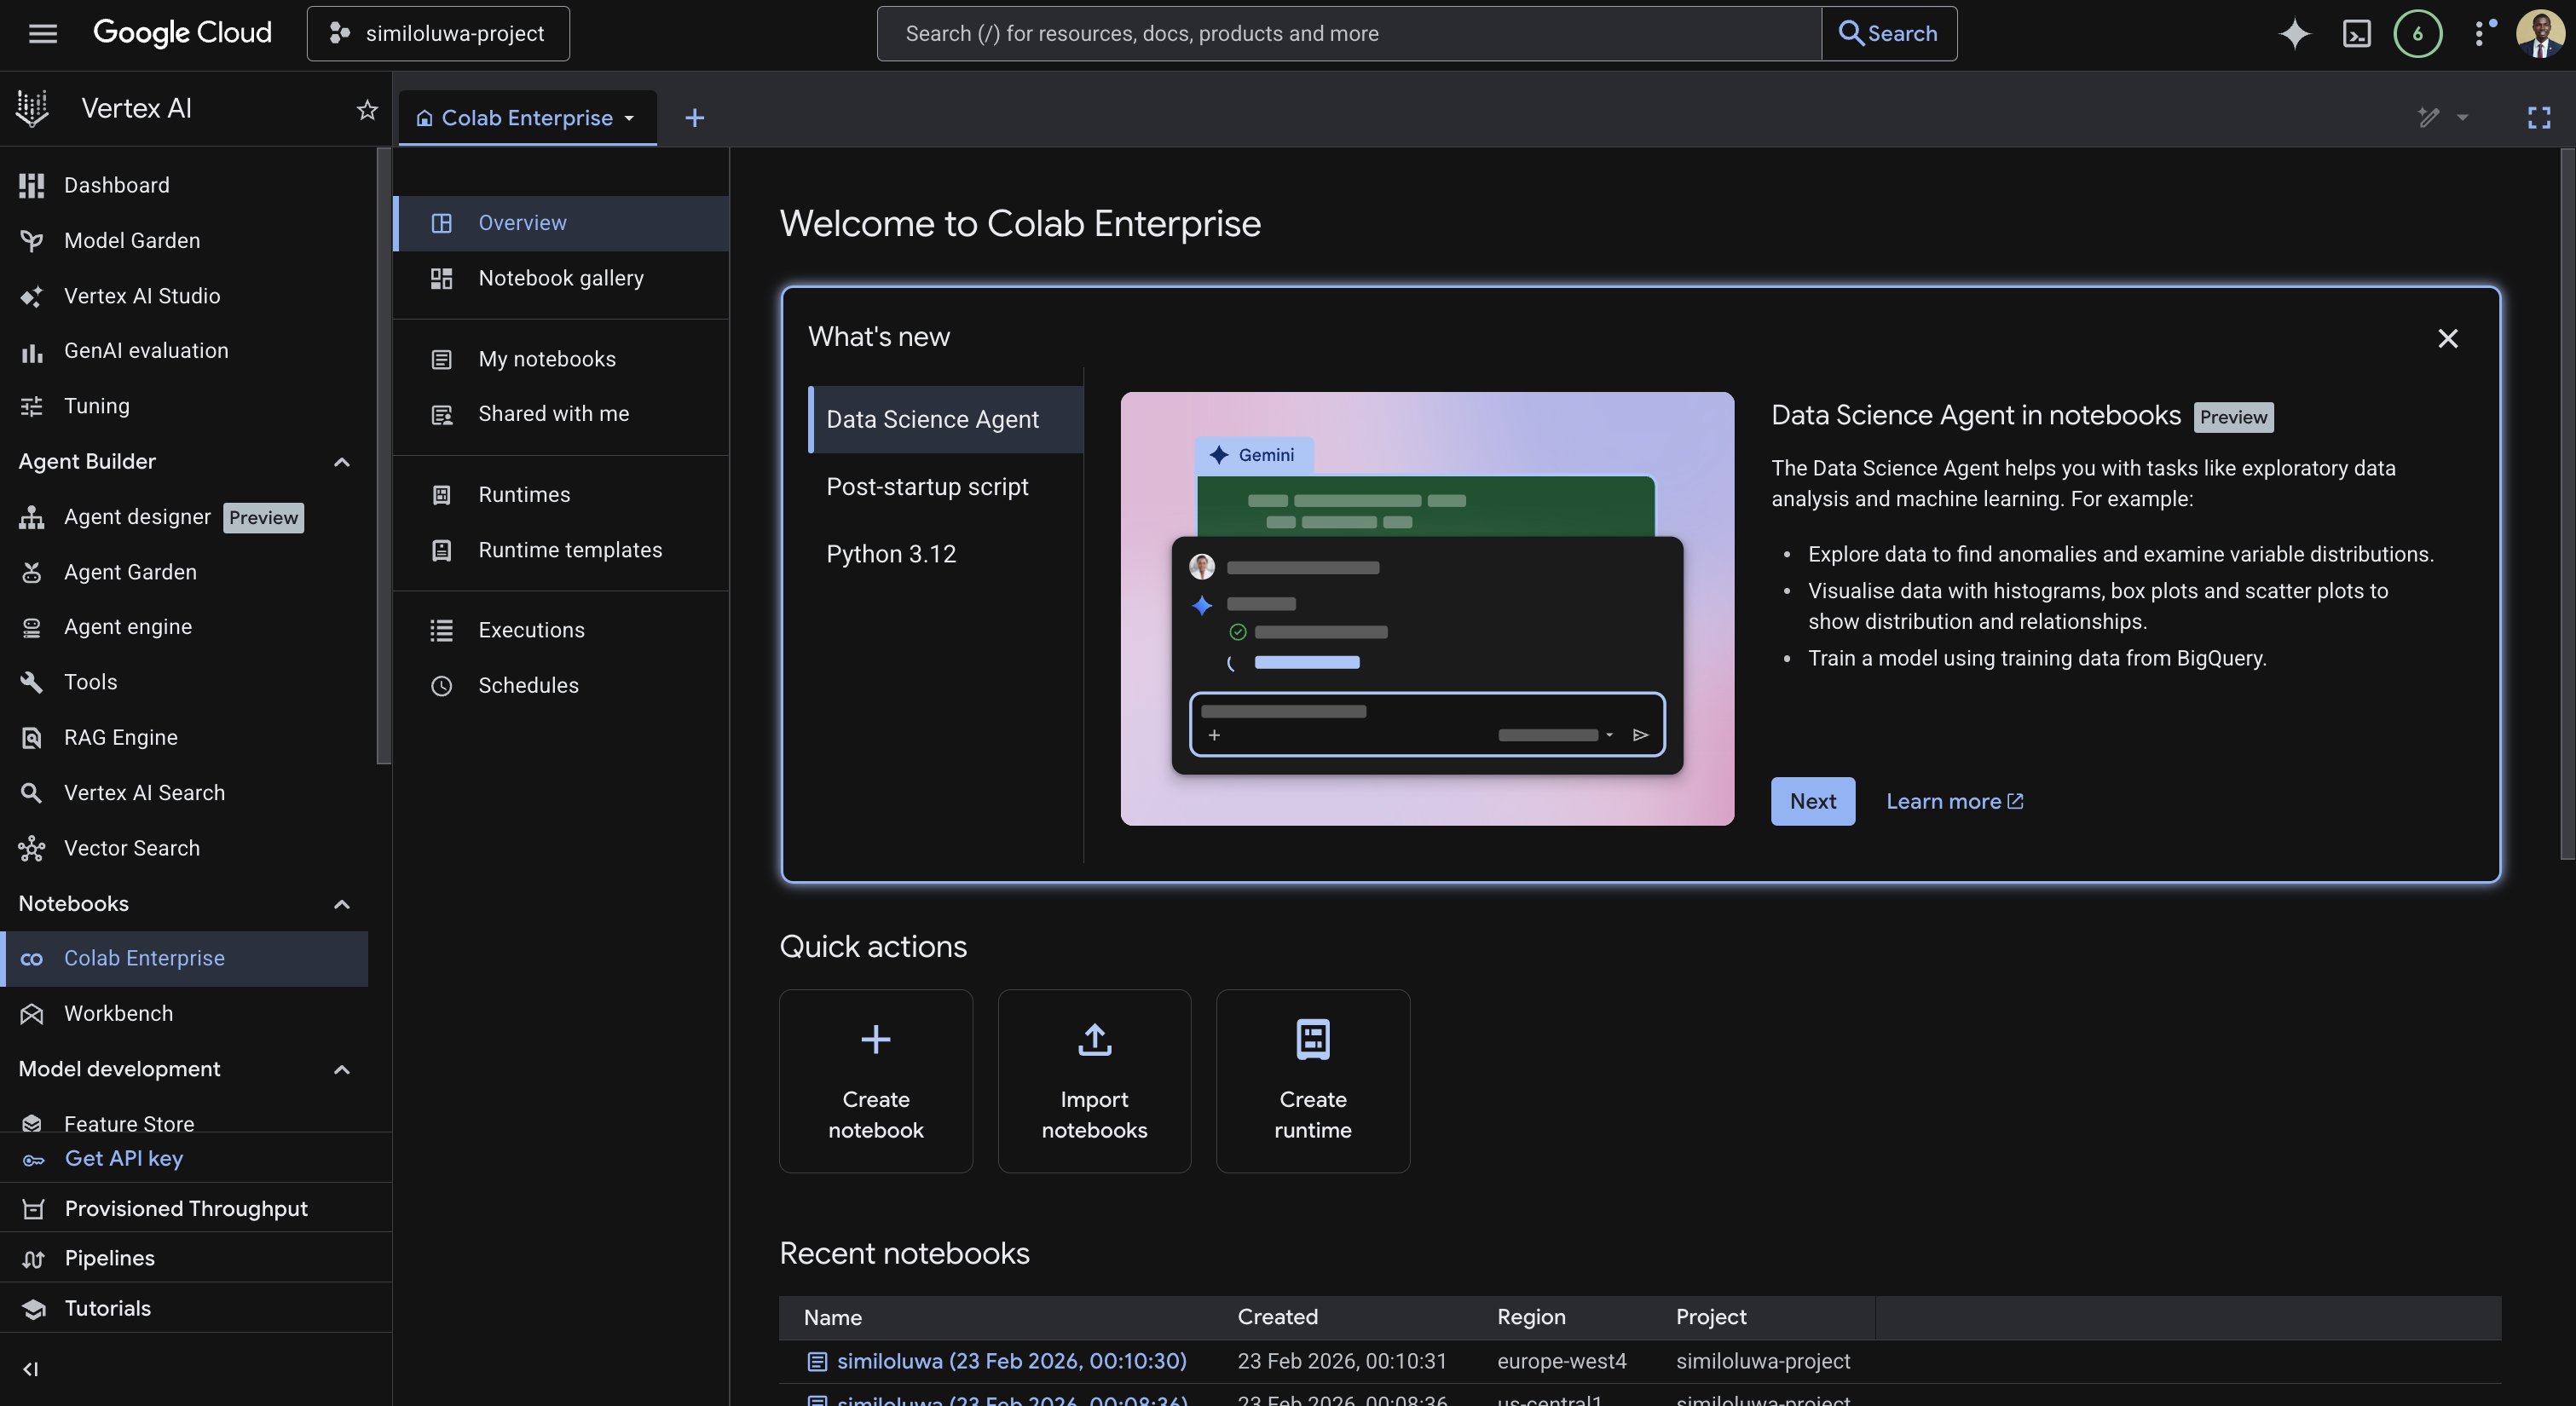
Screenshot of the Colab enterprise page in Vertex AI
Step 2: Create a Runtime Template
A runtime template defines the hardware configuration that your notebook will run on. We create it once and can reuse it across multiple notebooks.
In the left sidebar, click Runtime templates, then click Create a new runtime template.
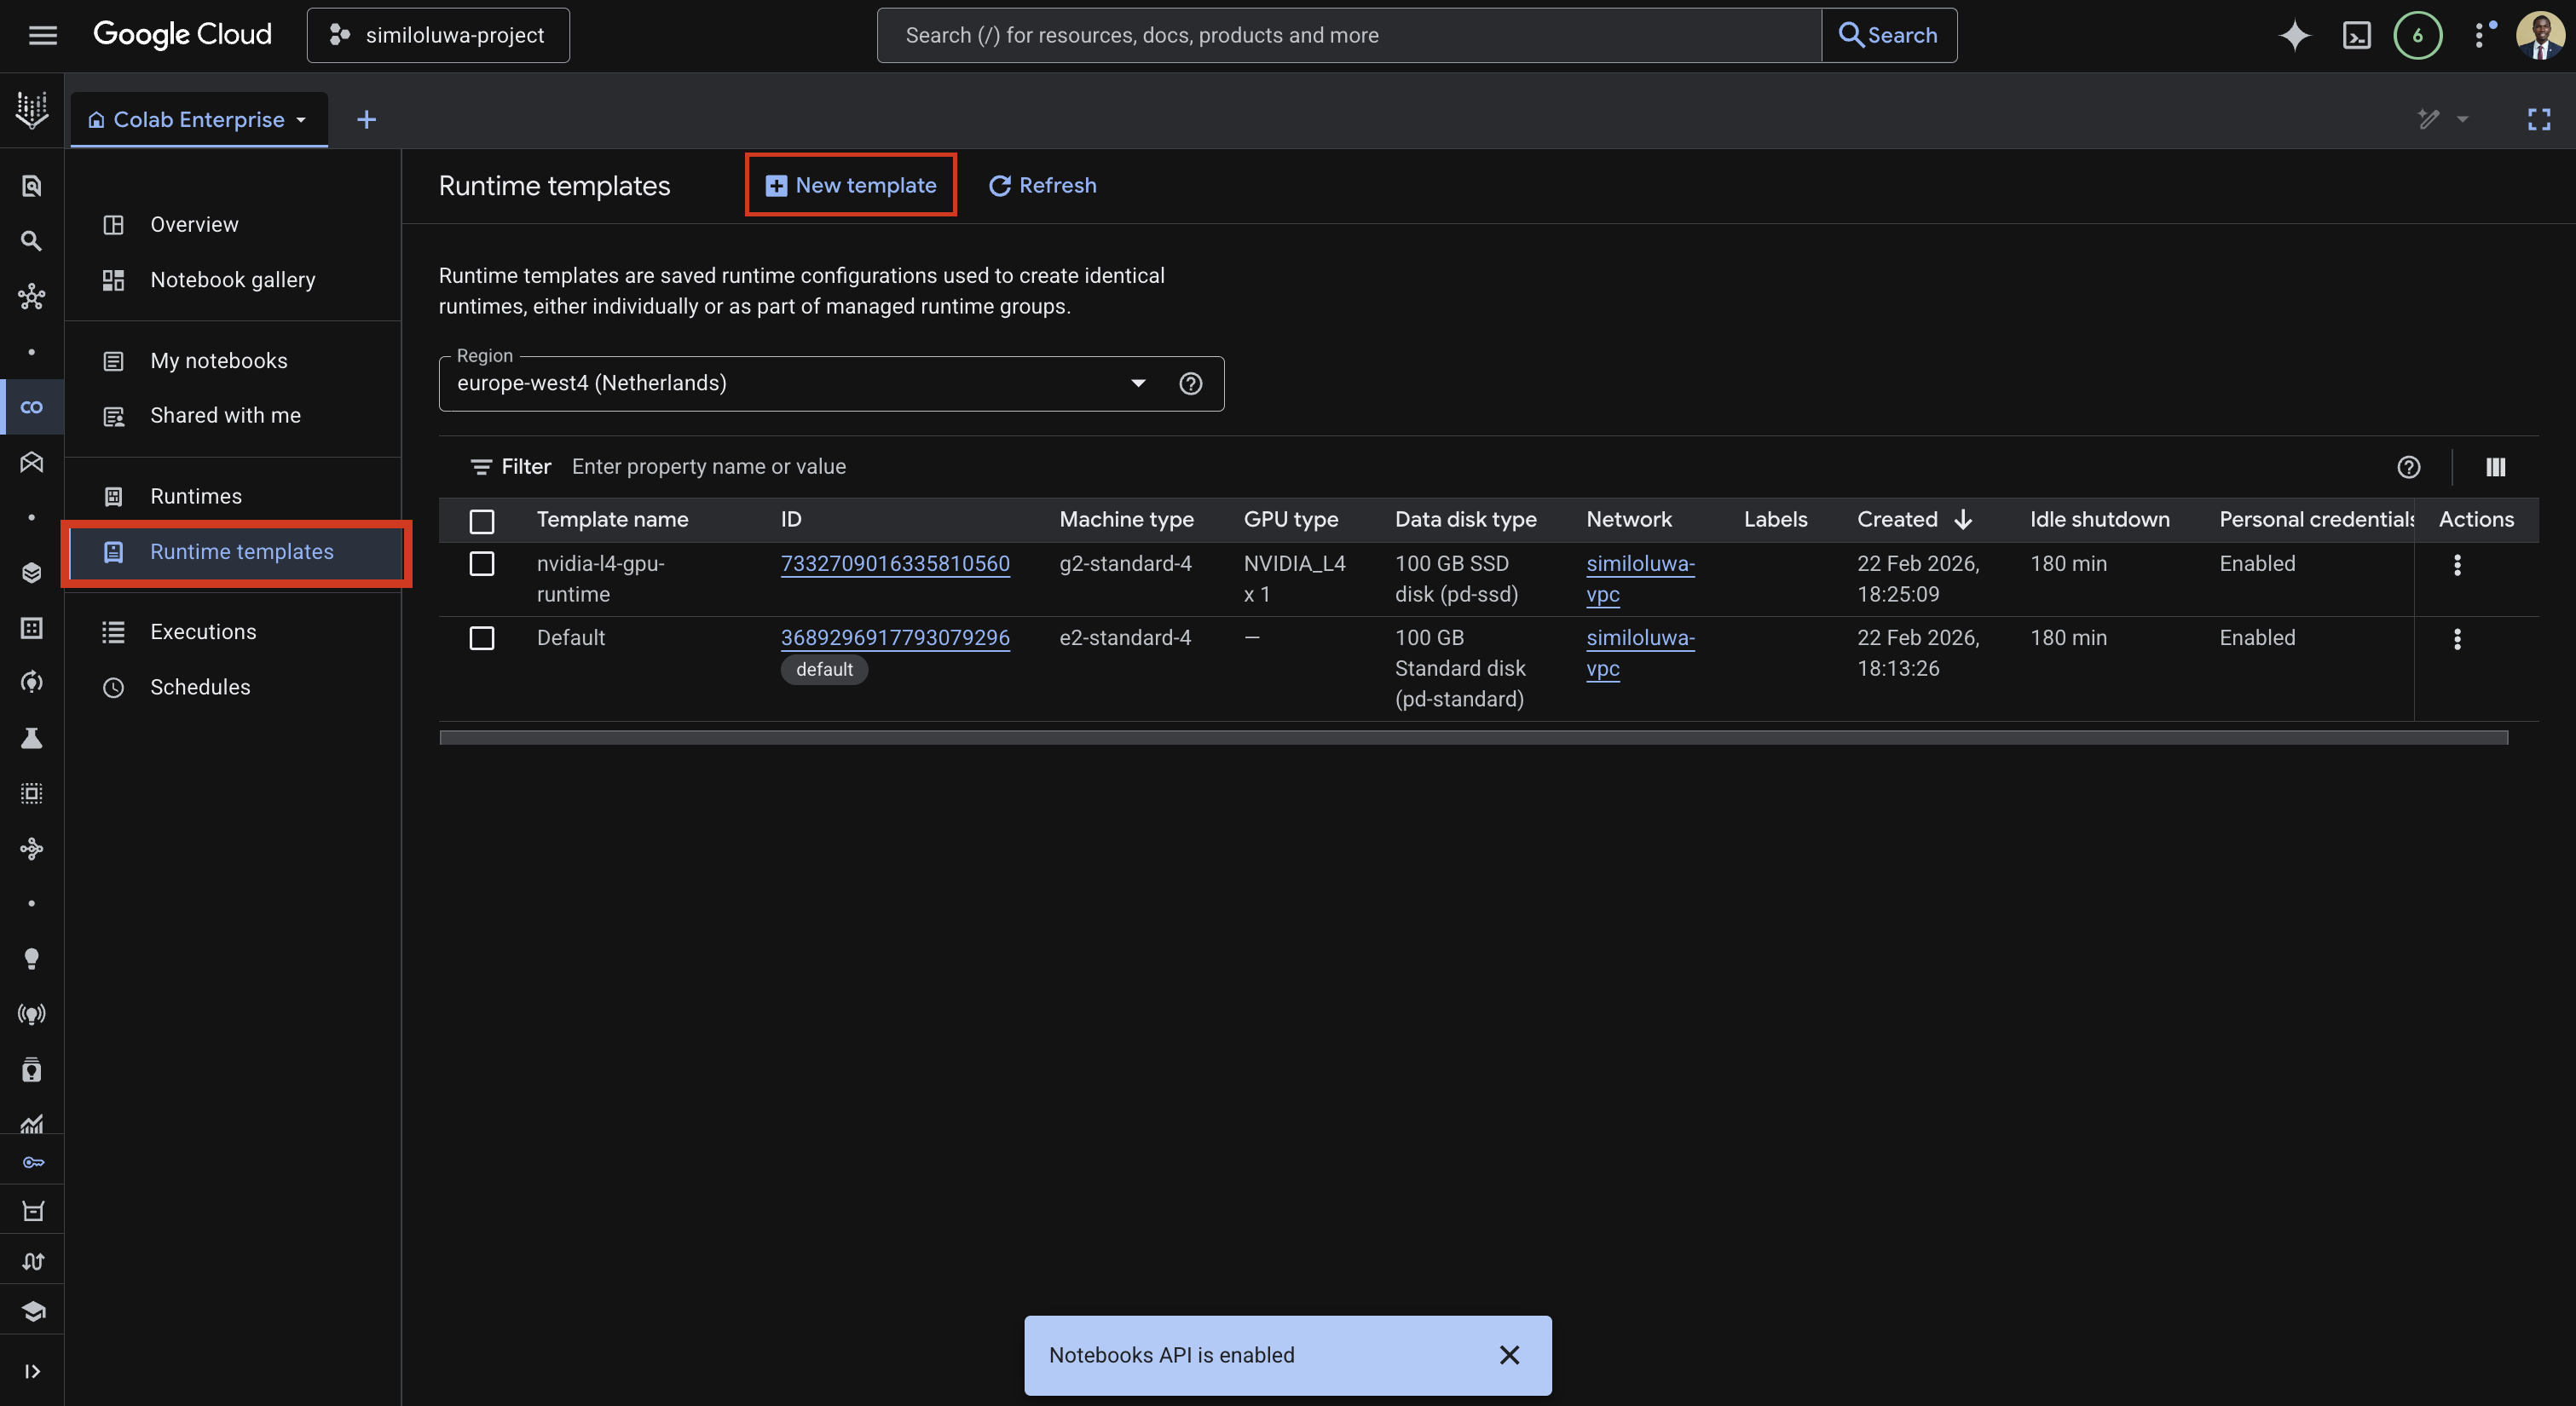
Screenshot: Create a new runtime template
The runtime template creation has four sections.
Runtime basics
Enter a name for the template, for example
nvidia-l4-gpu-templateSelect the region for the runtime template, for example
europe-west4

Screenshot: Runtime basics (edit display name and select region)
Configure compute
This is where we configure the compute associated with the runtime template.
Under Machine Type, select
g2-standard-4Under Accelerator type, select
NVIDIA_L4and set Accelerator count to1
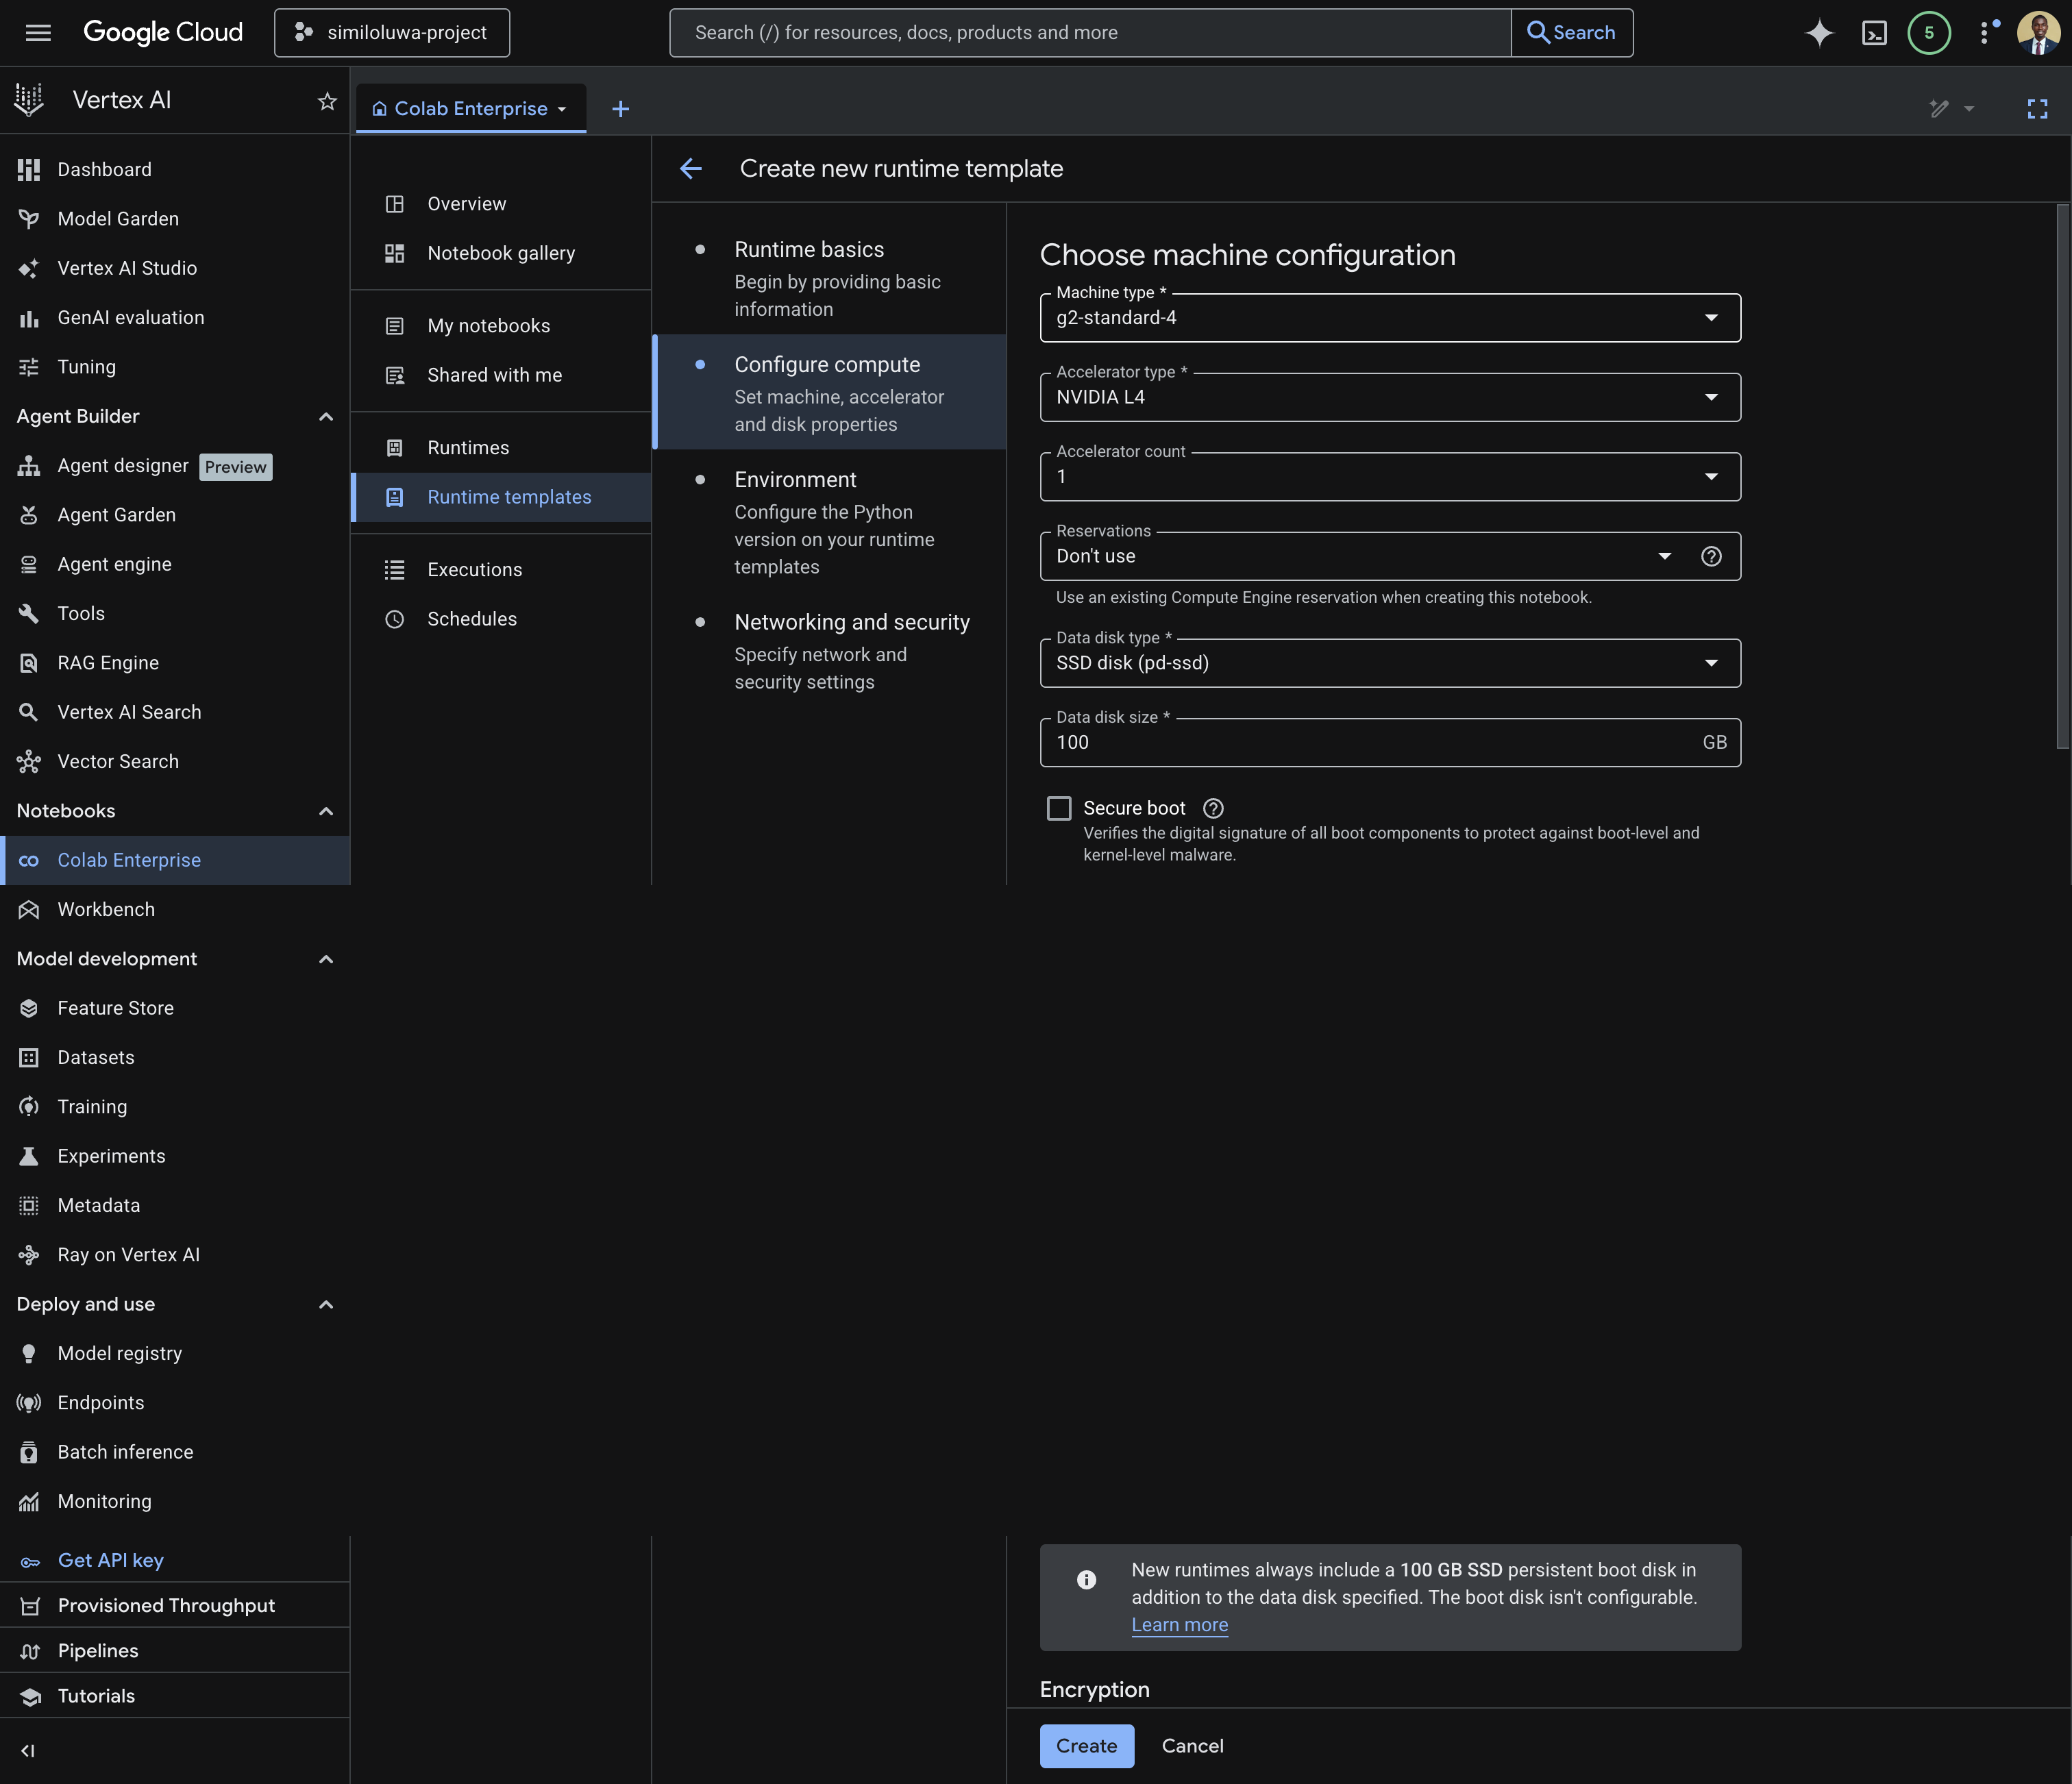
Screenshot: Configure machine configuration for the runtime template
Configure Python Environment
Select the Python environment under the Environment input (you can use Python 3.12)
Under the Environment variables, add your environment variables:
HF_TOKEN= Your HuggingFace API tokenWANDB_API_KEY= Your WandB API keyWANDB_PROJECT= Your WandB project nameBUCKET_NAME= Your GCS bucket name
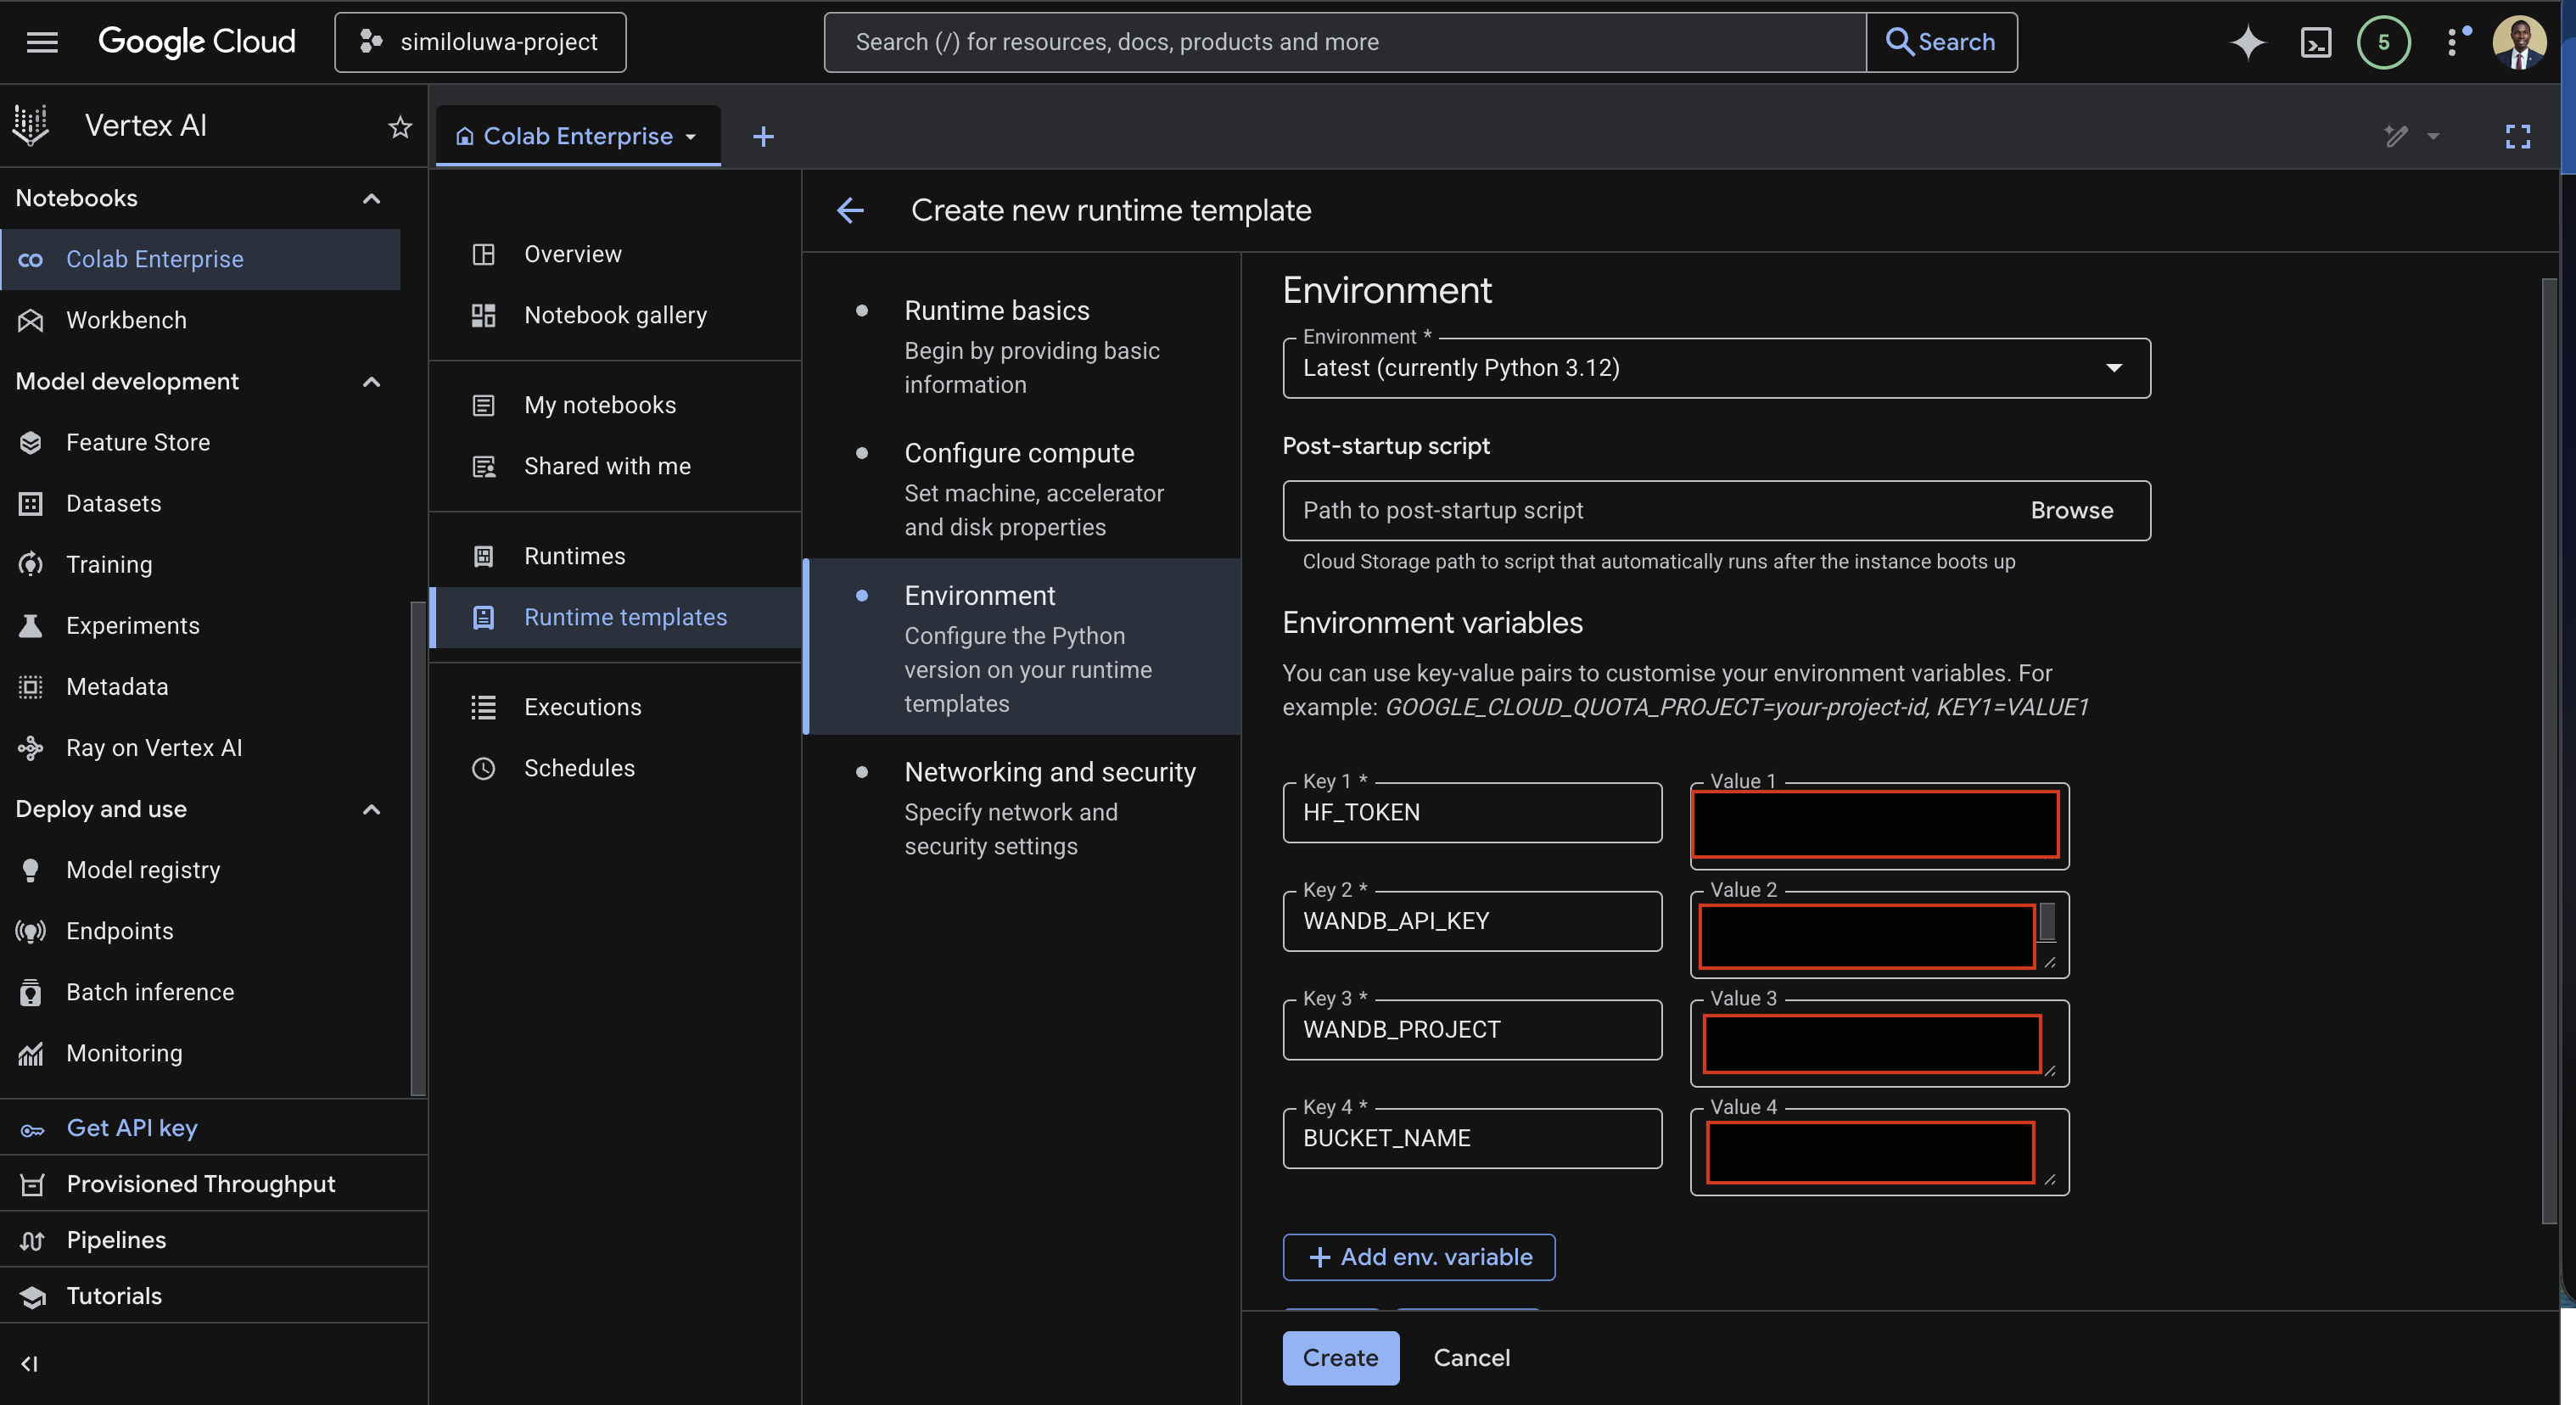
Screenshot: Configure Python environment for runtime template with environment variables filled in
Networking and security
This is where we choose the networking configuration.
Under Network input, select the VPC you created earlier (
similoluwa-vpc) or create a new VPC.Select the same VPC under the Subnetwork input.
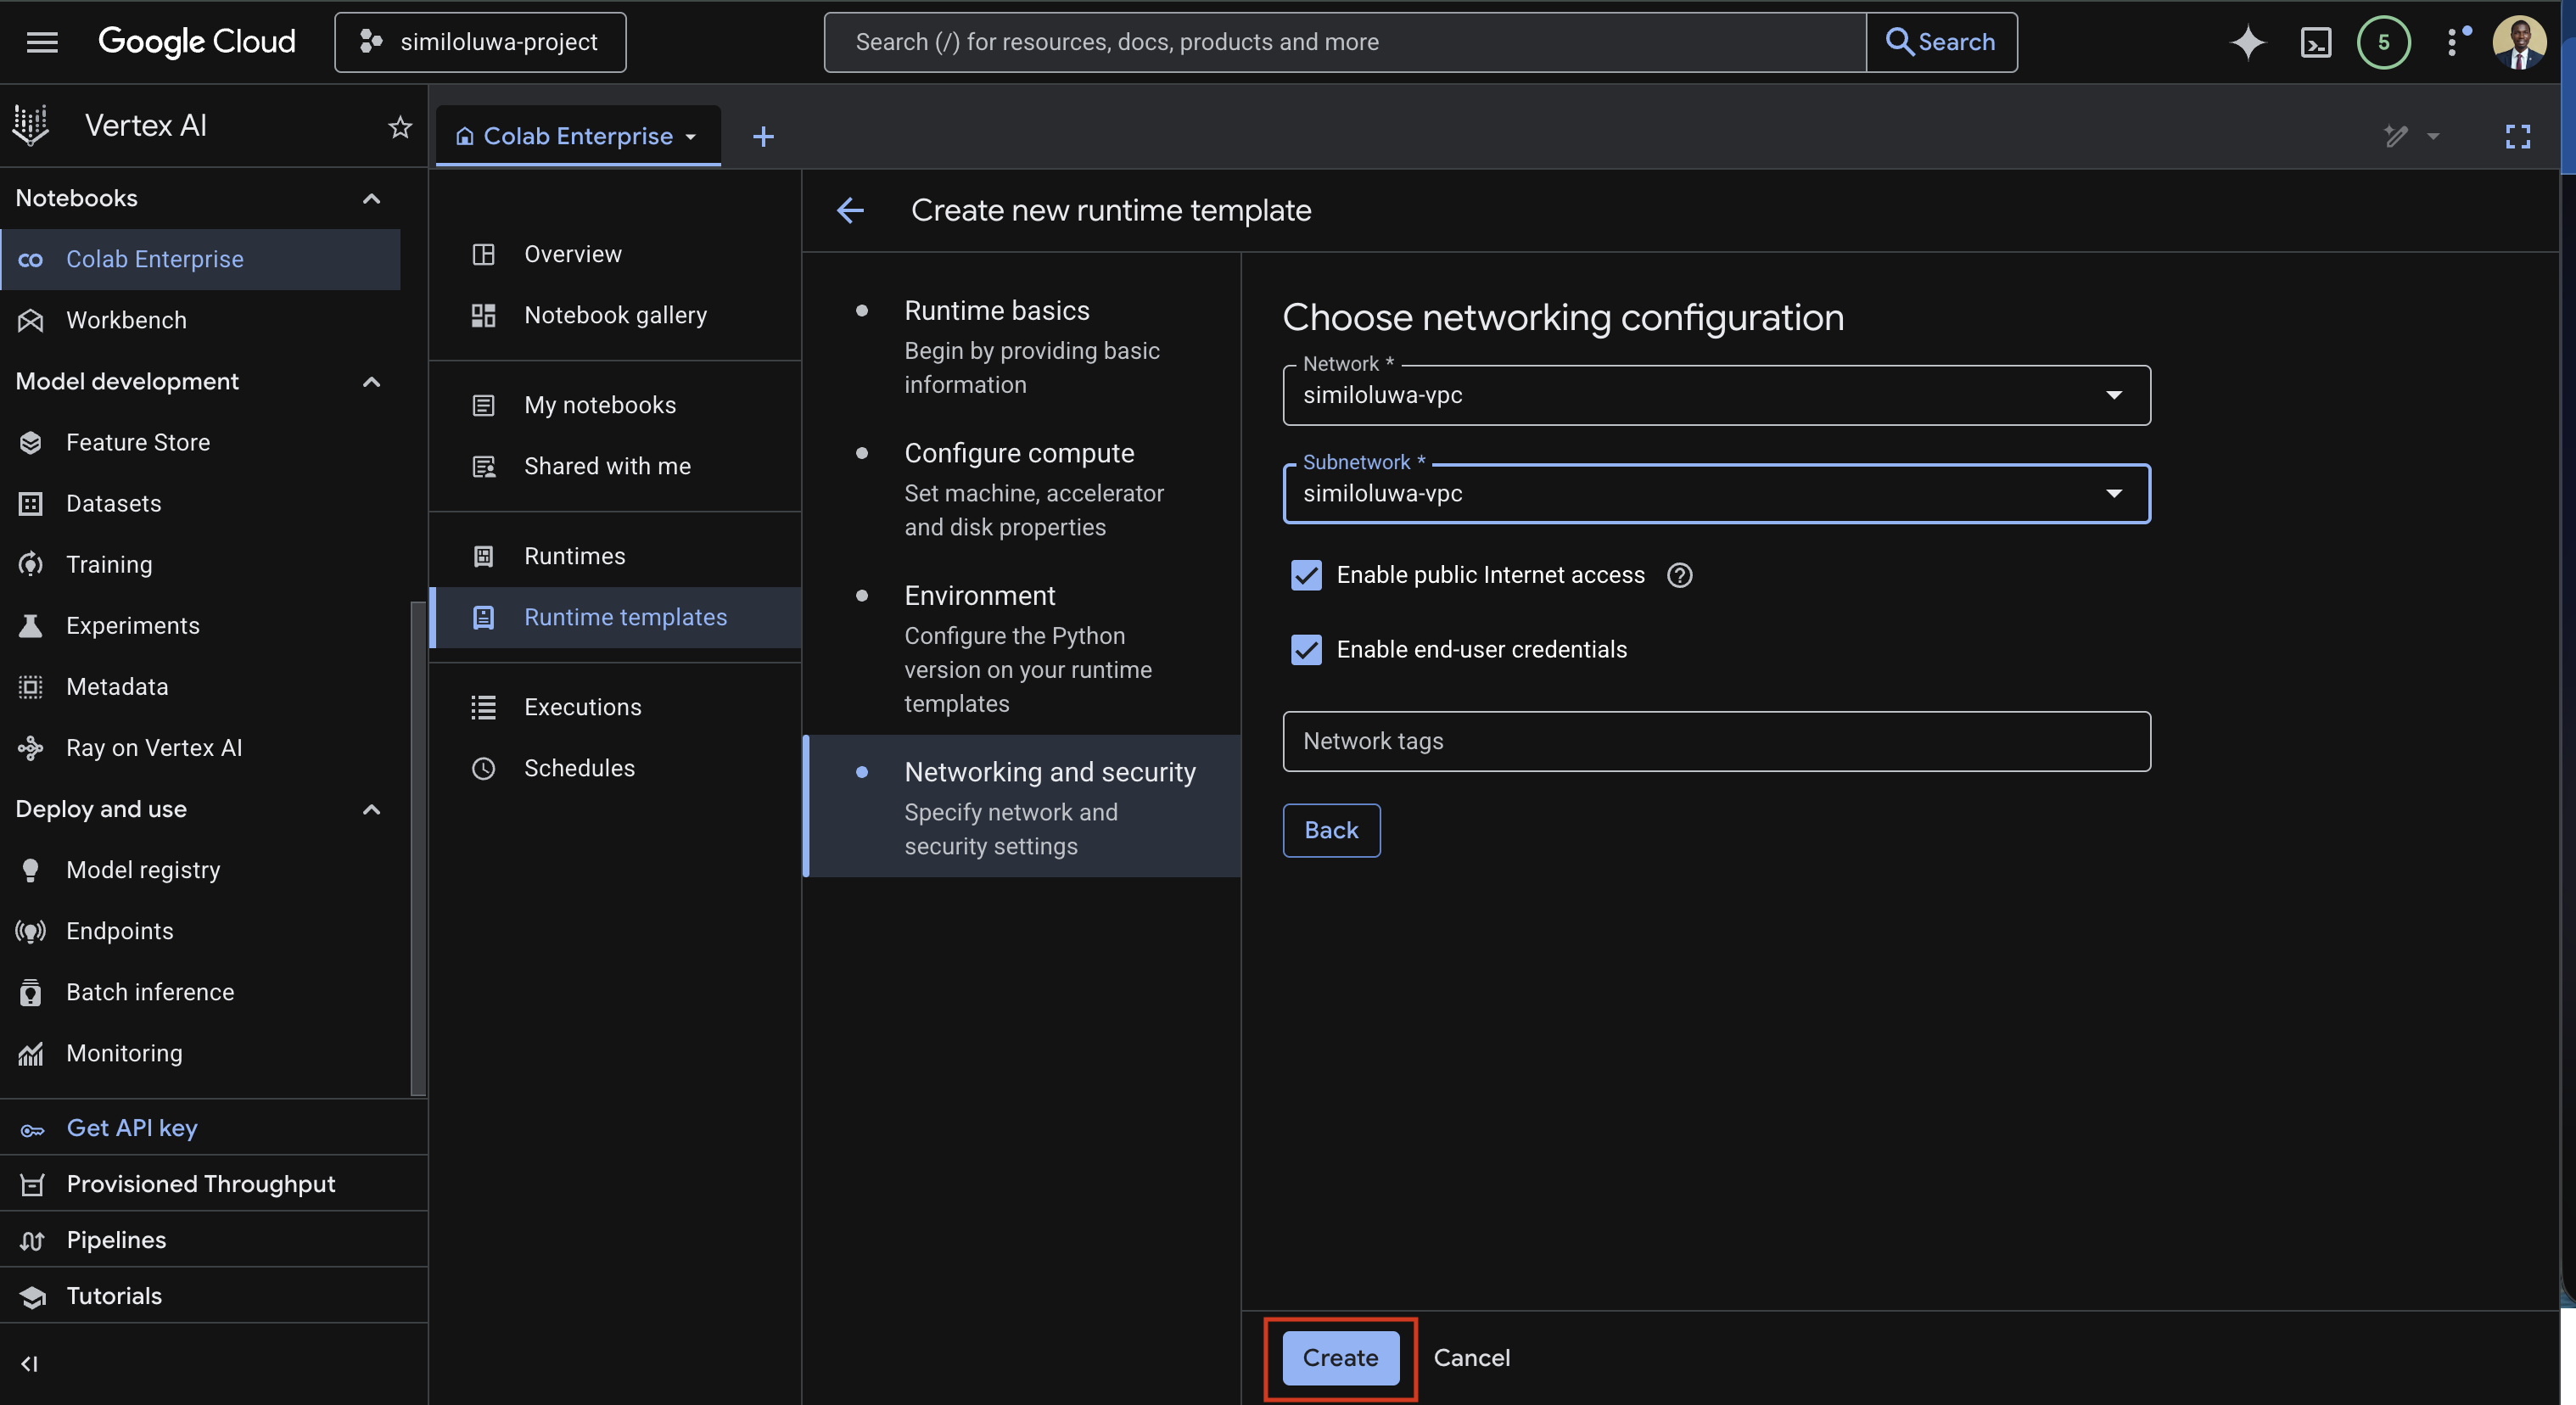
Screenshot: Networking and security section with VPC selected
Finally, click the Create button to create the runtime template.
Step 3: Create a Runtime
Now, we can create a runtime using the runtime template that was just created.
In the left sidebar, click Runtimes
Click Create new runtime
Select the template you just created i.e.
nvidia-l4-gpu-template, under the Runtime template inputEnter a name for your runtime in the Runtime name input
Click Create and wait for it to provision. This takes a few seconds.
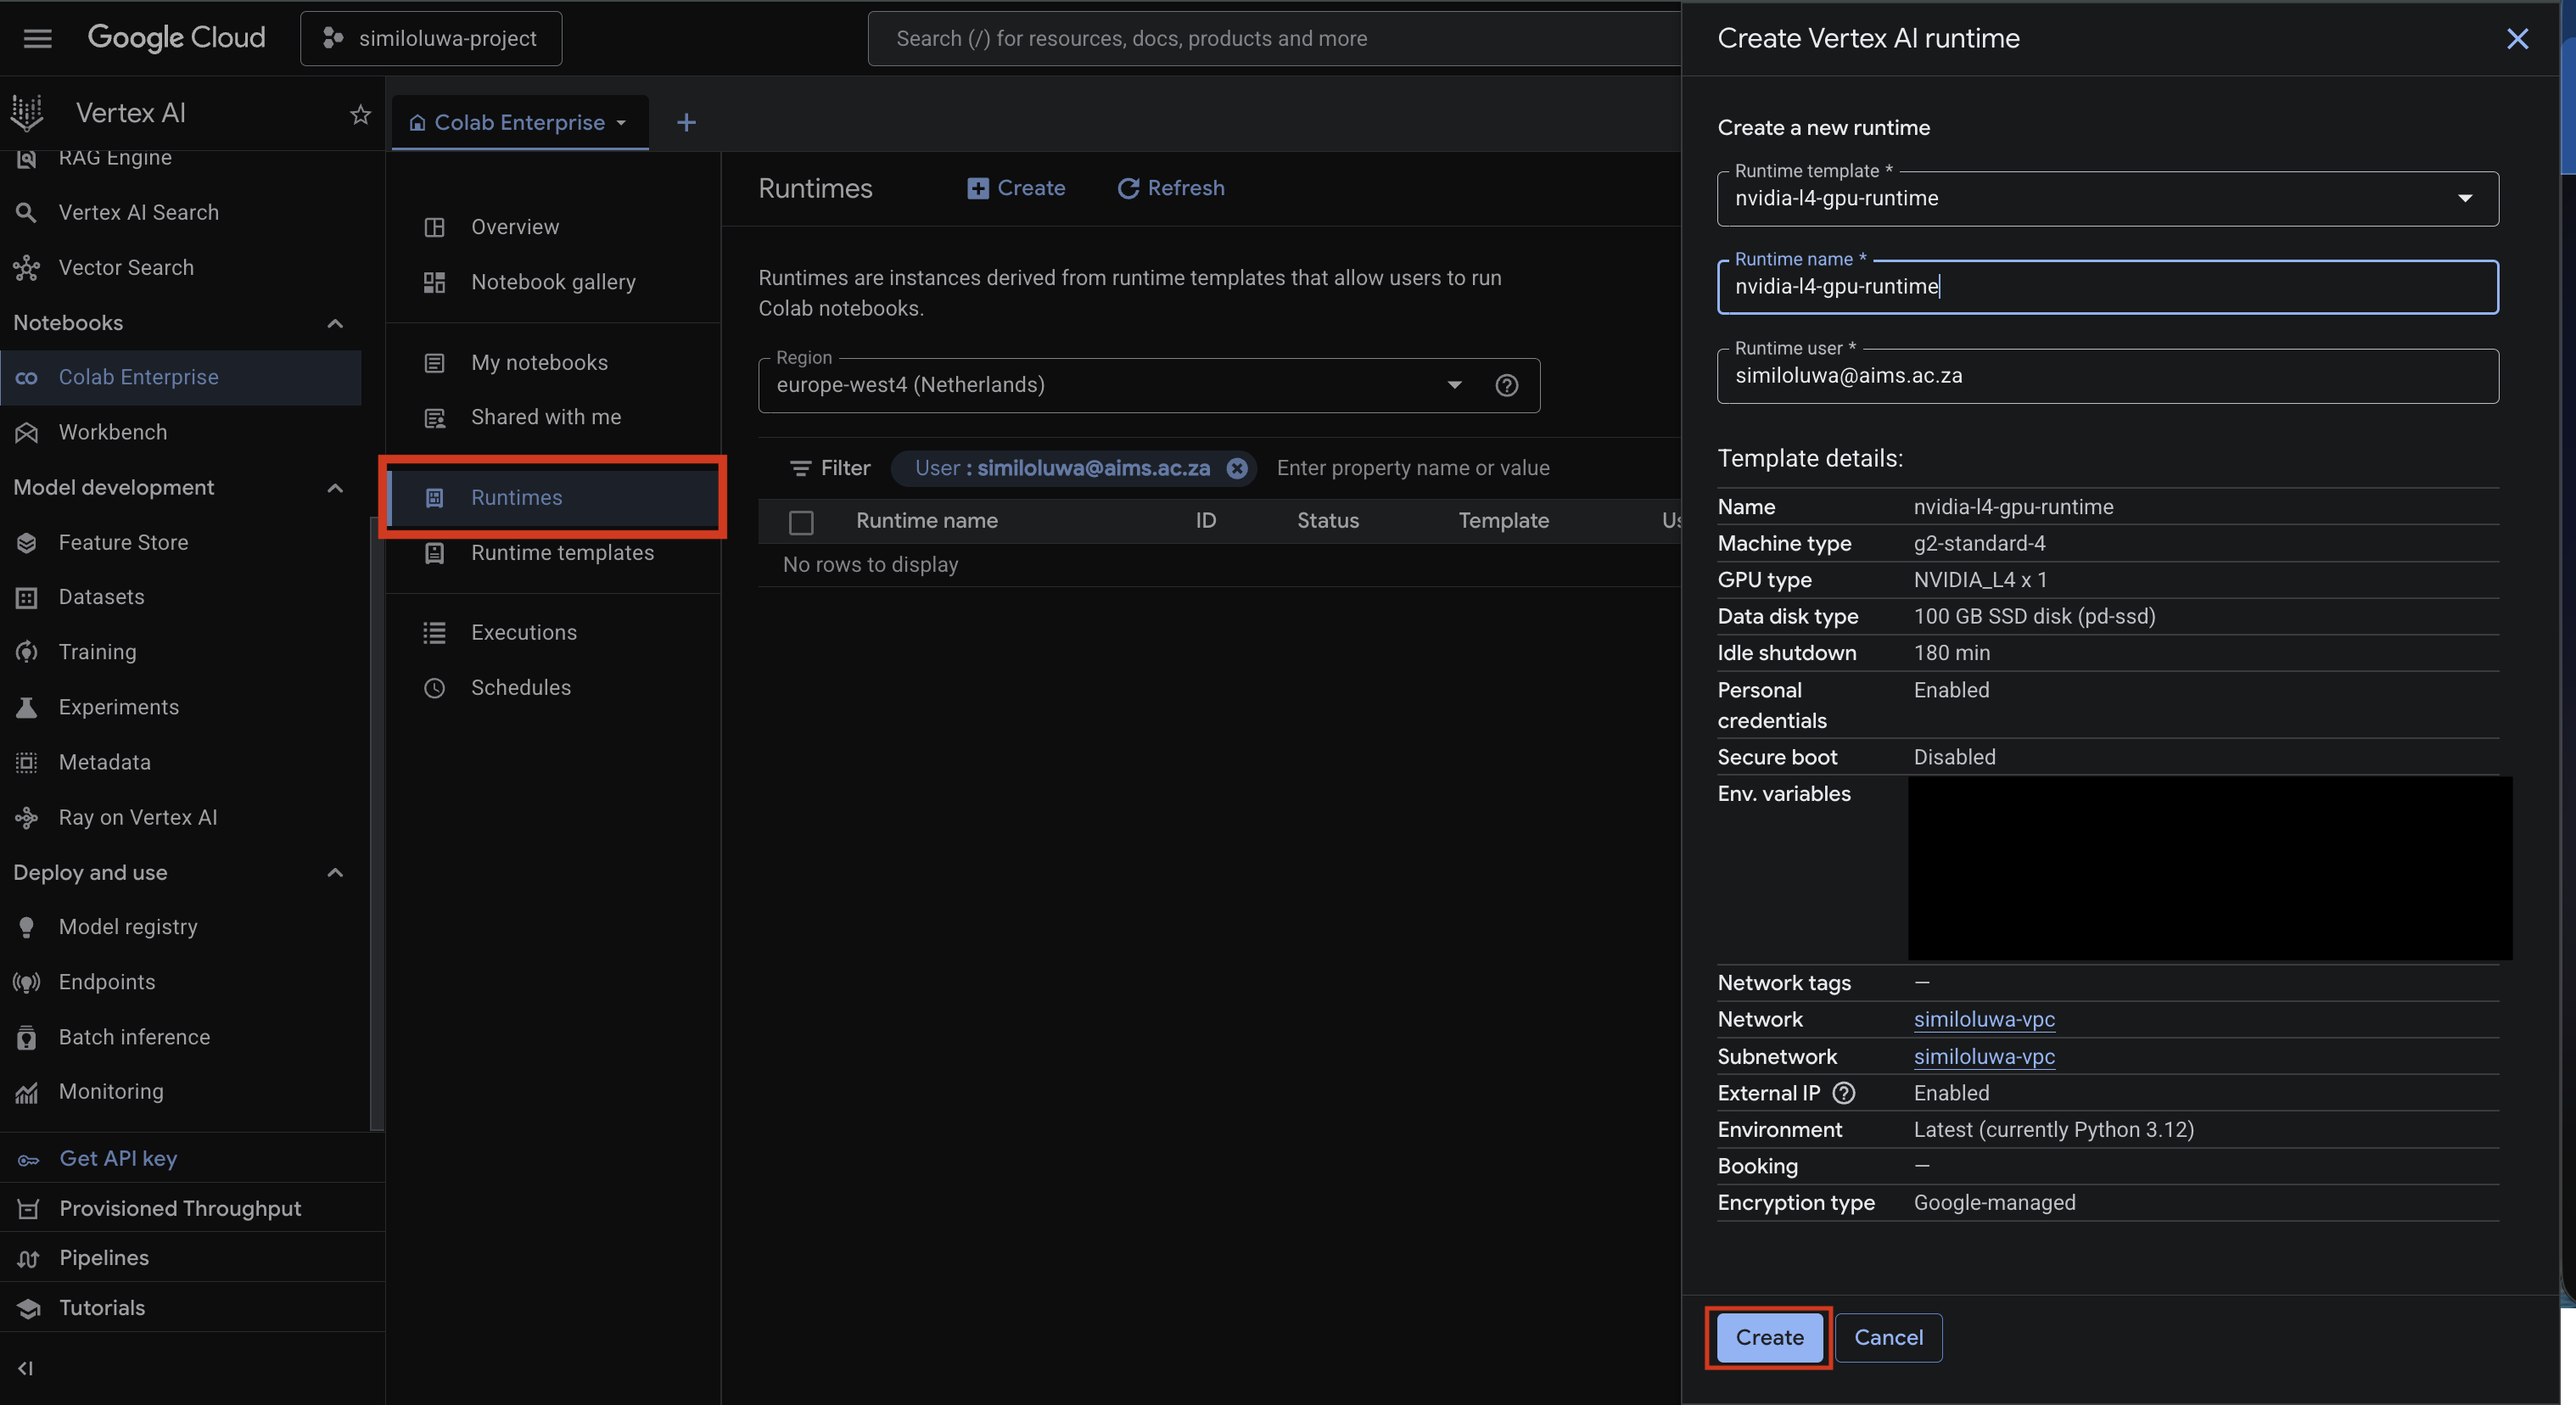
Screenshot: Create a new runtime using the created runtime template
Step 4: Create a Notebook and Connect to the Runtime
Now, we can create a Vertex AI notebook using the newly created runtime.
On the Colab Enterprise main page, click the Create notebook button in Quick actions section
Once the notebook opens, click the Connect dropdown in the top right
Click Connect to a runtime
In the Connect to Vertex AI runtime dialog:
Select the Connect to an existing runtime option
Select the runtime you just created under the Select an existing runtime input
Finally, click Create to connect to the runtime.

Screenshot: Create Colab Enterprise notebook
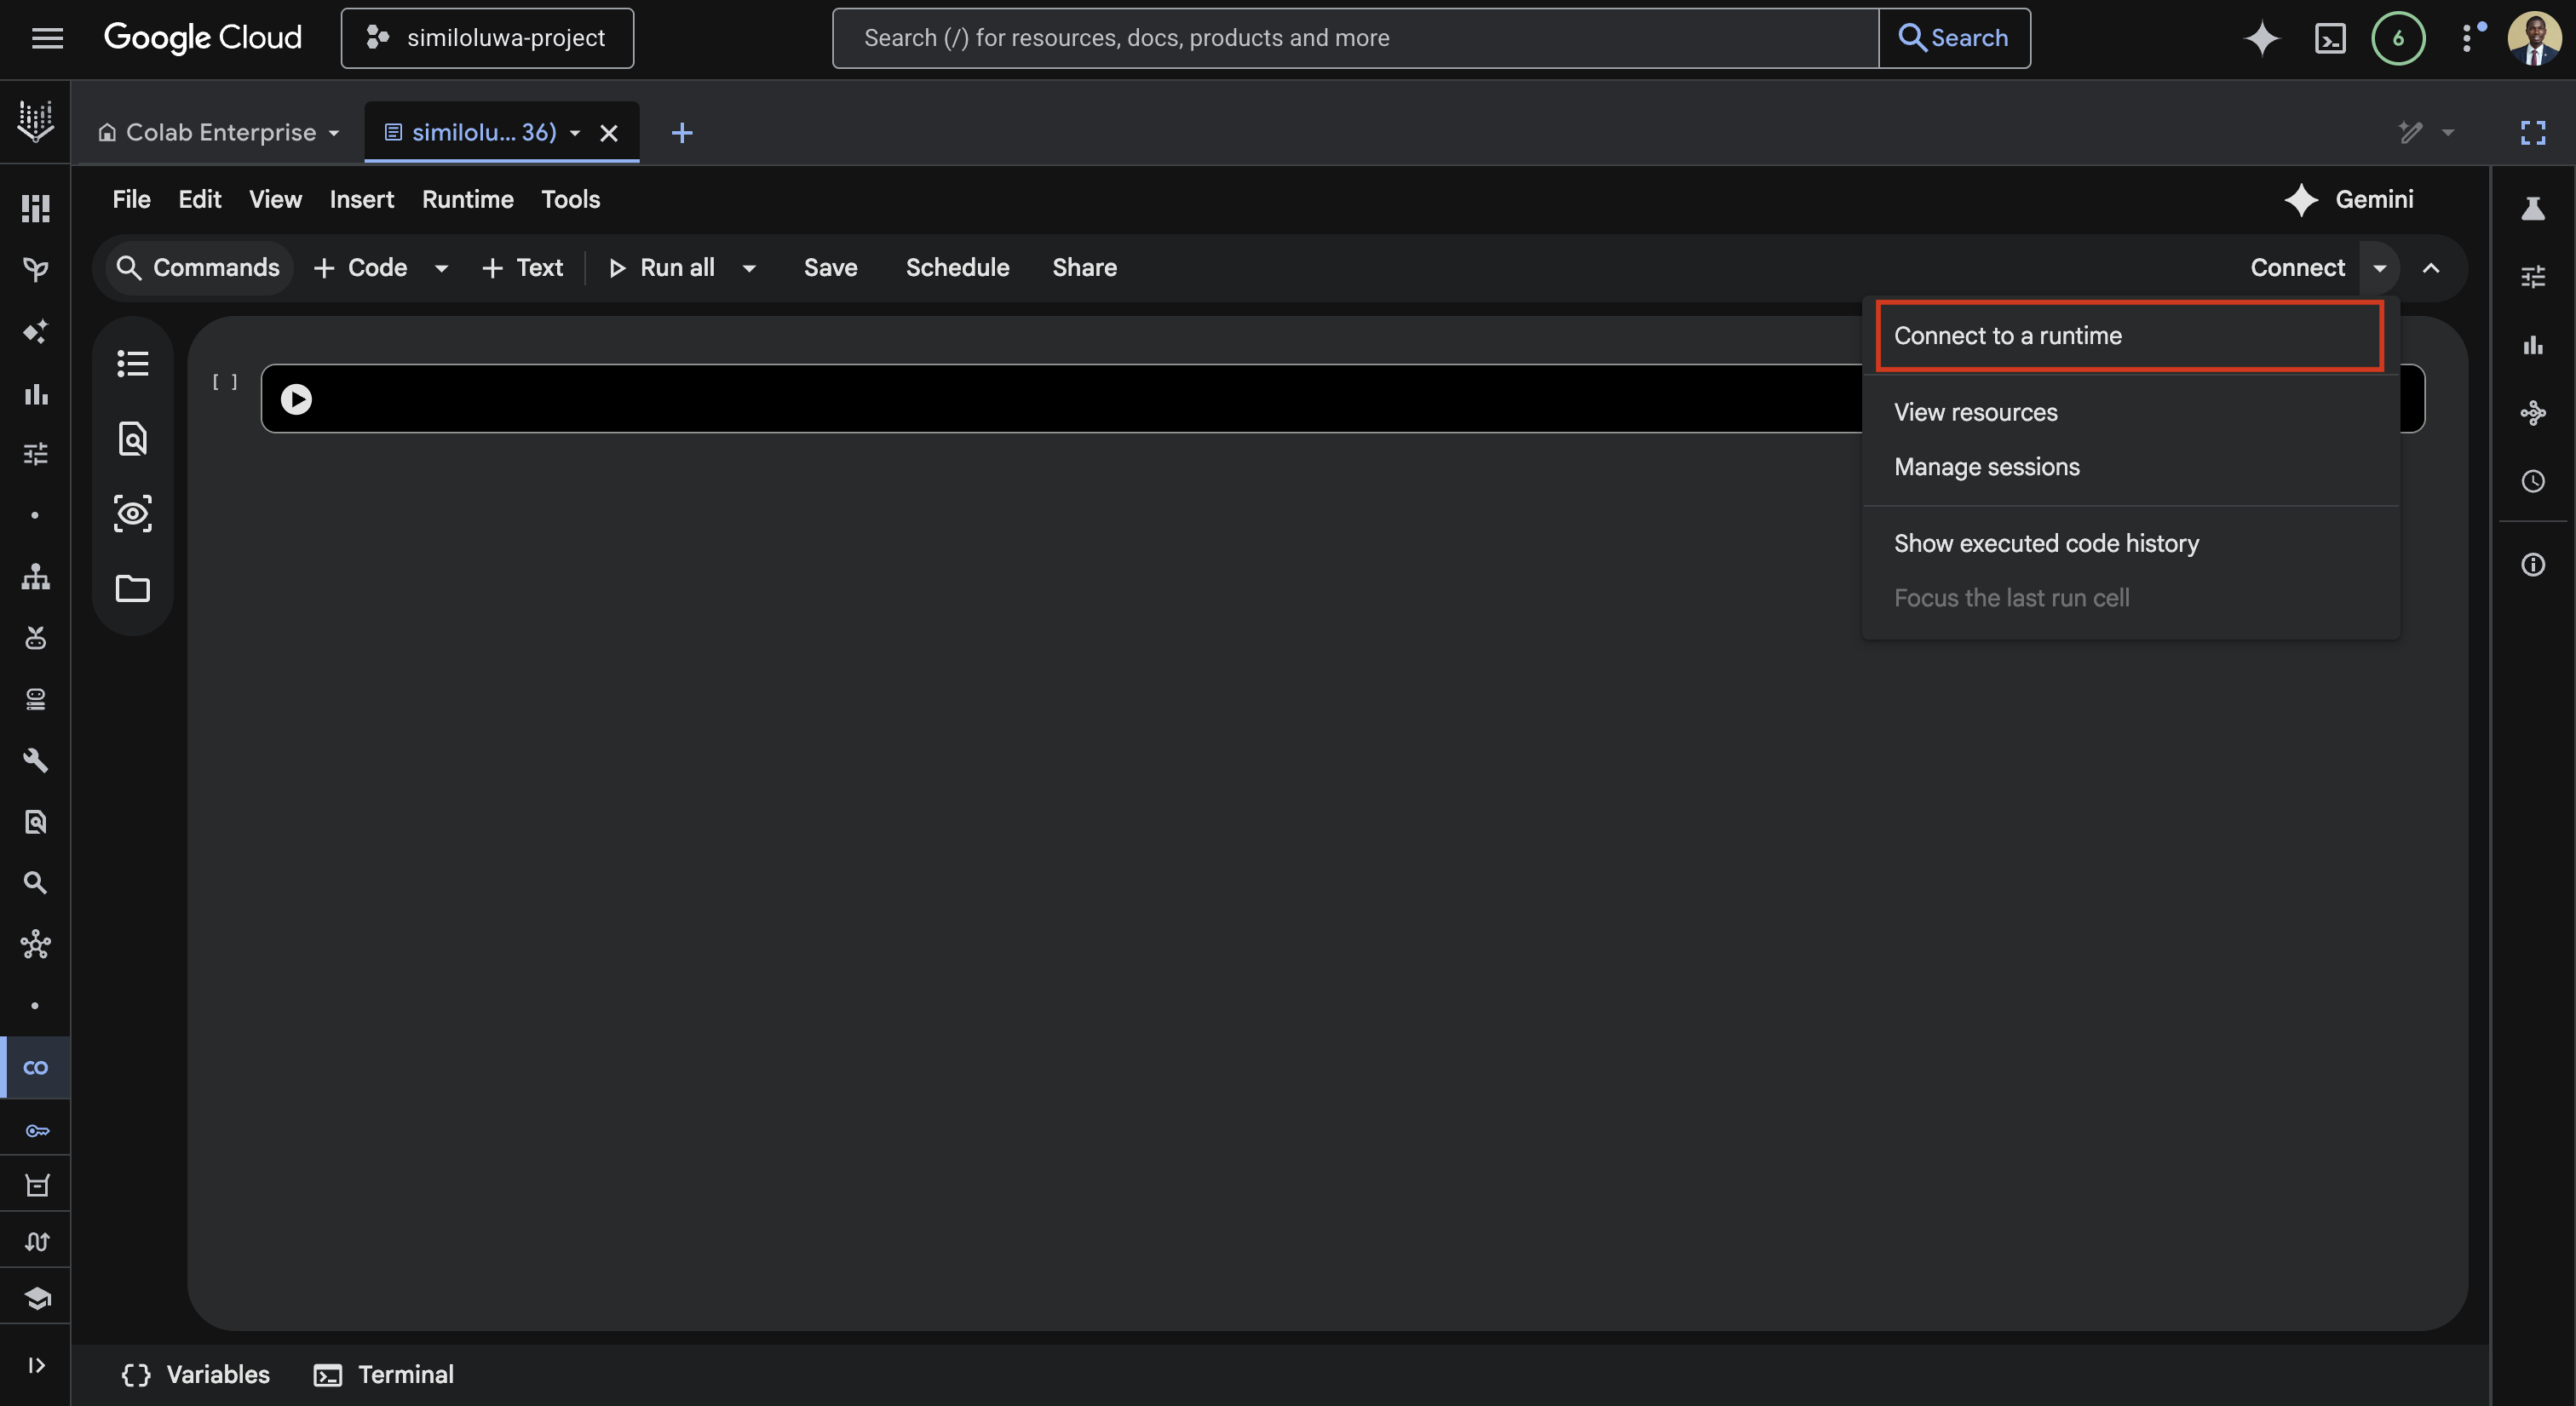
Screenshot: Connect to a runtime dropdown
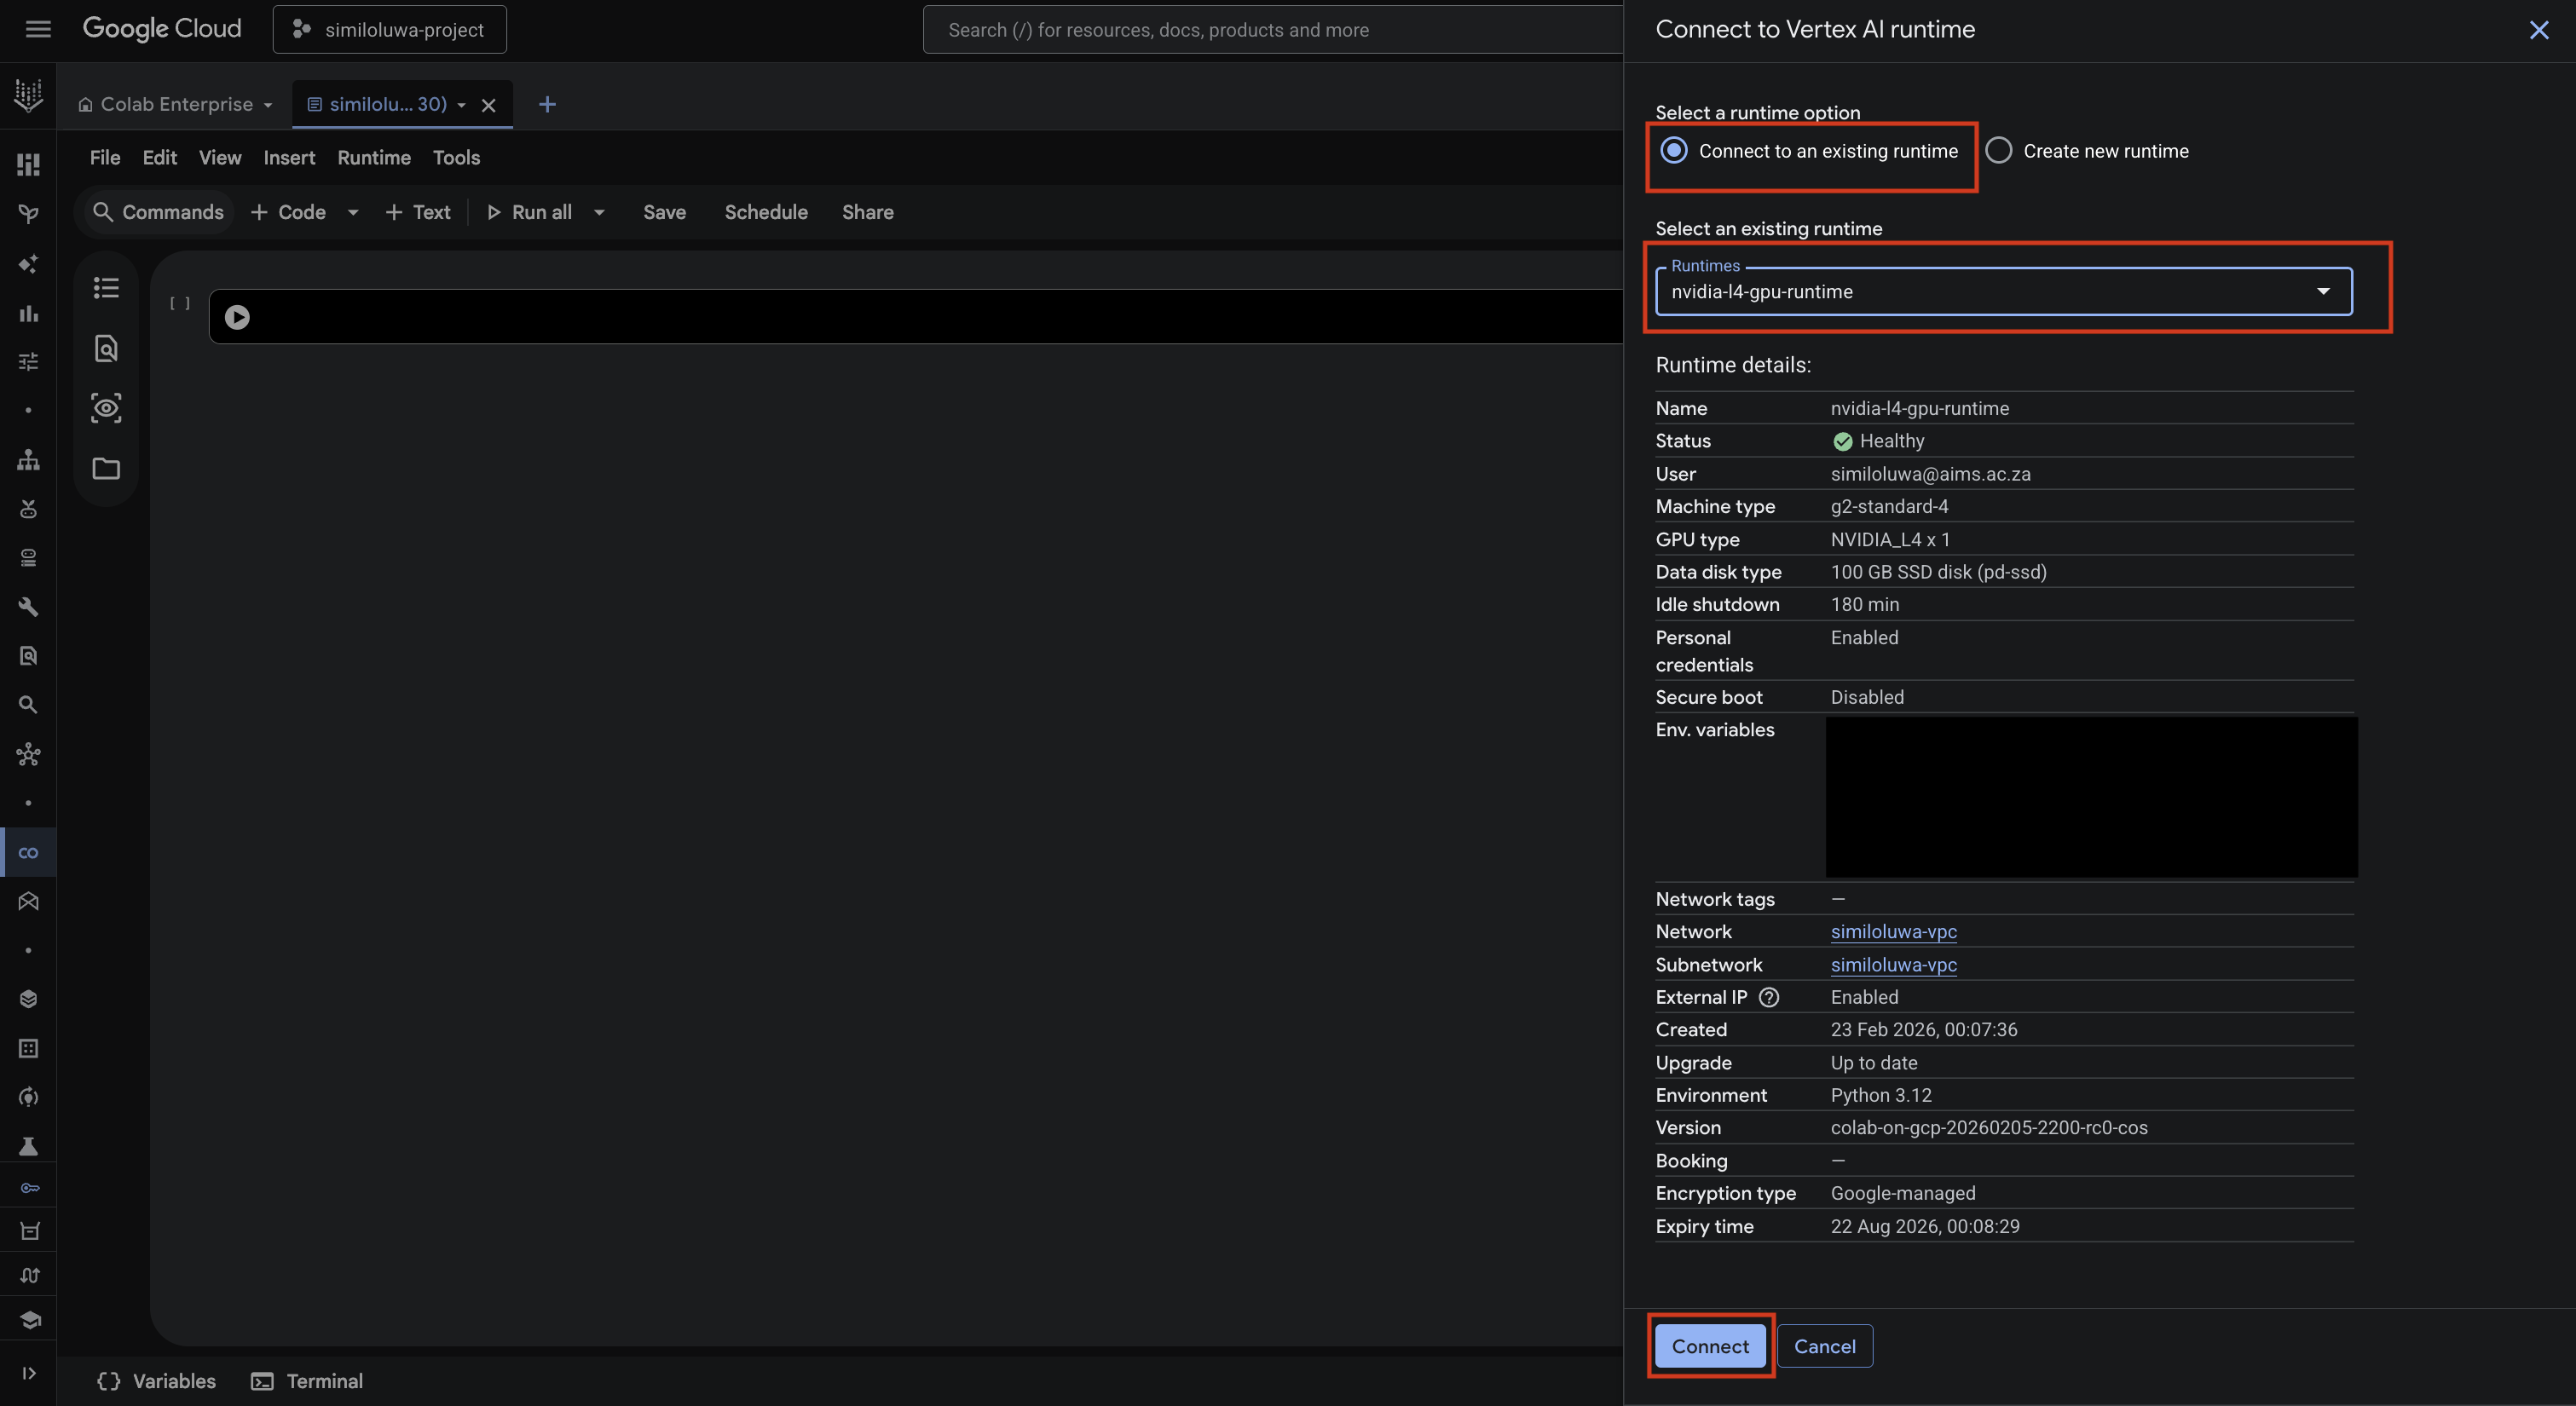
Screenshot: Connect to a runtime dialog
Once connected, the runtime immediately becomes active and you can start using notebook.
Step 5: Using the Notebook
In this section, we will use the notebook to fine-tune the Gemma 3 1B model.
Verify the GPU is Available
To verify the GPU is available:
%%bash
nvidia-smi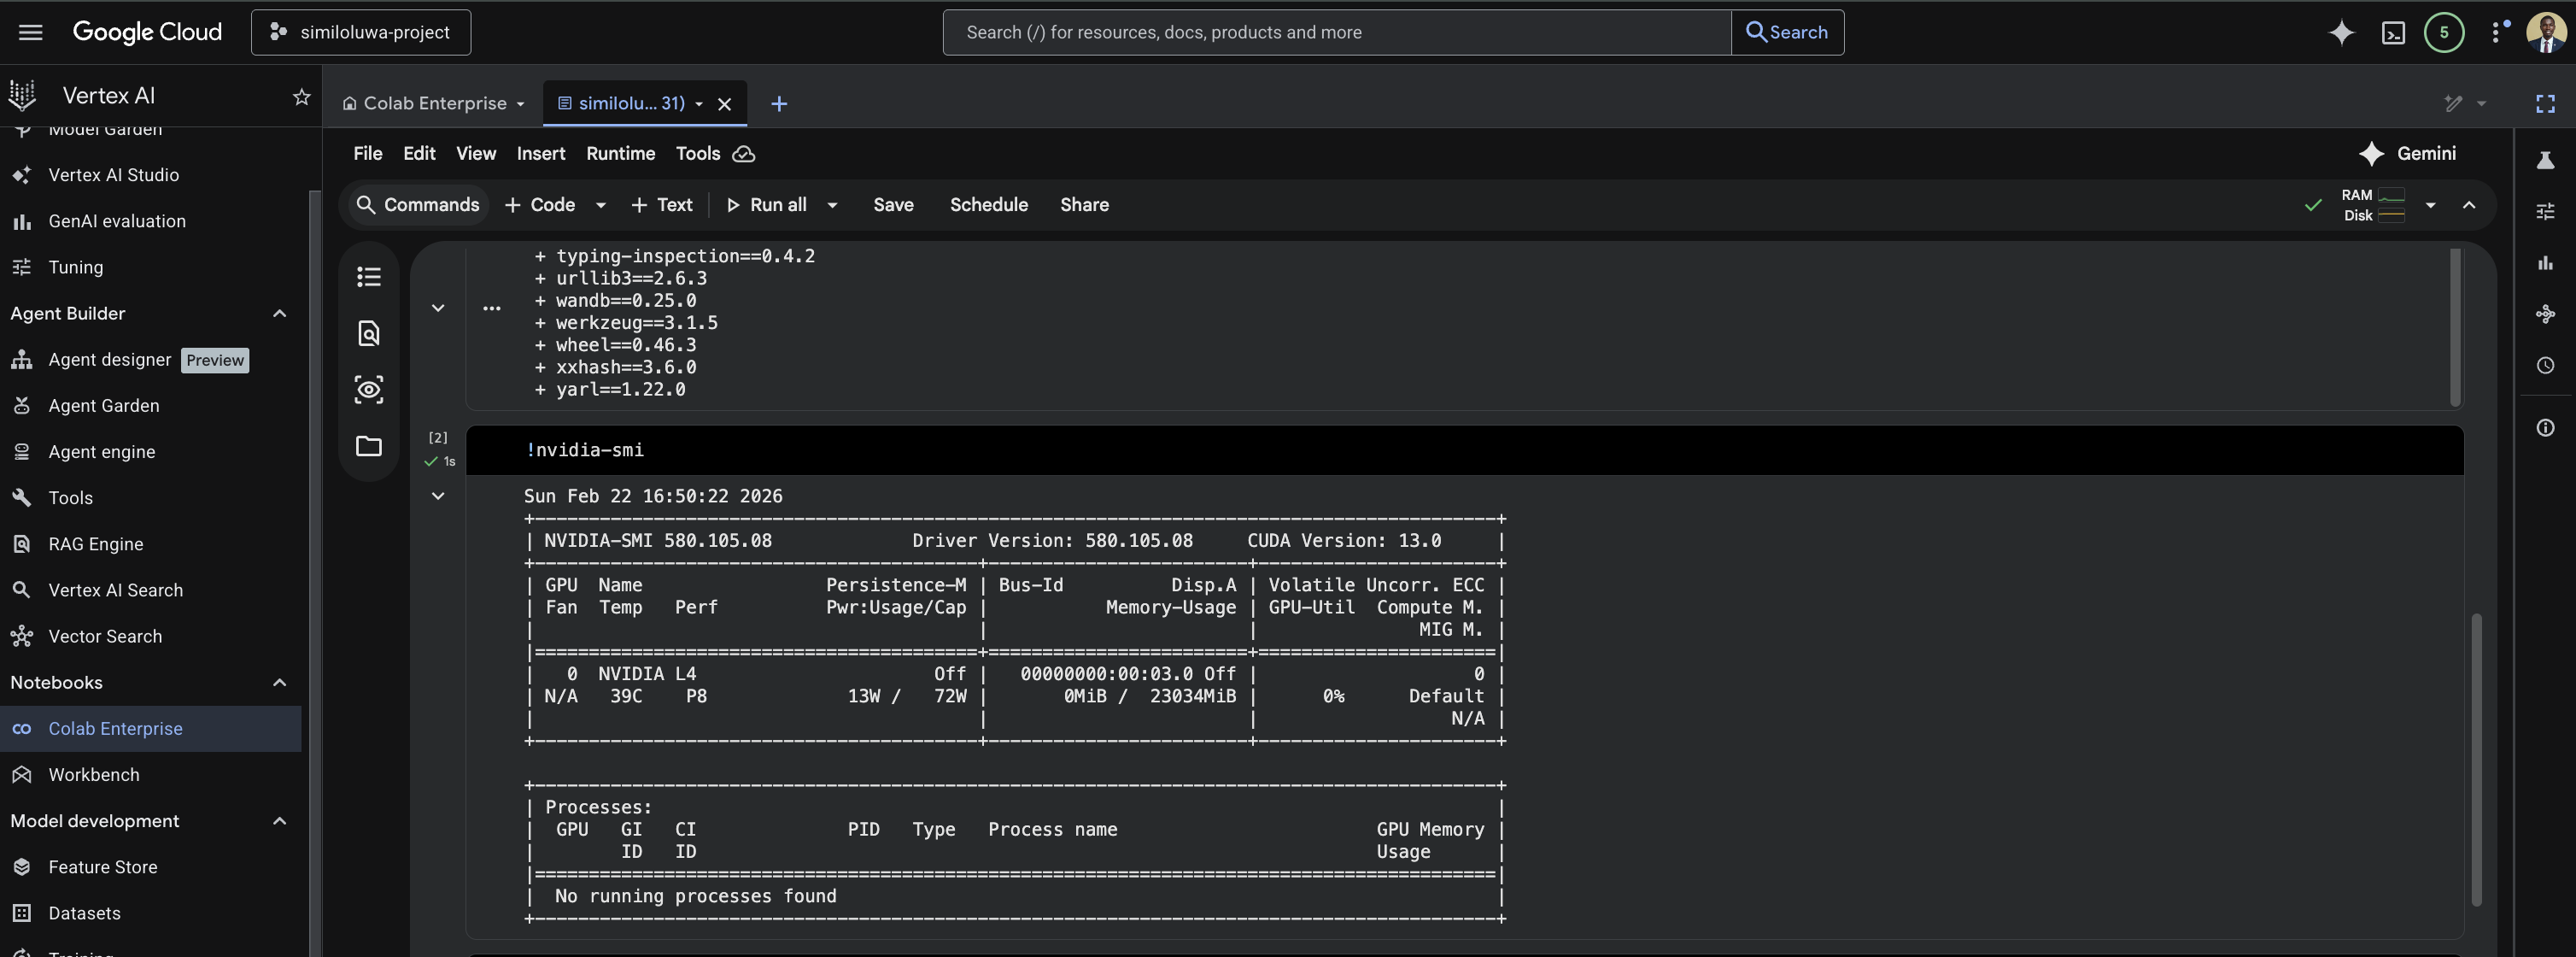
Screenshot: Testing nvidia-smi command in Vertex notebook
Set Up the Python Environment
In the next cell, install uv and clone the repository:
%%bash
curl -LsSf https://astral.sh/uv/install.sh | sh
source $HOME/.local/bin/env
git clone https://github.com/rexsimiloluwah/finetuning-gemma-1b-aims-gcp-tutorial.git
cd finetuning-gemma-1b-aims-gcp-tutorial
uv sync
Run Training
In the next cell, run the fine-tuning script:
%%bash
source $HOME/.local/bin/env
cd finetuning-gemma-1b-aims-gcp-tutorial
uv run python -m scripts.run_train data.source=gcs data.max_train_samples=10000 training.num_epochs=2 training.batch_size=8 experiment_id=exp_lora_r8_colab
Training takes roughly 20-30 minutes on the L4. You can monitor progress in real time from your WandB dashboard at wandb.ai while the cell is running.
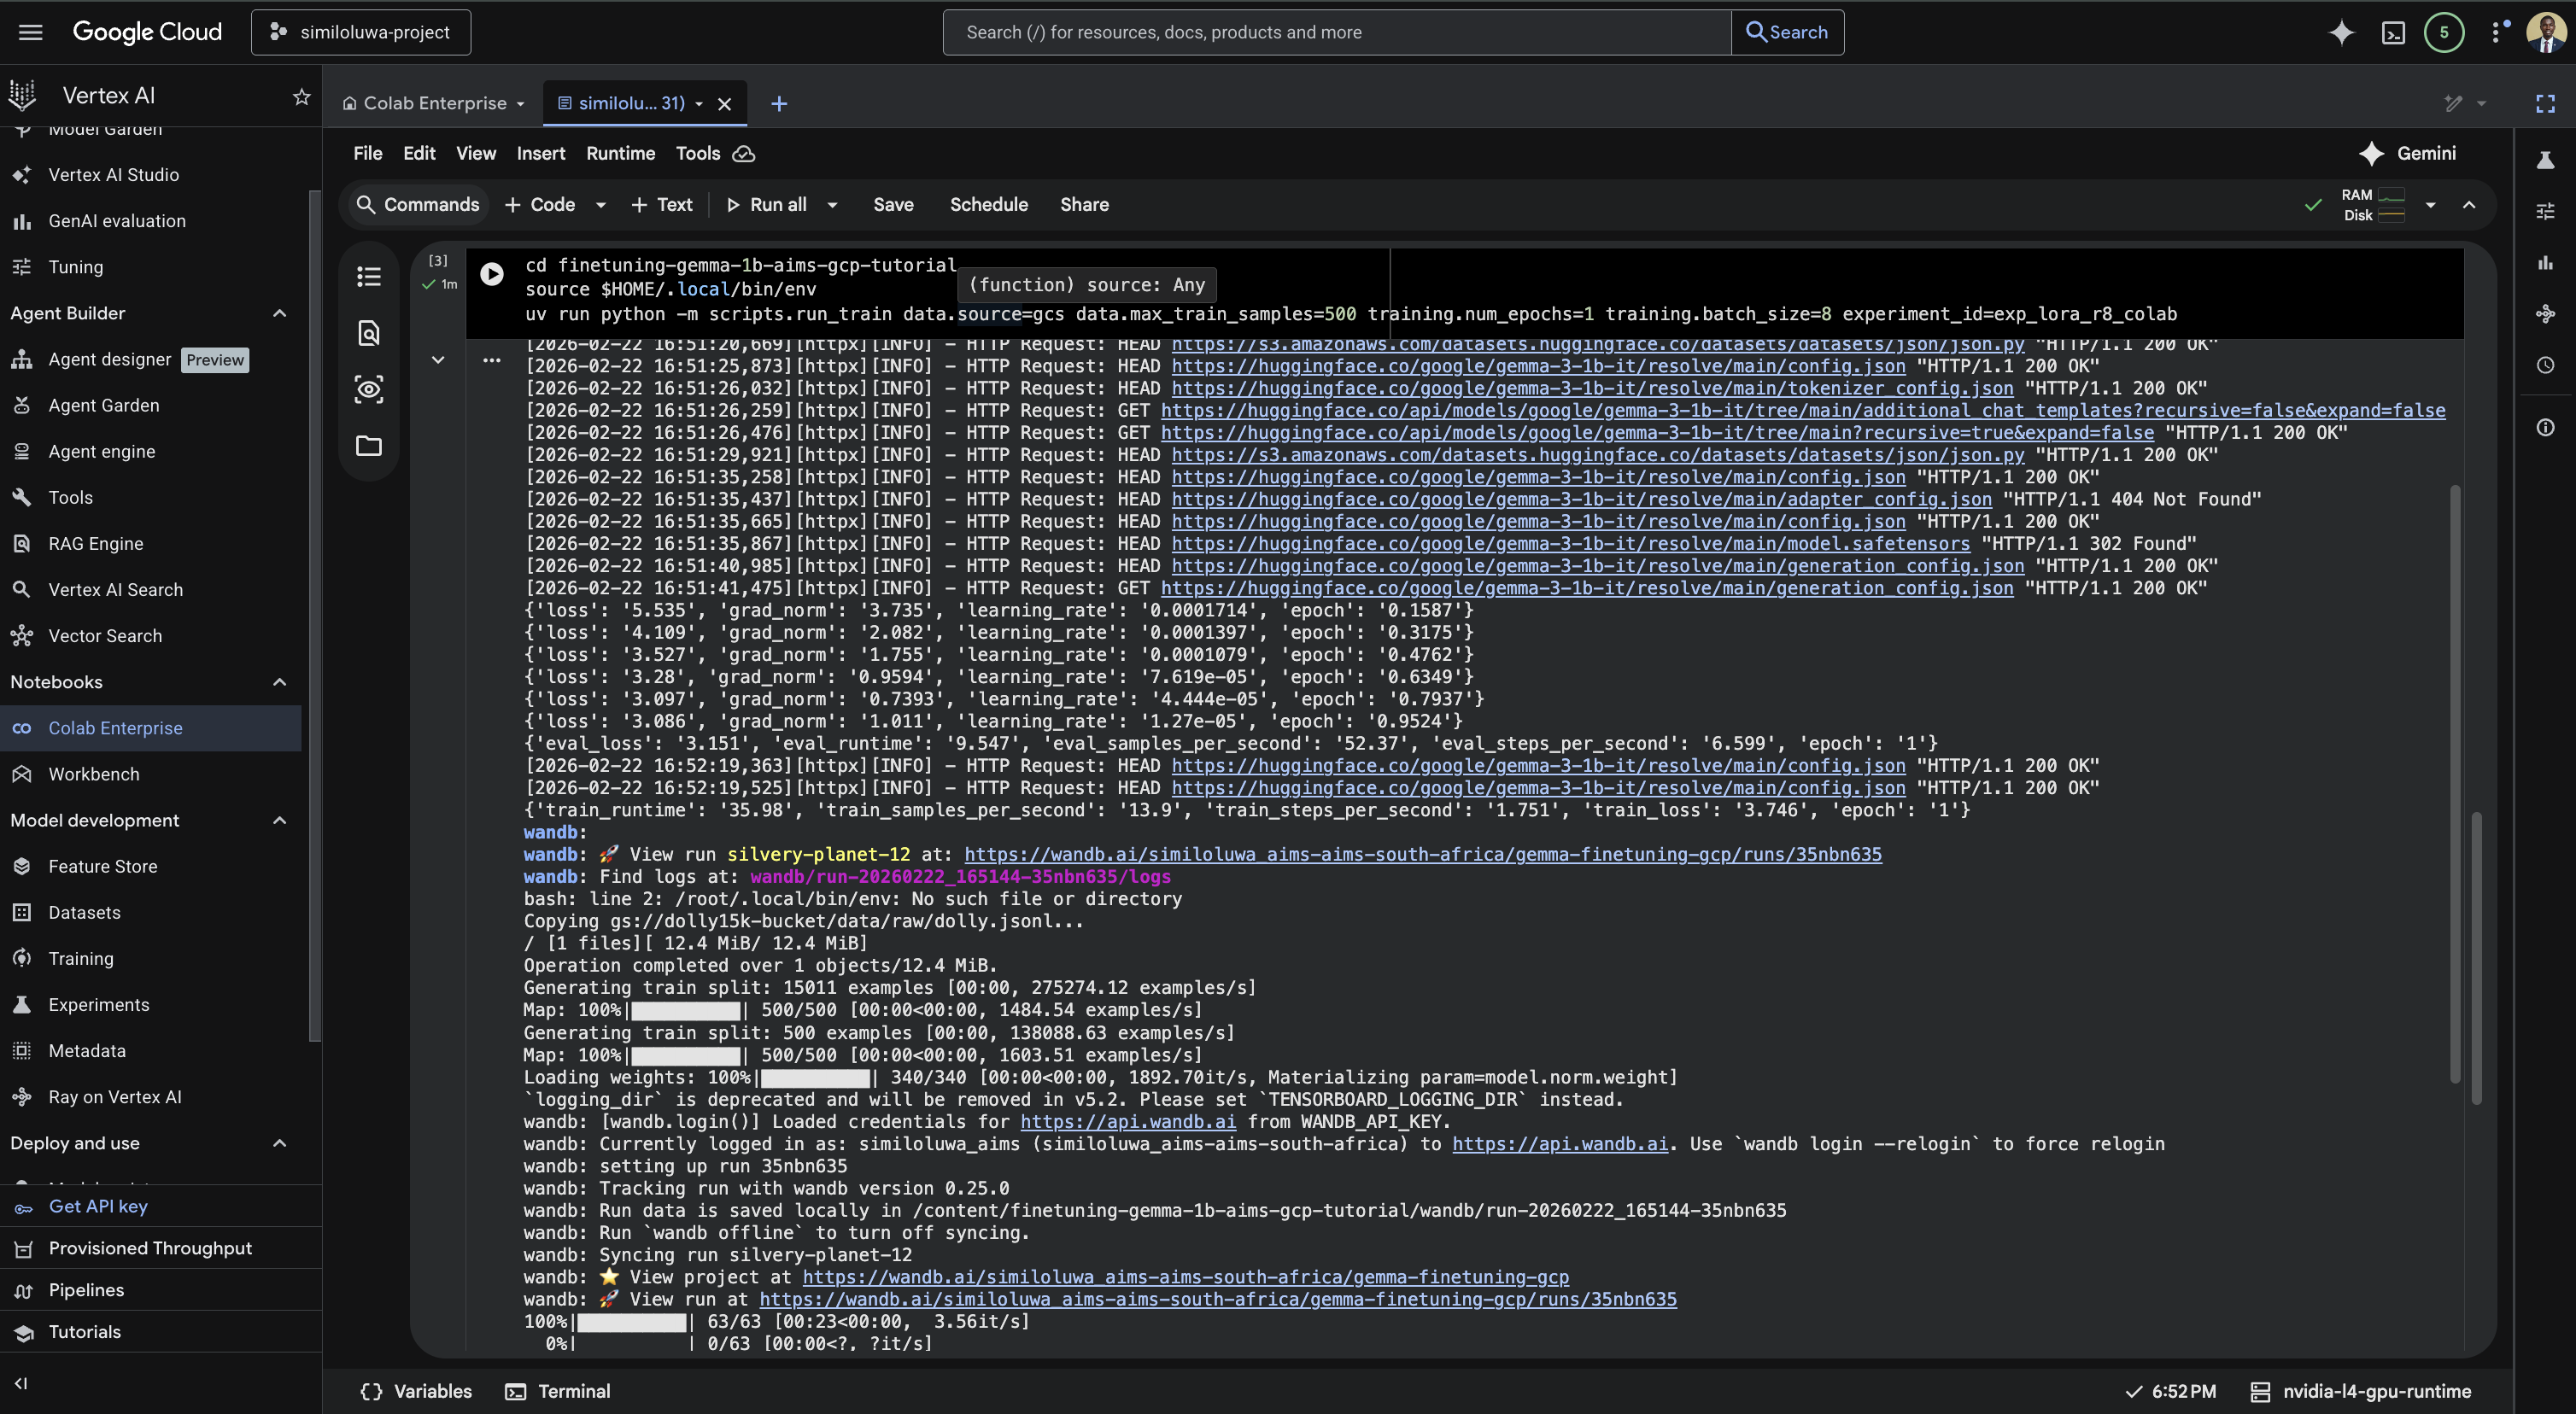
Screenshot: Run the training script in the Vertex notebook. Here, it was trained for only 1 epoch using 500 samples for demonstration purposes. Do not expect any good results during evaluation.
Run Evaluation
Once training finishes, run evaluation in the next cell:
%%bash
source $HOME/.local/bin/env
cd finetuning-gemma-1b-aims-gcp-tutorial
uv run python -m scripts.run_evaluate \
    --model_path outputs/exp_lora_r8_colab/checkpoint-2500 \
    --eval_file data/eval/eval_prompts.jsonl \
    --max_eval_samples 200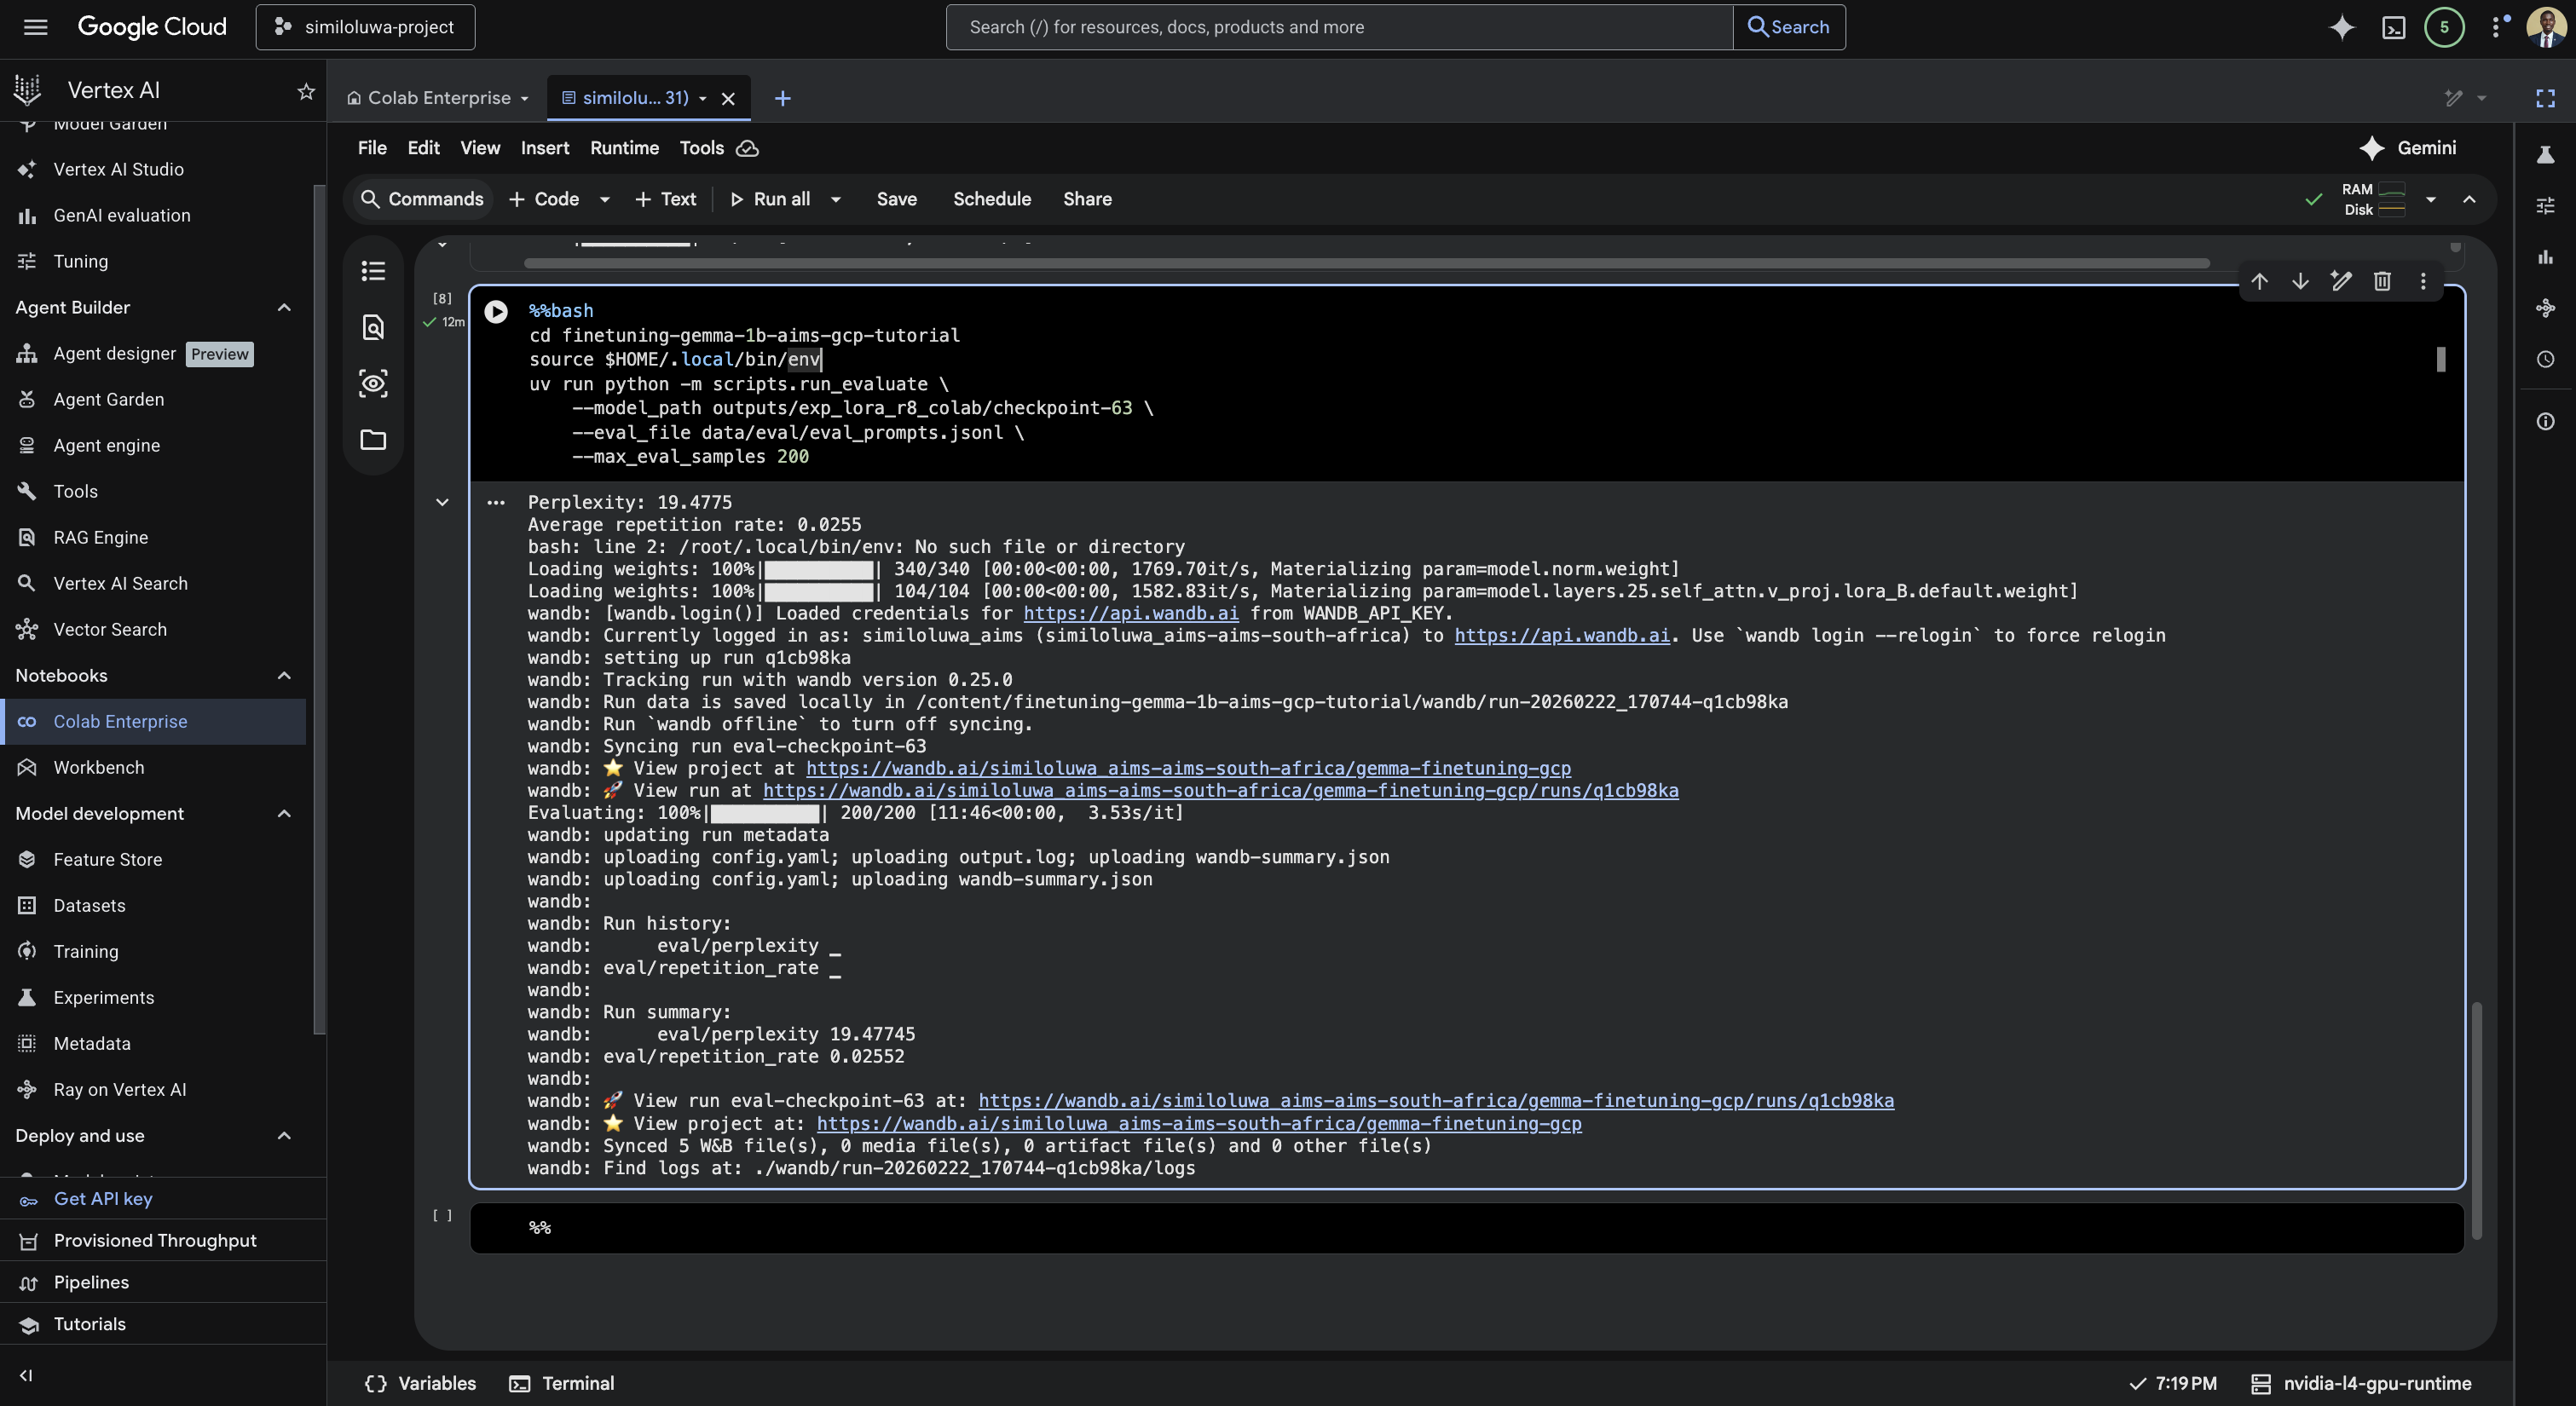
Screenshot: Run the evaluation script.
This computes perplexity and repetition rate on 200 eval examples and logs the results to WandB.
Run Inference
Test the trained model on a single instruction in the next cell:
%%bash
source $HOME/.local/bin/env
cd finetuning-gemma-1b-aims-gcp-tutorial
uv run python -m scripts.run_inference \
    --model_path outputs/exp_lora_r8_colab/checkpoint-2500 \
    --instruction "Explain what machine learning is in simple terms"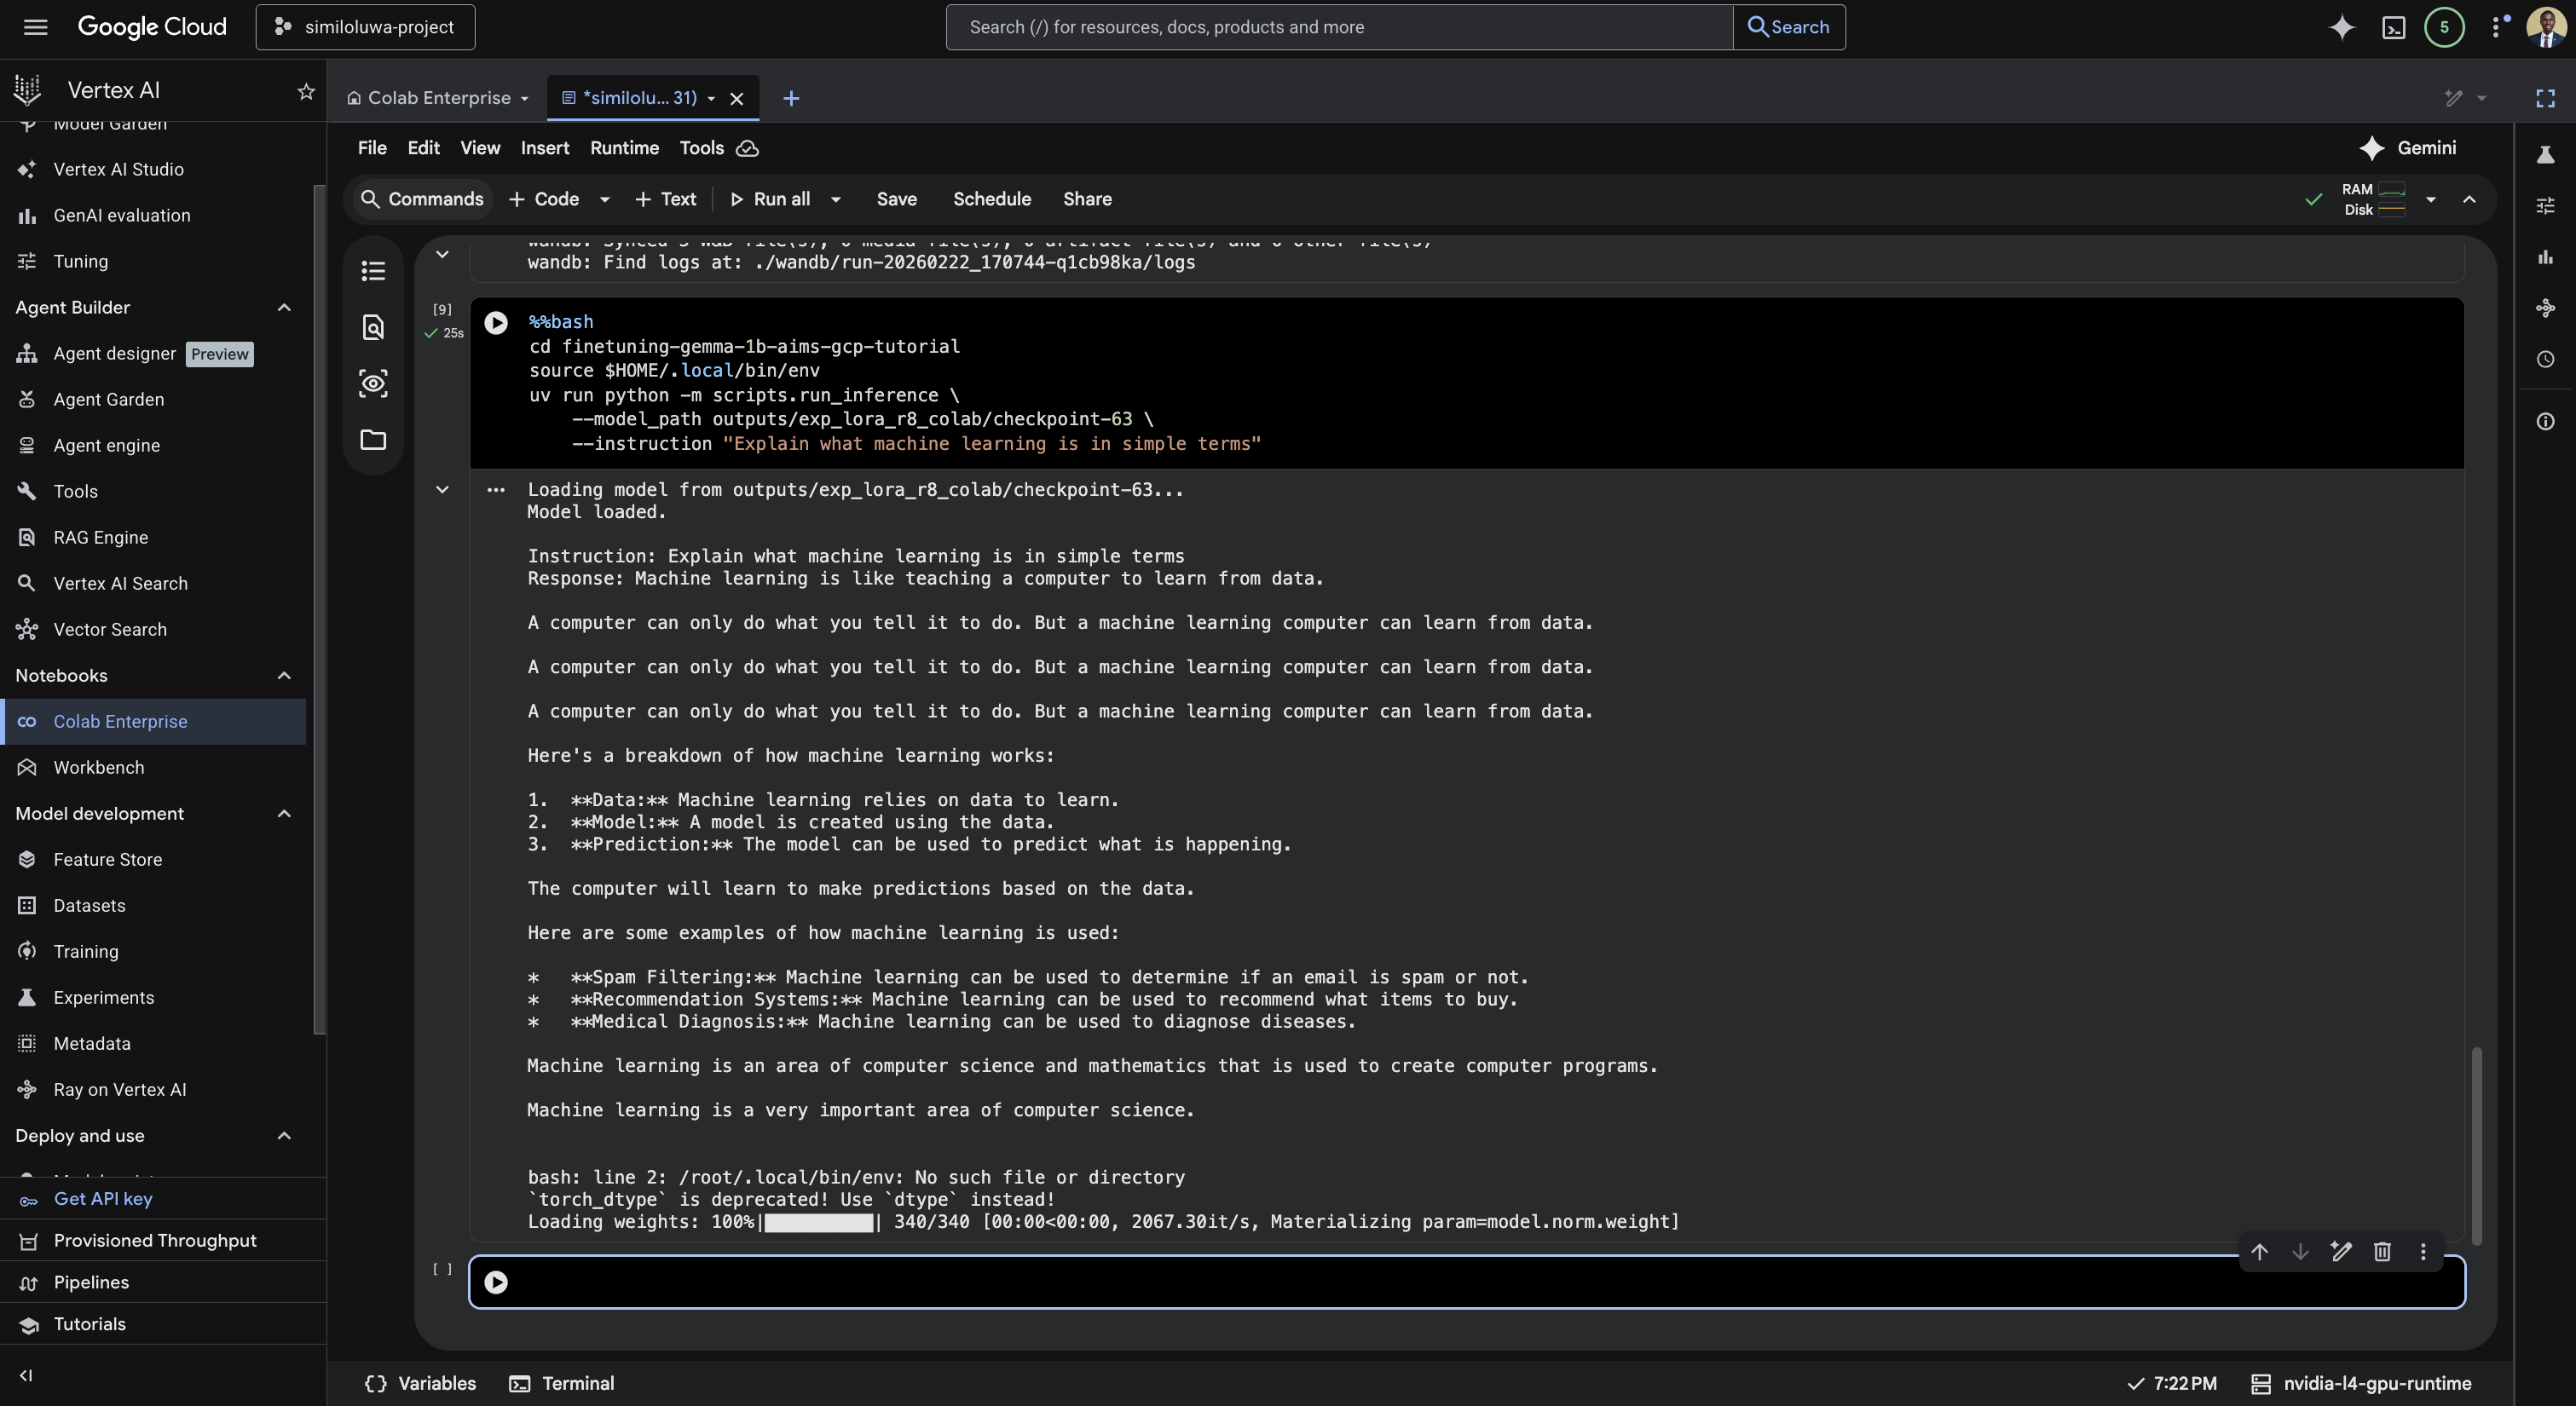
Screenshot: Run the inference script.
Step 6: Resource Cleanup
Delete the runtime from the GCP Console:
In the left sidebar, click Runtimes
Find your runtime in the list
Click the three dots menu next to it
Click Delete
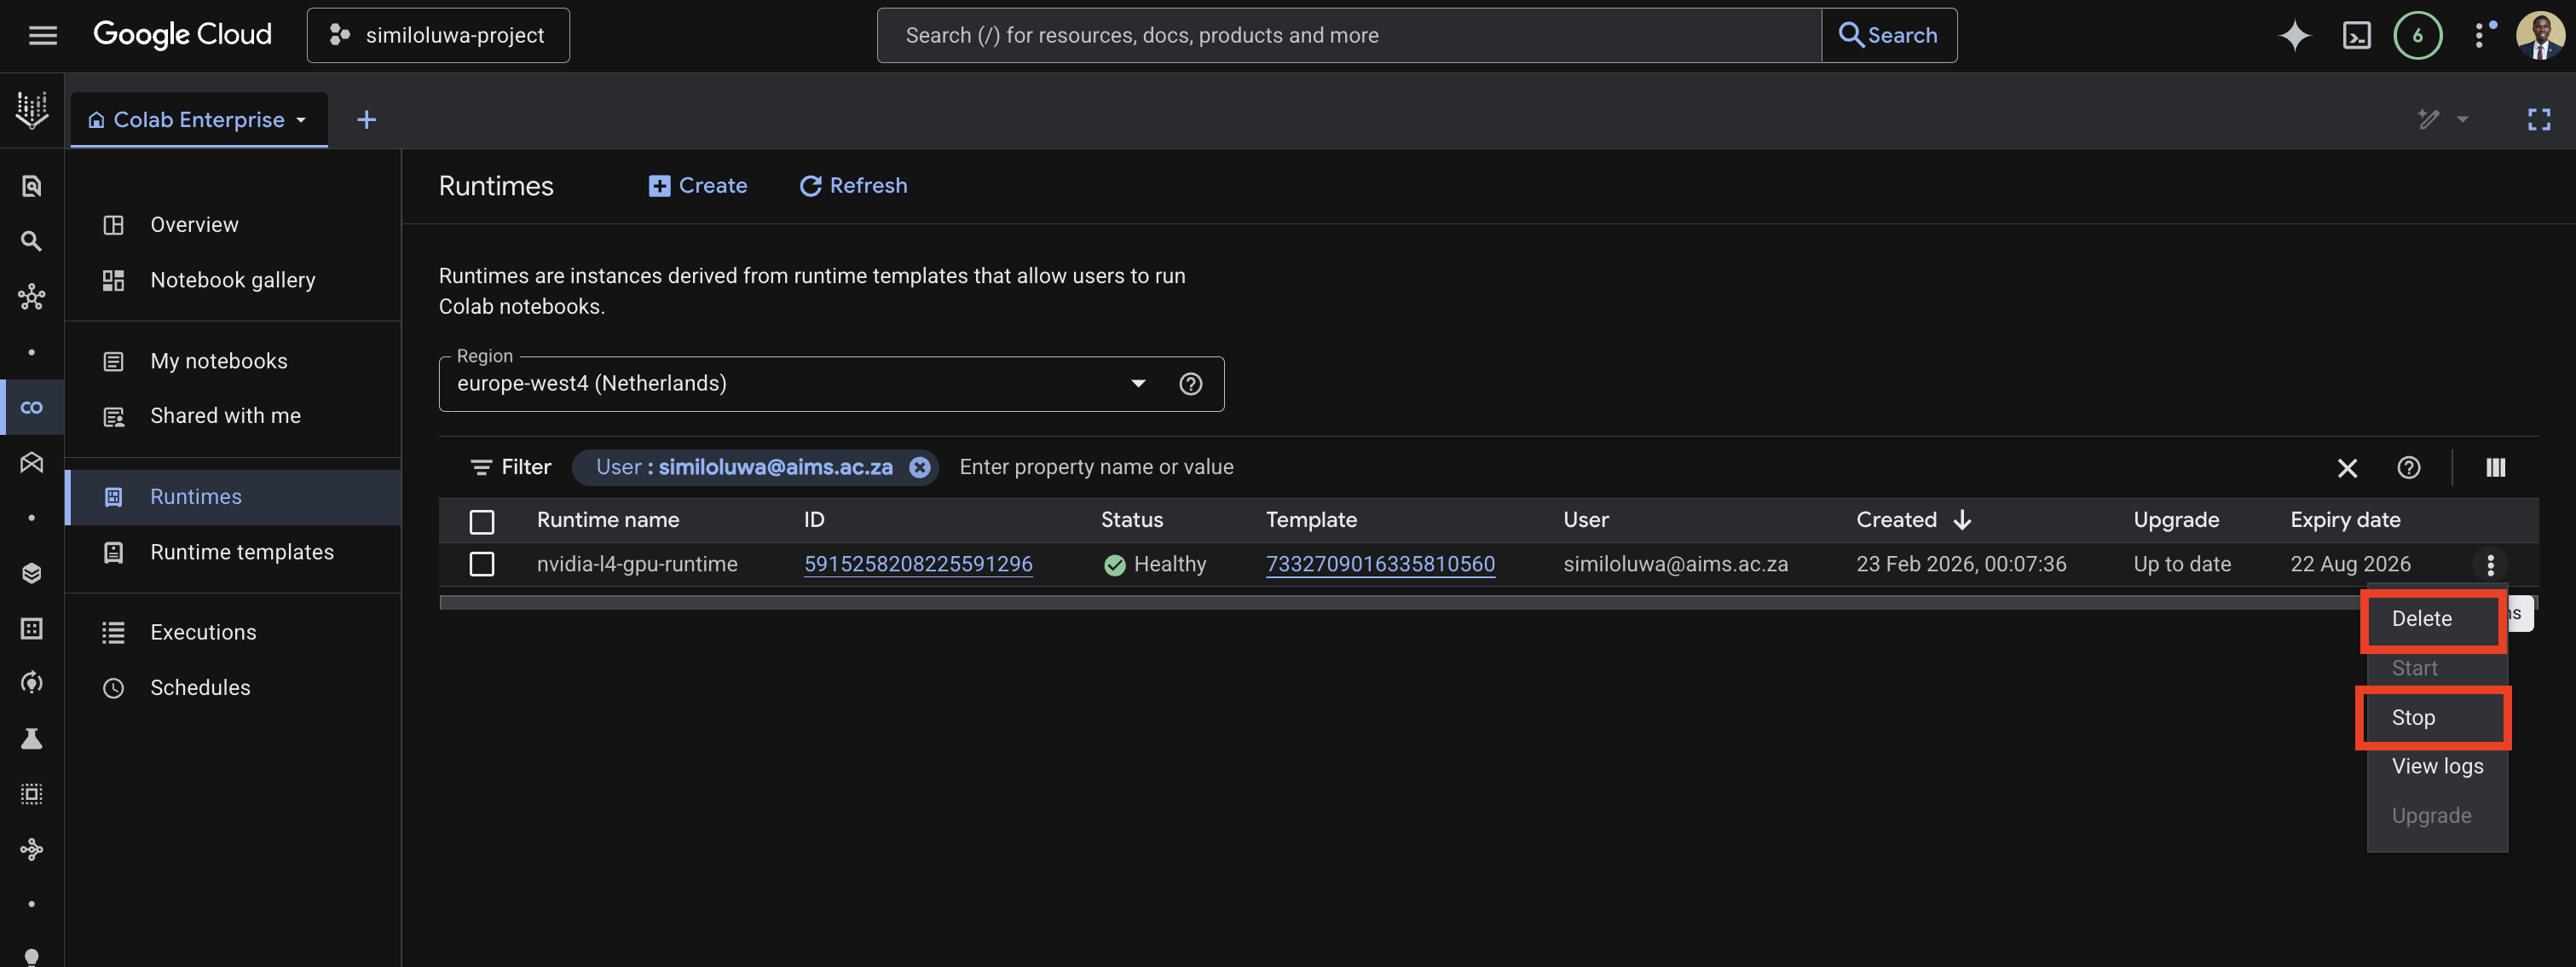
Screenshot: Delete the Vertex AI runtime.
🔑 Key Takeaways
Colab Enterprise gives you an interactive GPU notebook environment with no infrastructure to manage, accessible directly from your browser
Creating a runtime template first and reusing it across notebooks saves time and ensures a consistent hardware configuration across sessions
Adding environment variables to the runtime template means credentials are automatically available in every notebook that connects to it, without hardcoding them in notebook cells
Unlike the VM-based approach, you do not need
tmuxsince notebook cells keep running even if you close your browser, as long as the runtime stays activeFor long training runs, a Custom Training Job is more reliable since it runs entirely unattended. Colab Enterprise is better suited for interactive experimentation and debugging.